This guide details how you can troubleshoot and fix a computer that won’t start (or won’t boot).
This guide goes through various solutions and fixes that you can apply for most Windows versions: XP, Vista, 7, 8, 8.1 and 10.
Contents
Fix with Easy Recovery Essentials
Using Easy Recovery Essentials (EasyRE) and its built-in Automated Repair process, you can find and fix various boot errors that prevent your computer from starting.
Everything is done in one single-click:
- Download Easy Recovery Essentials. Make sure to note your Windows version (XP, Vista, 7, 8, 10, or Windows 11) before you download EasyRE. This guide can help you identify what version of Windows you have installed.
- Burn the image. Follow these instructions on how to burn the bootable ISO image very carefully, as making a bootable CD can be tricky! Alternatively, these instructions explain how to create a bootable EasyRE recovery USB stick/drive.
- Boot up your PC from the Easy Recovery Essentials CD or USB you created.
- Choose “Automated Repair” option and click Continue.

Choose “Automated Repair” in Easy Recovery Essentials
- After EasyRE scans your computer’s drives, identify and select the drive letter for your Windows installation from the list, and then click on the Automated Repair button to begin.

Choose the drive associated with the Windows installation you’re trying to repair.
- Easy Recovery Essentials will start analyzing the selected drive for problems. EasyRE will test for and attempt to automatically correct errors with the disk, partition, bootsector, filesystem, bootloader, and registry.
No intervention is required, as EasyRE’s repair is fully automated:

Easy Recovery Essentials searches for errors and makes corrections to the selected Windows installation.
- Once the process is complete, EasyRE will report its findings. Click on the Restart button to reboot your PC and test the changes.
- Your PC begins to boot again:

Windows, booting up successfully.


Download Easy Recovery Essentials by clicking this link.
General fixes if Windows won’t start
Fix #1: Boot into Last Known Good Configuration
If Windows doesn’t start, booting in the Last Known Good Configuration mode usually fixes this.
To boot into this mode, follow these steps:
- Restart your computer
- Press the F8 key before the Windows logo appears
- At the Advanced Boot Options menu, select Last Known Good Configuration
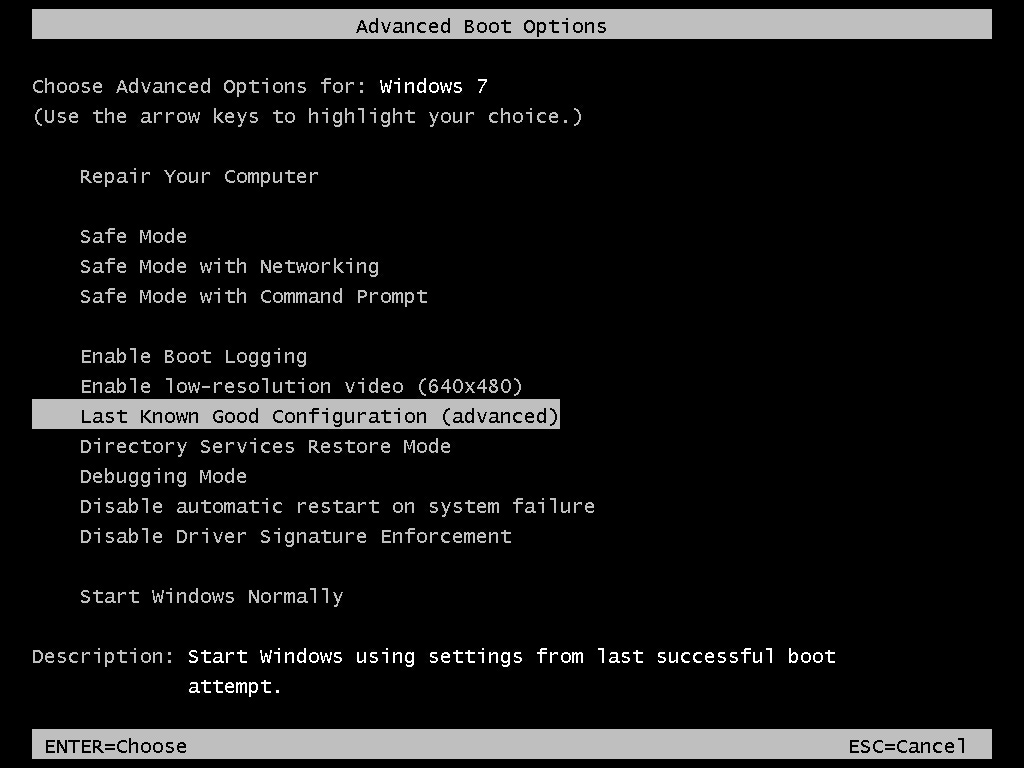
The advanced boot options startup menu.
- Press Enter
Fix #2: Boot into Safe Mode
Here are the steps you need to follow to boot into the Safe Mode of your computer:
- Restart your computer
- Press the F8 key repeatedly as soon as your computer boots, but before the Windows logo appears
- Select Safe Mode at the Advanced Boot Options menu
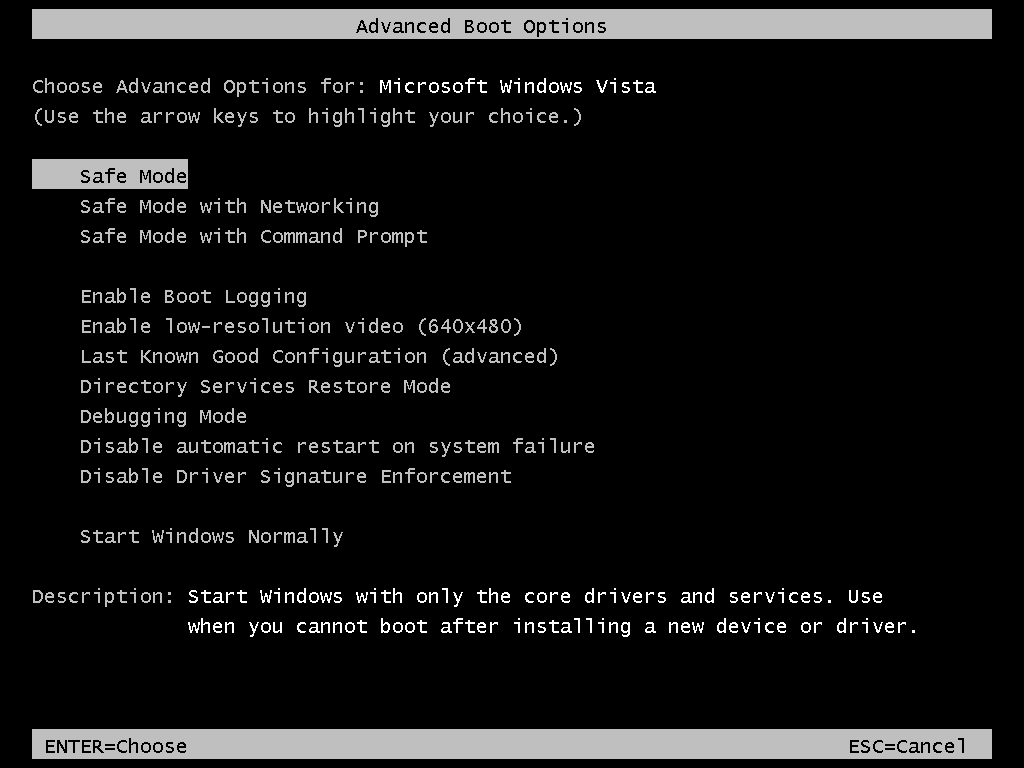
The Advanced Boot Options screen in Windows Vista
- Press Enter
You can now try to uninstall recently added hardware drivers or software applications.
Fix #3: Remove recently added hardware
If you recently added a new piece of hardware, follow these tips:
- Remove the new added hardware and restart your computer to check if it now starts and boots correctly.
- Remove any external hardware from your computer, except your mouse and keyboard. Restart your computer to test if it boots correctly.
Fix #4: Run chkdsk and sfc
The chkdsk and sfc utilities, part of Windows, can detect issues with your HDD. To run chkdsk and sfc, follow these steps:
- Open Command Prompt via the Windows original installation disc
- Type:
chkdsk C: /r
Replace
C:is the letter of the drive where Windows is installed. - Press Enter
- Type:
sfc /scannow /offbootdir=c:\ /offwindir=c:\windows
Replace
c:with the letter of the drive where your Windows XP is installed. - Press Enter
- Type
exitand press Enter. Restart your computer.
If you don’t have the original Windows disc, use Command-line from Easy Recovery Essentials (our recovery and repair disc) to run these commands:
- Download Easy Recovery Essentials
- Burn the ISO Image. Follow our instructions on how to burn a bootable ISO image. If you’d like to have a recovery USB instead, follow our instructions on how to make a recovery USB.
- Boot Easy Recovery Essentials from the CD, DVD or USB
- Select Launch Command Line

To download Easy Recovery Essentials, click here.
Fix #5: Run msconfig
If Windows won’t start because of a recently added software that runs at startup, you can use the msconfig utility to disable startup services or software applications:
- Boot your computer into the Safe Mode mode
- Click Start
- Click Run and type
msconfigor search formsconfigdirectly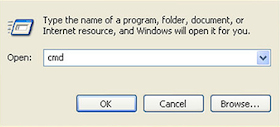
- Go to the Startup or Services tab
- Disable all services listed in this tab
- Click OK
- Click Restart to restart your computer
Fix #6: Check for viruses
If you don’t have an antivirus software that you can use, get Easy Recovery Essentials and use built-in antivirus scanner which can run outside Windows, if you can’t boot into your computer:
The Professional Edition of Easy Recovery Essentials for Windows features a powerful antivirus and rootkit scanner that can normally resolve this and similar errors caused by viruses, rootkits, trojans, or spyware. EasyRE is currently available for Windows XP, Vista, 7 and 8 and can be downloaded and created on any PC.
- Download Easy Recovery Essentials. Make sure to note your Windows version (XP, Vista, 7 or 8) before you download EasyRE. This guide can help you identify what version of Windows you have installed. For the purposes of this guide, you will need to obtain the Professional Edition of EasyRE.
- Burn the image. Follow these instructions on how to burn the bootable ISO image very carefully, as making a bootable CD can be tricky! Alternatively, these instructions explain how to create a bootable EasyRE recovery USB stick/drive.
- Boot up your PC from the Easy Recovery Essentials CD or USB you created.
- Once EasyRE is running, choose the “Virus Scanner” option and click Continue.

Choose “Virus Scanner” in Easy Recovery Essentials
- After EasyRE scans your computer’s drives, identify and select the drive letter for your Windows installation from the list, and then click on the Scan button to begin.

Choose the drive associated with the Windows installation you’re trying to repair.
- EasyRE will begin scanning the drive for viruses, rootkits, trojans, spyware, and other unwanted malware on your machine. No intervention is required, and EasyRE will repair viruses as it finds them, reporting its progress as it goes along:

Easy Recovery Essentials searches for viruses and cleans infections on the selected Windows installation.
- Once the process is complete, EasyRE will report its findings. Click on the Restart button to reboot your PC and test the changes.


You can download Easy Recovery Essentials from here.
Fixes if Windows Vista or 7 won’t start
Before following these fixes, go to General fixes if Windows won’t start.
Fix #1: Run Startup Repair
To run Startup Repair, follow these steps:
- Insert the original Windows Vista or 7 installation disc
- Restart the computer and press any key to boot from the disc
- Click Repair your computer

Windows Vista Repair Your Computer Menu
- Choose your operating system and click Next to continue
- At System Recovery Options, select Startup Repair

Windows Vista System Recovery Options
- After Startup Repair is done, restart your computer
Fix #2: Restore the MBR
Restoring the MBR of your computer might fix the computer to boot again. To do so, you need to run the bootrec utility:
- Insert the Windows Vista or Windows 7 install disc and restart the computer
- Boot from the disc
- Click Repair your computer
- Select Command Prompt at the System Recovery Options screen
- Type:
bootrec /FixMbr
- Press Enter
- Type:
bootrec /FixBoot
- Press Enter
- Type:
bootrec /RebuildBcd
- Press Enter
- Type:
exit
- Press Enter
- Restart your computer
Fix #3: Disable Automatic Restart
Disabling the Automatic Restart option on a Windows Vista or 7 system might work and make the computer boot again.
To do so, perform these steps:
- Restart the computer
- Press the F8 key as soon as the computer starts to boot, but before the Windows logo appears on your screen
- Select Disable automatic restart on system failure
- Press Enter
Fix #4: Use System Restore
With System Restore, you can revert your computer to a working state earlier in time.
Since you can’t start Windows, you can run System Restore from Safe Mode:
- Start the PC and press the F8 key repeatedly until the Advanced Boot Options menu appears
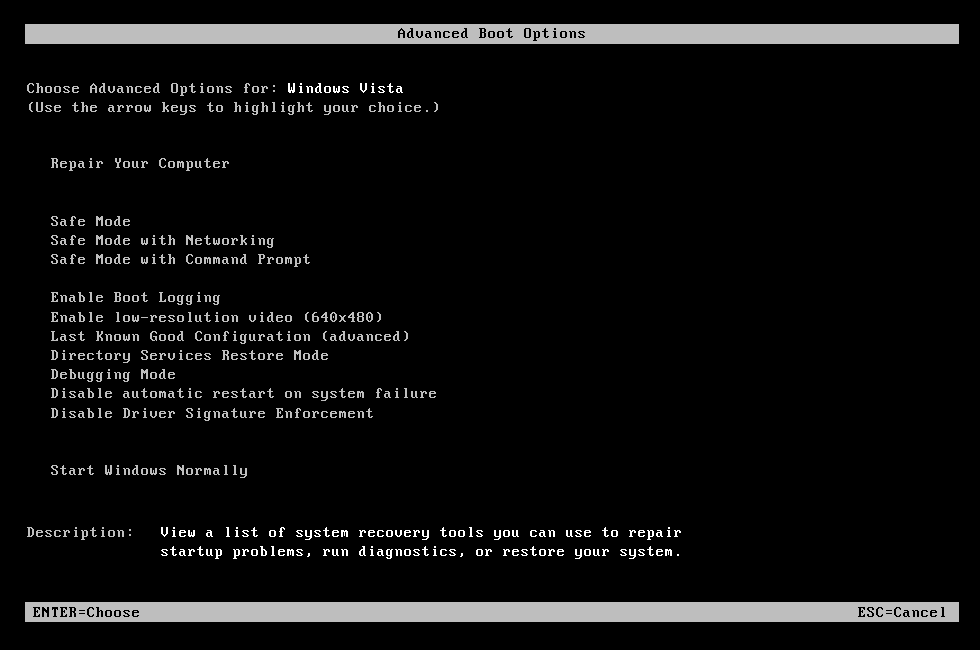
Advanced Boot Options Screen on Dell Computer
- Select Safe Mode with Command Prompt
- Press Enter
- Type:
rstrui.exe
- Press Enter
- Follow the wizard instructions to choose a restore point
If you can’t access the Advanced Boot Options menu, Easy Recovery Essentials also lets you access restore points from an external DVD or USB drive.
Fixes if Windows 8 won’t start
Before following these fixes, go to General fixes if Windows won’t start.
Fix #1: Restore the MBR
Similarly to the Windows Vista or Windows 7 steps to restore the MBR, use the Windows 8 DVD or USB to perform the same bootrec commands:
- Insert the installation media, the DVD or the USB, and boot from it
- Click Repair your computer

Windows 8 Repair Your Computer Menu
- Click Troubleshoot
- Click Advanced options
- Click Command Prompt
- Type:
bootrec /FixMbr
- Press Enter
- Type:
bootrec /FixBoot
- Press Enter
- Type:
bootrec /ScanOs
- Press Enter
- Type:
bootrec /RebuildBcd
- Press Enter
Fix #2: Refresh or Reset
Windows 8 or Windows 8.1 can be refreshed or reseted. These 2 operations – Refresh or Reset – can be used to fix a non-working Windows.
To perform a Refresh, follow these steps:
- Restart the computer
- Insert the Windows 8 or 8.1 installation DVD and boot from it
- Click Repair your computer
Windows 8 Repair Your Computer Menu
- Click Troubleshoot
- Click Refresh your PC
To perform a Reset, follow these steps:
- Insert the installation media and boot from it
- Click Repair your computer
- Click Troubleshoot
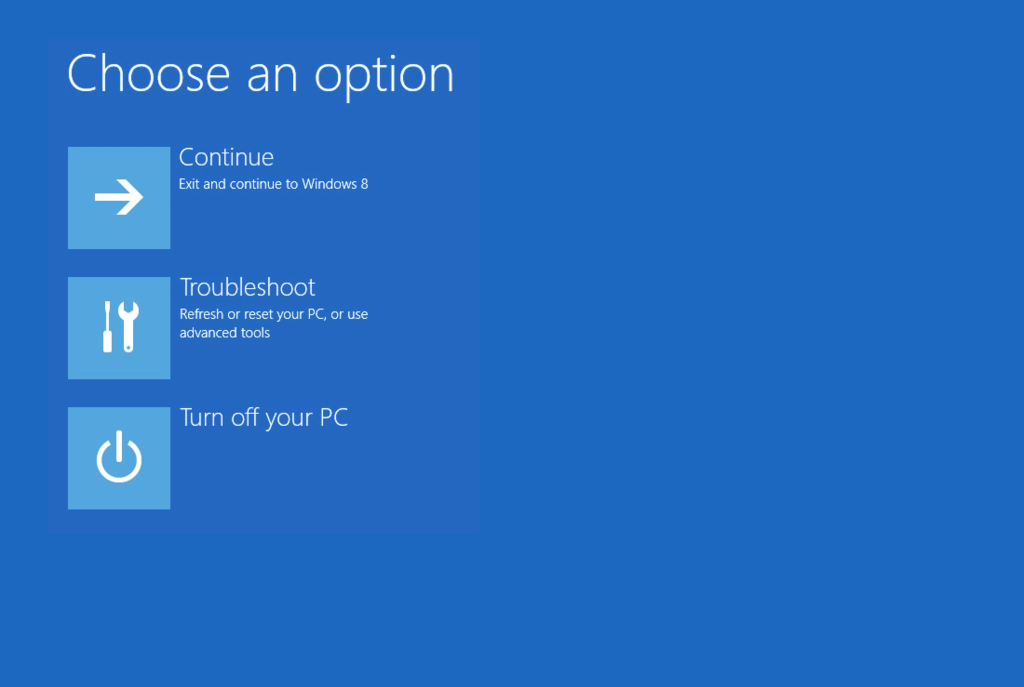
Troubleshoot in Windows 8 recovery options screen
- Click Reset your PC
Fixes if Windows 10 won’t start
Before following these fixes, go to General fixes if Windows won’t start.
Fix #1: Restore the MBR
Similarly to the Windows Vista 8 steps to restore the MBR, use the Windows 10 DVD or USB to perform the same bootrec commands:
- Insert the installation media, the DVD or the USB, and boot from it
- Click Repair your computer

- Click Troubleshoot
- Click Advanced options

- Click Command Prompt
- Type:
bootrec /FixMbr
- Press Enter
- Type:
bootrec /FixBoot
- Press Enter
- Type:
bootrec /ScanOs
- Press Enter
- Type:
bootrec /RebuildBcd
- Press Enter
Fix #2: Refresh or Reset
Windows 8 or Windows 8.1 can be refreshed or reseted. These 2 operations – Refresh or Reset – can be used to fix a non-working Windows.
To perform a Refresh, follow these steps:
- Restart the computer
- Insert the Windows 8 or 8.1 installation DVD and boot from it
- Click Repair your computer
- Click Troubleshoot
- Click Refresh your PC
To perform a Reset, follow these steps:
- Insert the installation media and boot from it
- Click Repair your computer
- Click Troubleshoot
- Click Reset your PC
More Information
Linked Entries
Support Links
- Easy Recovery Essentials for Windows – our repair and recovery disk.
It’s an easy-to-use and automated diagnostics disk. It’s available for Windows 8, Windows 7 and Windows Vista. It’s also available for Windows XP and Windows Server.Read more at Windows Recovery Disks.
- The NeoSmart Support Forums, member-to-member technical support and troubleshooting.
- Get a discounted price on replacement setup and installation discs: Windows XP, Windows Vista, Windows 7, Windows 8, Windows 10.
Applicable Systems
This Windows-related knowledgebase article applies to the following operating systems:
- Windows XP (all editions)
- Windows Vista (all editions)
- Windows 7 (all editions)
- Windows 8 (all editions)
- Windows 8.1 (all editions)
- Windows 10 (all editions)