This guide explains how to create a backup of your files and restore those files on Windows 7 computer.
If you’re looking on how to use System Restore, go to our Windows System Restore – Windows 7 guide.
Contents
How to create a backup in Windows 7
To backup certain files on a Windows Vista computer, you’ll be using the Backup and Restore utility.
In Windows Vista, it was called Backup and Restore Center.
To create a backup of your system in Windows 7, follow these steps:
- Click Start
- Go to Control Panel
- Go to System and Security
- Click Backup and Restore
For a faster route: click Start, type
backupin the search field, and then click on the Backup and Restore option from the search results list. - At the Back up or restore your files screen, click Set up backup
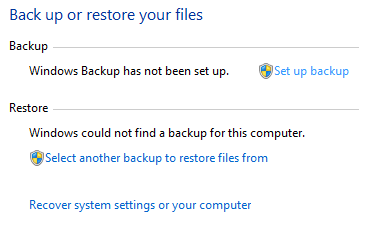
Windows 7: Set up backup
- Select where you want to save the backup and click Next
You can save the backup on:
- a hard disk drive
- writable DVDs
- on a network
If you plan to save the backup on a DVD, insert the DVD when prompted and label each DVD in sequence.
If you plan to save the backup on a network, browse to the the desired location on the network. After you type the network credentials, click OK.
- Choose Let Windows choose (recommended)
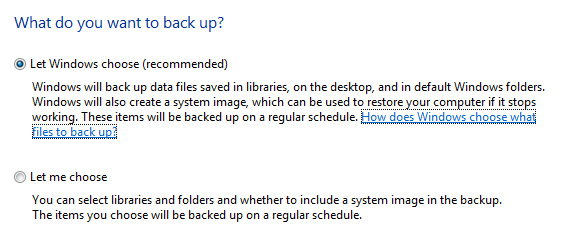
Windows 7: Let Windows Choose
You can opt for Let me choose and select individual files and folders to backup.
- Click Next
- Verify the backup details
- Click Save settings and run backup
- The process will now start. This might take some time because your system is backing up all data on your system.
- After the process is complete, the Back up or restore your files wizard will display the size of the backup file.
How to restore a backup in Windows 7
The instructions to restore a backup file using the Backup and Restore utility are:
- Click Start
- Go to Control Panel
- Go to System and Security
- Click Backup and Restore
- At the Back up or restore your files screen, click Restore my files.
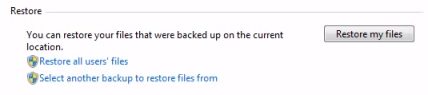
Windows 7: Restore my files
If no backups are being detected, the Restore my files button won’t appear. In this case, click Select another backup to restore files from instead.
- Browse to locate the backup file
You can narrow your location search by clicking Choose a different date. This enables you to choose a backup file based on the date you saved the backup.
- Click Next
- Select a location where you want to restore the backup file
- Click Restore
- The restore process will now begin. This process may take a while depending on how large the backup file is.
- When the process is complete, click Finish
Or type backup in the search box at Start and click the Backup and Restore items from the search results list.
Delete individual backup files
In Windows 7, you can delete individual backup files created using Backup and Restore utility.
To do, follow these steps:
- Click Start
- Go to Control Panel, then System and Security
- Click Backup and Restore
- At the Back up or restore your files screen, click Manage space

Manage Space button in Windows 7
- The Manage Windows Backup disk space wizard should now appear
- Click View backups

View Backups button in Windows 7
- Select the backup files you want to remove
- Click Delete
- Click Delete again to confirm that you want to delete the backup files.
- The deletion process will now start. This may take a while depending on how large (and how many) the backup files are.
- Once the backup files are deleted, click Close
- Click Close again to exit the Manage Windows Backup disk space wizard
Restore files from Windows Vista backup
If you created a backup file in Windows Vista, you can have it restored on a Windows 7 system.
To do so, follow these steps:
- Insert the Backup DVD you used in Windows Vista
- Click Start
- Go to Control Panel, then System and Security
- Click Backup and Restore
- At the Restore section, click Select another backup to restore files from
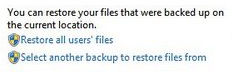
- Verify the backup file details. Click Refresh if you don’t see the details yet.
- Click Next
- Choose Select all files from this backup
- Click Next
- Choose where you want to save the files on your Windows 7 system
- Click Restore
- Once the process is complete, verify that the files have been restored successfully
More Information
Support Links
- Easy Recovery Essentials for Windows – our repair and recovery disk.
It’s an easy-to-use and automated diagnostics disk. It’s available for Windows 8, Windows 7 and Windows Vista. It’s also available for Windows XP and Windows Server.Read more at Windows Recovery Disks.
- The NeoSmart Support Forums, member-to-member technical support and troubleshooting.
- Get a discounted price on replacement setup and installation discs: Windows 7.
Applicable Systems
This Windows-related knowledgebase article applies to the following operating systems:
- Windows 7 (all editions)