This guide explains how to create a backup of your files and restore those files on Windows 8 or Windows 8.1 system.
If you’re looking on how to use System Restore, go to our Windows System Restore – Windows 8 guide.
Contents
How to create a backup on Windows 8 or 8.1 system
Before you begin, make sure you’re logged in as an Administrator.
The instructions are:
- Go to Settings

Settings Icon in Windows 8
- Go to Control Panel
- Under System and Security, click Save backup copies of your files with File History
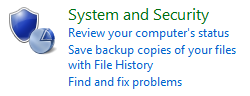
Windows 8: System and Security in Control Panel
- The utility software should now load
- Select a destination where to save your backup
- Click Turn on to start the backup process.
You can save the backup either on an external disk drive or on a network.
If you save the backup on a network, you need browse to add the desired location on the network, then type the network credentials and click OK.
- The backup process will now start. This may take a while, depending on the final size of the file.
How to restore a backup in Windows 8 or 8.1 system
Before you restore a backup file, please log in as an Administrator.
The instructions are:
- Click Search or press the
 and C keys to open the Charm Bar
 - Type
restorein the search box - Click Restore your files with File History from the search results list

Windows 8: Restore files with File History
- The software should now load
- Search and locate for your backup, select it, then click the refresh button at the bottom of the wizard to restore it
- The restore process should now begin. This may take a while, depending on how large is your backup file.
Delete individual backup files
You can delete individual backup files already created by following the instructions below. In this case, Windows 8 is using the Windows 7 File Recovery utility.
This option is only available for Windows 8 users, not Windows 8.1. Users on Windows 8.1 will not have the Windows 7 File Recovery utility.
Like the instructions above, please make sure you’re logged in as an Administrator.
- Click Search
- Type Windows 7 File Recovery in the search box
- Click on the Windows 7 File Recovery item from the search results list
- In the Back up or restore your files screen, click Manage space
- The utility wizard should now appear
- Click View backups
- Select the backup files you don’t want
- Click Delete
- Click Delete again to confirm that you want to delete the backup files
- The deletion progress will now begin
- Once the backup files are deleted, click Close
- Click Close again to exit the Manage Windows Backup disk space wizard
More Information
Support Links
- Easy Recovery Essentials for Windows – our repair and recovery disk.
It’s an easy-to-use and automated diagnostics disk. It’s available for Windows 8, Windows 7 and Windows Vista. It’s also available for Windows XP and Windows Server.Read more at Windows Recovery Disks.
- The NeoSmart Support Forums, member-to-member technical support and troubleshooting.
- Get a discounted price on replacement setup and installation discs: Windows 8.
Applicable Systems
This Windows-related knowledgebase article applies to the following operating systems:
- Windows 8 (all editions)
- Windows 8.1 (all editions)