This guide is about boot partitions for the following Windows versions: Windows XP, Vista, 7, 8, 8.1 and 10
Contents
What is a boot partition?
A Windows boot partition is the partition that holds the necessary files for the Windows operating system (either XP, Vista, 7, 8, 8.1 or 10).
A boot partition is also known as a boot volume.
Whenever you install another operating system, e.g. Windows Vista if you already have Windows XP installed or Ubuntu (Linux) next to your already installed Windows Vista, you’ll have two partitions. This is called a dual-boot or a multi-boot configuration.
For each operating system you install, you’ll have boot partitions for each. A system partition will contain the hardware-related files.
You can identify which partition is a boot partition or a system partition, in Windows Vista and Windows 7, using the Disk Management wizard:

To do so, follow these steps:
- Open Disk Management from Control Panel (System and Security > Administrative Tools > Computer Management)
- At the Status column, the boot partitions are identified using the (Boot) word, while the system partitions are with the (System) word.
You can create a new partition on your PC if you have unallocated space disk available on the hard disk.
If the current installed operating system occupies the entire hard disk space, you’ll need to shrink or delete the partition used by that operating system.
Boot partition and System partition
The system partition contains the files that your Windows needs to start (the Boot Configuration Data or BCD). The reserved partitions (or the system partitions) do not have a letter assigned to them. You can see these partitions with a Partition Editor software or through Disk Management.
The boot partition is the partition that holds the Windows installation.
Create boot partition in Windows XP
You must run all the steps as an Administrator on your Windows XP PC or as any user that has administrative rights to the system.
To create a new boot partition on a Windows XP computer, follow the steps below:
- Boot into Windows XP
- Click Start
- Click Run
- Type
compmgmt.mscto open Computer Management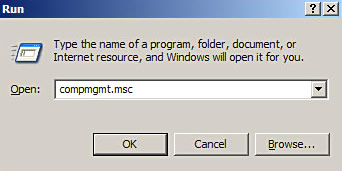
- Click OK or press Enter
- Go to Disk Management (Computer Management (Local) > Storage > Disk Management)
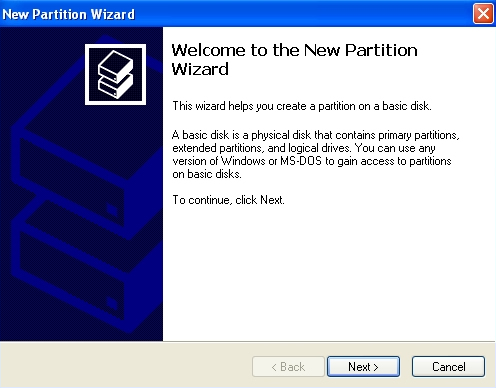
- Right-click on a unallocated space available on your hard disk and click New Partition
- In the New Partition wizard, follow the instructions to complete the process
You can also create a partition with the diskpart utility using Command Prompt:
- Open Command Prompt

- Type
diskpartand press Enter - Type
list diskand press Enter. You will now see a list of available disks. Note the number of the disk that you want to use as a new partition. - Type
select disk x, wherexis the number of the disk that you want to use - Press Enter
- Type the following commands, depending on which type of partition you want to create:
create partition primary size=SIZE_IN_MBto create a primary partitioncreate partition extended size=SIZE_IN_MBto create an extended partitioncreate partition logical size=SIZE_IN_MBto create a logical partition
where
SIZE_IN_MBshould be the size of the partition you want to create, in MB.
Create boot partition in Windows Vista
All the below steps must be performed as an Administrator or as any user with administrative rights to the system.
If you install different versions of Windows, such as Vista and 7, you need to install Windows Vista first. The earliest version of Windows must be installed first on your PC.
To create a new boot partition in Windows Vista, follow these steps:
- Boot into Windows Vista
- Click Start
- Click Control Panel
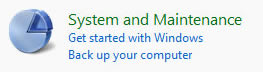
- Click System and Maintenance
- Click Administrative Tools
- Click Computer Management
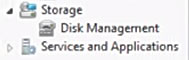
- Under the Storage section, click Disk Management
- At this step you should see how much unallocated space you have on your hard disk
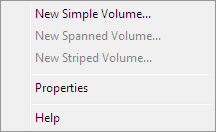
- Right-click on the unallocated box and click New Simple Volume
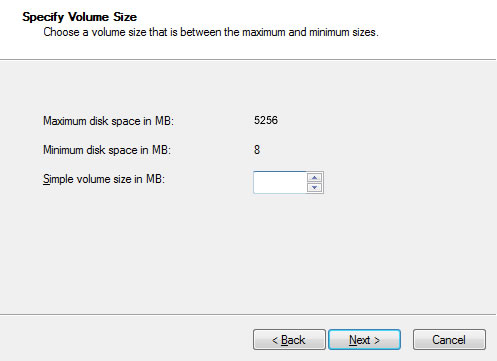
- At the New Simple Volume wizard, click Next
- Type the size of the boot volume you want to create, in MB, and click Next
- Choose a drive letter for the boot volume and click Next
- At the Format Partition screen, you can select Do not format this volume and click Next to format the partition later on. If you want to format the partition now, do not select Do not format this volume, and click Next.
- Click Finish
If you don’t have enough unallocated space available, you either need to shink or delete already used partitions.
To shrink a boot volume (or boot partition), follow these steps:
- Right-click on the volume you want to shrink
- Click Shrink Volume
- Follow the instructions to complete the process
Create boot partition in Windows 7
The steps to create a boot partition in Windows 7 are similar to those of Windows Vista.
You must perform these steps as an Administrator
If you install multiple Windows versions, the first Windows version installed on your PC must be the earliest, e.g. install Windows Vista and then Windows 7 and not the other way around
The steps to create a new boot partition in Windows 7 are:
- Boot into Windows 7
- Click Start, then click Control Panel
- Go to System and Maintenance and click Administrative Tools
- Click Computer Management
- If you’re prompted for the Administrator password, enter it and click OK or press Enter
- At the Storage section, click Disk Management
- Right-click on the unallocated space box and click New Simple Volume
- Click Next
- Type the size you want for this new boot partition you’re creating now
- Click Next
- Type the drive letter for the partition. Make sure it’s unique or leave the default as suggest by Windows 7.
- Click Next
- At the Format Partition dialog, choose to either format the partition now or later and click Next. To format it later, check the Do not format this volume option and then click Next.

- Click Finish
If you don’t have enough unallocated space available, you either need to shink or delete already used partitions.
To shrink a boot volume (or boot partition), follow these steps:
- Right-click on the volume you want to shrink
- Click Shrink Volume
- Follow the instructions to complete the process
Create boot partition in Windows 8
To create a new boot partition on a Windows 8, follow the steps below.
If you perform these steps to install Windows 7 along with Windows 8, it won’t work. You need to install Windows 7 first, use Disk Management from Windows 7 to create the boot partition and then install Windows 8.
You can install Windows 10 along with Windows 8. Use the Disk Management from Windows 8 to install Windows 10 on a new partition.
The steps to create a new boot partition in Windows 8 are:
- Boot into Windows 8
- Press the
 key and R to open Run
 - Type
diskmgmt.mscto open Disk Management
- Click OK or press Enter
- Check if you have any unallocated space available on the hard disk. If so, right-click on that unallocated space and click New Simple Volume.If you don’t have unallocated space space, you can shrink a volume Windows 8 already uses. To do so, right-click on the volume and click Shrink Volume.
- Continue with the instructions to finish the process

Create boot partition in Windows 10
To create a new boot partition on a Windows 10, follow the steps below.
If you perform these steps to install Windows 7 along with Windows 10, it won’t work. You need to install Windows 7 first, use Disk Management from Windows 7 to create the boot partition and then install Windows 10.
You can install Windows 10 along with Windows 8. Use the Disk Management from Windows 8 to install Windows 10 on a new partition.
The steps to create a new boot partition in Windows 10 are:
- Boot into Windows 10
- Open the Start Menu
- Type
diskmgmt.mscto access Disk Management
- Click OK or press Enter
- Check if you have any unallocated space available on the hard disk. If so, right-click on that unallocated space and click New Simple Volume.If you don’t have unallocated space space, you can shrink a volume Windows 8 already uses. To do so, right-click on the volume and click Shrink Volume.
- Continue with the instructions to finish the process
More Information
Support Links
- Easy Recovery Essentials for Windows – our repair and recovery disk.
It’s an easy-to-use and automated diagnostics disk. It’s available for Windows 8, Windows 7 and Windows Vista. It’s also available for Windows XP and Windows Server.Read more at Windows Recovery Disks.
- The NeoSmart Support Forums, member-to-member technical support and troubleshooting.
- Get a discounted price on replacement setup and installation discs: Windows XP, Windows Vista, Windows 7, Windows 8, Windows 10.
Applicable Systems
This Windows-related knowledgebase article applies to the following operating systems:
- Windows XP (all editions)
- Windows Vista (all editions)
- Windows 7 (all editions)
- Windows 8 (all editions)
- Windows 8.1 (all editions)
- Windows 10 (all editions)
- Windows Server 2003 (all editions)
- Windows Server 2008 (all editions)
- Windows Server 2012 (all editions)