This guide shows you how to use the Bootcfg utility for the following Windows versions: Windows XP, Server 2003, NT 4.0 or 2000.
Bootcfg is only available on Windows XP. If you’re looking for the bootrec utility (available for Windows Vista, 7, 8, 8.10, read the Bootrec guide.
Contents
About bootcfg
Using the bootcfg utility you can modify the boot.ini file. The utility is part of Windows XP Recovery Console.
The Recovery Console is available on your original Windows XP installation disc.
If you don’t have the installation disc, use Easy Recovery Essentials. You can burn EasyRE directly on a CD, DVD or USB to access Command Prompt.
With this utility you can:
- rebuild a new boot.ini file
- scan your hard drive for new Windows installations (Windows NT 4.0; Windows 2000; Windows XP) and add these to the boot.ini file
Parameters
Parameters for bootcfg are:
bootcfg /default will set the default operating system automatically.
bootcfg /add, bootcfg /rebuild and bootcfg /scan will scan the hard drive for new Windows installations, and then it allows you to add these installations to the file (except for /scan which will only print found installations).
bootcfg /add will print this type of message:
Scanning all disks for Windows Installations
Please wait, since this may take a while...

Total Identified Windows Installs: 2

[1] C:\Windows
[2] D:\Windows

Select installation to add: (select a number)

Enter Load Identifier: (Custom description for an operating system loading from the Boot menu)
Enter Operating System Load Options: (that is: /fastdetect)
bootcfg /rebuild will print this type of message:
Total Identified Windows Installs: 2

[1] C:\Windows
Add installation to boot list? (Yes/No/All):
Enter Load Identifier: (Custom description for an operating system loading from the Boot menu)
Enter Operating System Load Options: (that is: /fastdetect)

[2] D:\Windows
Add installation to boot list? (Yes/No/All):
Enter Load Identifier: (Custom description for an operating system loading from the Boot menu)
Enter Operating System Load Options: (that is: /fastdetect)
bootcfg /scan will print this type of message:
Scanning all disks for Windows Installations
Please wait, since this may take a while...

Total Identified Windows Installs: 2

[1] C:\Windows
[2] D:\Windows
bootcfg /list will read the boot.ini and display it. It will print this type of message:
Total entries in boot list: 2

[1] Microsoft Windows Whistler Professional
Operating System Load Options: /fastdetect
Operating System Location: D:\Windows

[2] Microsoft Windows Whistler Server
Operating System Load Options: /fastdetect
Operating System Location: C:\Windows
bootcfg /redirect will enabled redirection in the boot loader.
bootcfg /disableredirect will disable redirection in the boot loader.
Run bootcfg
If you can boot into Windows XP
The bootcfg command is usually used to modify the boot.ini. You can modify the boot.ini file directly from Control Panel.
To do so, follow these steps:
- Click Start
- Click Control Panel
- Click Performance and Maintenance
- Click System
- At the Advanced tab, click Startup and Recovery
- Click Settings
- At the System Startup tab, click Edit
- Save the changes and click OK
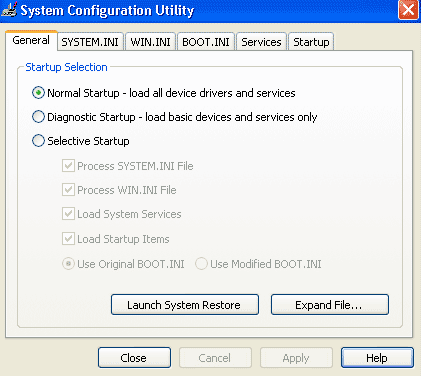
- Click Start
- Go to Run
- Type
msconfig - Hit Enter
- Click the boot.ini tab
If you can’t boot into Windows XP
If you can’t boot into Windows XP to run the bootcfg command, you have two options:
- Boot into the Recovery Console with the original Windows XP installation disc
- Use Easy Recovery Essentials to launch the Command Line from it directly (you can burn EasyRE to any CDs or DVDs)
Instructions if you have the original Windows XP installation disc:
- Insert the Windows XP CD in the optical drive
- Reboot the computer
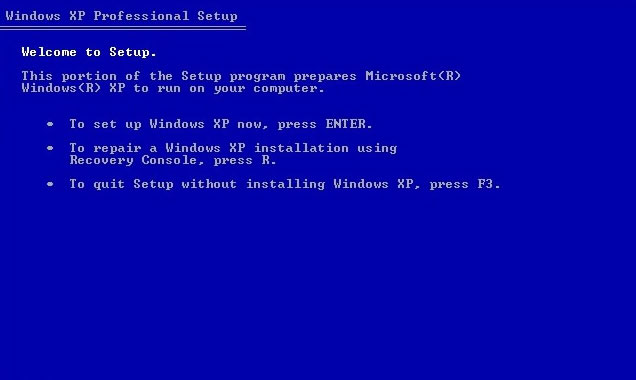
- At the Microsoft Setup menu, press R
- Select the operating system
- Enter the Administrator password
- When Command Prompt appears, you can type the bootcfg command:
bootcfg /rebuild
- Once completed, type
exitto reboot the computer
Instructions if you use Easy Recovery Essentials:
- Download Easy Recovery Essentials
- Burn the ISO Image. Follow our instructions on how to burn a bootable ISO image. If you’d like to have a recovery USB instead, follow our instructions on how to make a recovery USB.
- Boot Easy Recovery Essentials from the CD, DVD or USB
- Select Launch Command Line

Troubleshooting
bootcfg /scan failed
If the bootcfg /scan command failed and throws an error, try to run the chkdsk (related guide: chkdsk) command first to detect that your hard disk has no issues:
- Insert the Windows XP installation CD in the disk tray
- Restart your computer
- Boot from the CD
- At the “Press any key” message, press any key
- At the Windows Options menu, press R to open Recovery Console
- Enter the password for the Administrator account
- When Command Prompt appears on your screen, type this command and press Enter:
chkdsk C: /r
where
C:is the letter of the drive where Windows is installed and the/rparameter will try to repair errors and scan for bad sectors.
More Information
Support Links
- Easy Recovery Essentials for Windows – our repair and recovery disk.
It’s an easy-to-use and automated diagnostics disk. It’s available for Windows 8, Windows 7 and Windows Vista. It’s also available for Windows XP and Windows Server.Read more at Windows Recovery Disks.
- The NeoSmart Support Forums, member-to-member technical support and troubleshooting.
- Get a discounted price on replacement setup and installation discs: Windows XP.
Applicable Systems
This Windows-related knowledgebase article applies to the following operating systems:
- Windows XP (all editions)
- Windows Server 2003 (all editions)