This guide is about Windows System Restore feature for the following versions of Windows: Windows XP, Vista 7, 8, 8.1 and 10.
Contents
What is System Restore
System Restore is a feature of Windows that allows you to revert your computer’s state to a previous point in time. These restore points can be automatically or manually set.
This guide covers the restore feature for the following versions of Windows:
If you’re looking for a restore disk for your computer, go to Download restore disk.
Use Easy Recovery Essentials to restore your computer
If you need to restore your computer to a working state, download our recovery disk Easy Recovery Essentials to restore your computer:
- Download Easy Recovery Essentials from here
- Burn the image. Follow these instructions on how to burn the bootable ISO image very carefully, as making a bootable CD can be tricky! Alternatively, these instructions explain how to create a bootable EasyRE recovery USB stick/drive.
- Open Easy Recovery Essentials. It starts with a list of detected Windows installations

- Choose from the list of available restore points

- Easy Recovery Essentials will now create a backup of your current system configuration and begin restoring the selected snapshot.

Features of Easy Recovery Essentials include:
- Automatically find and fix boot errors
- Works even when you can’t get into Windows
- Recover from virus infections
- Restore your PC to a working state
- Access and backup your important data
- Advanced tools for IT experts
Easy Recovery Essentials is an ISO download image ready to be burned directly to a CD, DVD or a USB flash drive.

Screenshot of Easy Recovery Essentials
Note: Easy Recovery Essentials can not be used to install or reinstall Windows.
With Easy Recovery Essentials you can:
- Find and fix errors automatically with Automated Repair
- Recover your PC from infections with the built-in antivirus
- Restore your PC to a working state
- Access and backup your most important data (like documents, pictures, music, videos and so on)
Easy Recovery Essentials is compatible with the following Windows versions:
- Windows XP
- Windows Vista
- Windows 7
- Windows 8
Download Easy Recovery Essentials and restore your computer
How to use System Restore
Restore Windows XP
System Restore is, by default, turned on in all versions of Windows XP. Windows XP Professional has the option to turn it off. If it is turned off, you can not use it to restore your computer.
You can’t use the restore utility if Windows XP is unbootable. If you can’t boot into Windows XP, go to Download restore disk to restore your PC.
Before you begin, you must login as an Administrator. If you don’t have an “Administrator” user account, login with any user account that has administrative rights to the system.
Restore computer
To restore your computer with Windows XP installed, following these steps:
- Click Start
- Go to All Programs
- Find the Accessories folder
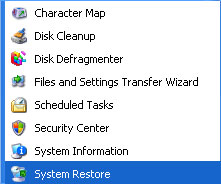
- Go to System Tools
- Find the System Restore item
- At the Welcome to System Restore welcome screen, make sure the “Restore my computer to an earlier time” option is selected
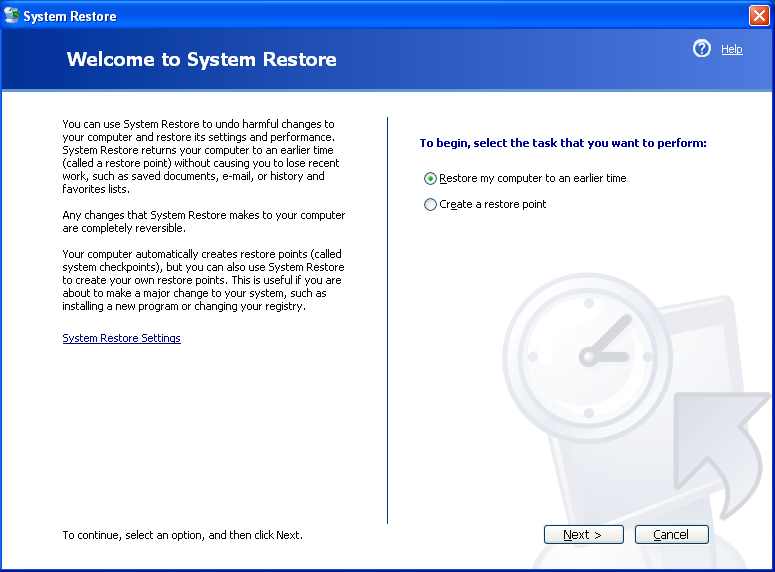
- Click Next
- At the Select a Restore Point screen, select the date you want to restore your computer from the “1. On this calendar, click a bold date” area.Dates that are colored from the calendar (in blue) mean that at least 1 restore point is available for that date
- Select one of the available restore points from the selected date from the “2. On this list, click a restore point.” area
- Click Next
- At the Confirm Restore Point Selection screen, click Next
- Wait for the software to restore your Windows XP to the previous date you selected
- Your computer will restart
- Once Windows XP boots, login as an administrator again
- At the Restoration Complete screen, click OK
Create restore point
To create a restore point in Windows XP, follow these steps:
- Boot your computer
- Login in as an Administrator or with any user account that has administrative rights
- Click Start > All Programs > Accessories > System Tools
- Click on System Restore
- Wait for the software to open. If it doesn’t open, it might be turned off
- Click on Create a restore point
- Click Next
- At the Restore point description screen, type a description of this restore point you’re about to create. Use any hints that might help you understand what this restore point is about
- Click Create
- The wizard screen will notify you when the restore point is created
- When finished, click Close
You can verify that the restore point was created successfully by following the steps from Restore computer until step 8.
Turn on/off
The restore feature is usually, by default, turned on. If this is not the case for your computer, follow these steps to enable it for Windows:
- Click Start
- Go to Control Panel
- Click on System (or double-click)
- Go to the System Restore tab
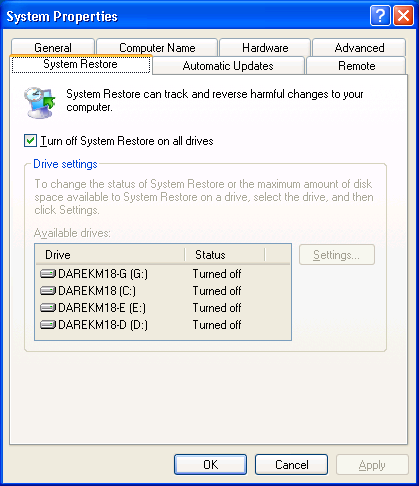
- Make sure the Turn off System Restore (or Turn off System Restore on all devices) check box is not selected:
- If this check box is selected, System Restore is turned off
- If this check box is not selected, System Restore is turned on
- Click OK if you made any changes
Run in Safe Mode
You can run Windows XP in Safe Mode, to restore your computer, by following these steps.
Before you begin, you must have access to the Administrator user account or any user account that has administrative rights to the system.
If you’re not able to run Safe Mode because of a boot error, download our disk Easy Recovery Essentials that can automatically fix boot errors using its Automated Repair features (read features list).
- Restart your computer
- Press and hold the F8 key right after
- At the Windows Advanced Options screen, select Safe mode with a Command prompt
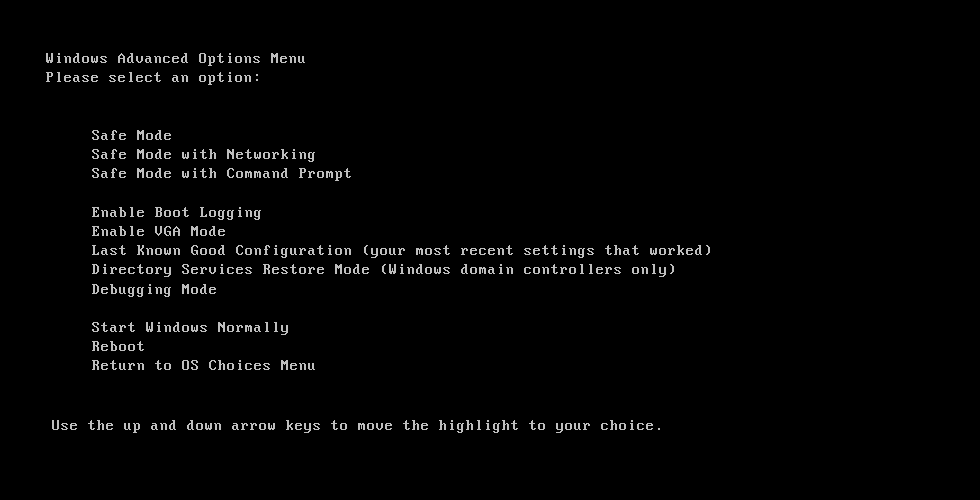
Windows XP Advanced Options Menu
- After this item is selected, hit Enter
- Log in as an administrator
- When the command prompt appears, type
%systemroot%\system32\restore\rstrui.exeand hit Enter - Follow the instructions on the screen
Restore Windows Vista
You will not be able to restore your computer if the restore feature is turned off or if Windows Vista is unbootable. Go to Download restore disk and see how to use Easy Recovery Essentials to restore your PC.
Restore computer
You can restore your Windows Vista by following these steps:
- Boot Windows Vista
- Click on Start
- Start typing “restore” in the search bar
- When the Backup and Restore Center item appears, click it
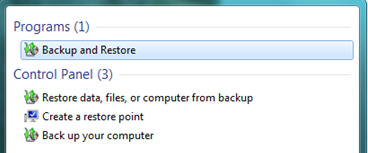
Windows Vista Backup and Restore Centre Menu Item
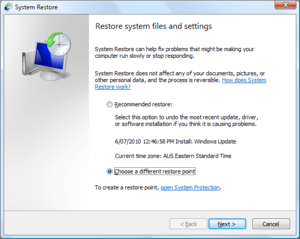
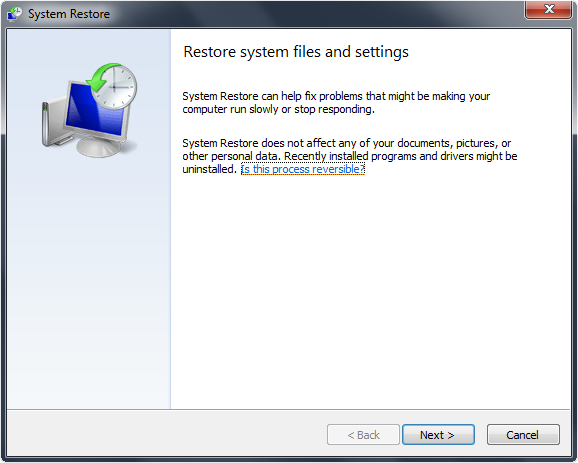
- At the Restore system files and settings screen, select either to restore your computer to the recommended date (suggested by Windows Vista) or choose a different restore point. Leave the Recommended restore option selected to restore your computer to the date Windows Vista suggests
- Click Next
- At the confirmation screen, click Yes. The confirmation message is this:
Once started, System Restore may not be interrupted and cannot be undone until after it has completed. Are you sure you want to continue?
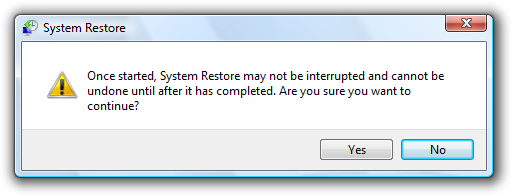
Windows Vista Restore Warning Message
- The software will now start and your computer will reboot
- When it reboots back, the confirmation message that the restore has been successful is this: System Restore completed successfully
- Click Close
Create restore point
You can create a restore point for Windows Vista using this set of instructions:
- Go to Start
- Click on All Programs
- Find the Accessories folder
- Go to System Tools
- Click on System Restore
- At the Restore system files and settings, click on “open System Protection“. Do not click Next.
Windows Vista Open System Protection
- The System Properties window will load, go to System Protection tab (or make sure it is selected)
- Click Create
- At the Create a restore point screen, enter a description or name for this point. Use any hints you want.
- Wait for the software to create the point
- When the “The restore point was created successfully” message appears, click OK
Turn on/off
You can turn on or off the restore utility of any Windows Vista systems by following these steps:
- Go to Start > All Programs > Accessories > System Tools
- Click on System Restore
- Click on “open System Protection“
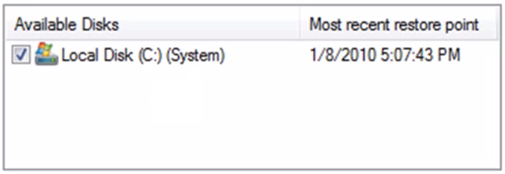
- At the System Protection tab, check any check boxes of the Available Disks (from the Automatic restore points area) you want to make sure a restore point will be created:
- For any disks you check, the restore feature will be turned on
- If no check boxes are selected, System Restore is turned off
- For any disks you check, the restore feature will be turned on
- Click OK
Run in Safe Mode
If you can’t start Windows Vista properly, you can boot into Safe Mode and restore your computer to a previously working state.
If you’re not able to run Safe Mode because of a boot error, download our disk Easy Recovery Essentials that can automatically fix boot errors using its Automated Repair features (read features list).
- Boot your computer
- Press and hold the F8 key before the Windows logo appears. If it appears, you need to try again by pressing and holding F8
- At the Advanced Boot Options screen, select Safe mode with command prompt
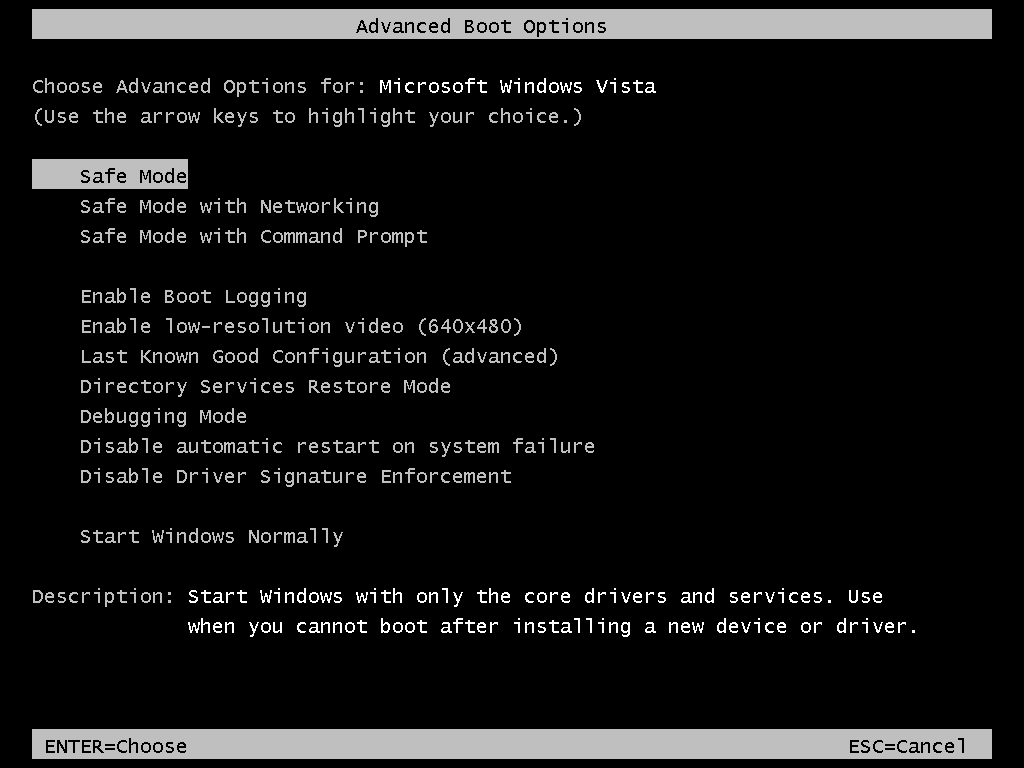
The Advanced Boot Options screen in Windows Vista
- When the command prompt appears, type
rstrui.exeand hit Enter - If Windows Vista asks for an administrator password, type the password
- Follow the wizard instructions to choose a restore point
Restore Windows 7
You can restore your Windows 7 if the restore software has been enabled (see Turn on/off on how to check).
Restore computer
You can restore Windows 7 by following these steps:
- Boot your Windows 7
- Click Start
- In the search bar, type: “System Restore“
- From the list of search results, select System Restore
- If the system asks for your administrator password, type the password
- Click Next
- At the Restore system fields and settings screen, select Choose a different restore point
- Click Next
- Select a restore point from the available list
- Click Next
- Click Finish
- Click Yes to confirm
- The software will now start and your computer will reboot
- After your computer boots back, at the “System Restore completed successfully” confirmation message, click Close
Create restore point
You can create a restore point in Windows 7 like this:
- Go to Start
- Right click on Computer
- Click Properties
- Click on System protection, from the left side
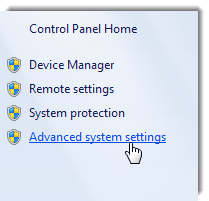
Windows 7 System Protection in Control Panel
- If your administrator password is required, type it
- Go to System Protection tab
- Click Create
- At the System Protection screen, type a description of this restore point
- Click Create
Turn on/off
The restore software can be turned on or off.
- Go to Control Panel
- Click System
- Choose System Protection from the left side
- Go to the System Protection tab
- Select what drives you want the restore utility to be active for. Your local disk, where Windows 7 is installed, is usually C:\ and marked with the Windows logo
- Click Configure
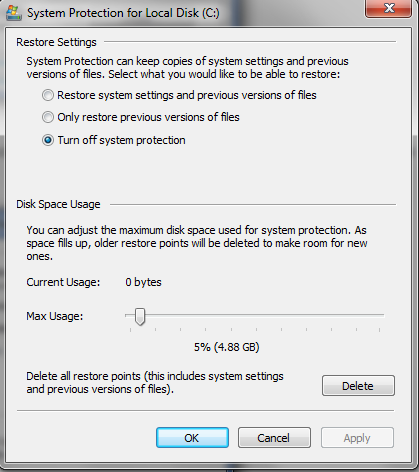
- The restore feature can now be turned on or off for the C:\ drive:
- Select Restore system settings and previous versions of files to have System Restore turned on
- Select Turn off system protection to have System Restore turned off
- Click OK
- Click Apply or OK at the System Properties window
Run in Safe Mode
The restore software of Windows 7 can also be ran from Safe Mode.
You can’t undo the restore operation if you run it from Safe Mode. If you want to have the undo option, go to Using the installation disk.
If you’re not able to run Safe Mode because of a boot error, download our disk Easy Recovery Essentials that can automatically fix boot errors using its Automated Repair features (read features list).
- Boot your computer
- Press and hold the F8 keyboard key before the Windows 7 logo appears
- At the Advanced Boot Options screen, choose Safe Mode with Command Prompt

Advanced Boot Options on Windows 7
- Hit Enter
- You may need to log on to the computer using your administrator account (or any account with administrative rights to the system)
- When command prompt appears, type:
rstrui.exe - Hit Enter
- Follow the wizard instructions
Using the installation disk
If your original Windows 7 installation disk is available, you can run the restore process from System Recovery Options by following the steps below.
If you no longer have the original installation disk, go to Download restore disk.
Unlike the Safe Mode option, running the restore wizard using the installation disk allows you to undo the operation when needed.
- Restart your computer
- Press and hold the F8 key to boot into the Advanced Boot Options menu
- Select Repair your computer
Advanced Boot Options on Windows 7
- Press Enter
- Select your keyboard language
- Click Next
- Login as an administrator
- At the System Recovery Options screen, click on System Restore

Windows 7 System Recovery Options Screen
- Click Next
- Make sure “Choose a different restore point” is selected and then click Next
- Select a restore point
- Click Next
- Confirm by clicking Yes at the warning screen
- Wait for software to finish
Restore Windows 8
You can restore Windows 8 using the restore software, if it’s turned on.
Restore computer
You can restore your computer running Windows 8 with this set of instructions. If you’re not able to boot into Windows 8, go to Download restore disk.
- Open Windows 8 and type “system restore” in the search bar
- Click Create a restore point from the search results list
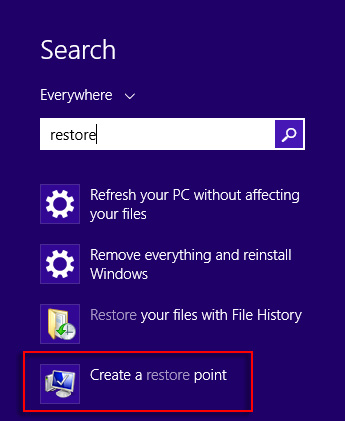
Windows 8 Create Restore Point
- From the System Protection tab, at the System Restore area, click on System Restore
- Click Next
- Select a restore point from the available list
- Click Next
- Click Finish
- Confirm this operation by clicking Yes at the warning message (“Once started, System Restore cannot be interrupted. Do you want to continue?“).

- The restore software will now start and your computer will restart
- After your computer boots back, go to your Desktop and you should see the confirmation message that the restore process has been successful: System Restore completed successfully.
Create restore point
You can create a restore point in Windows 8 with these steps:
- Open Windows 8
- Type “system restore” in the search bar
- Click on Create a restore point from the search results list
Windows 8 Create Restore Point
- At the System Protection tab, from the Protection Settings area select what drives you want to turn restore on. Usually the local drive where Windows 8 is installed is C:\ and has the Windows icon next to it
- Click Configure
- Select Turn on system protection. If this is already selected, the restore software might be working.
- Click OK
Turn on/off
The restore software in Windows 8 can be turned on or off by following these steps:
- Open Windows 8 and start typing “system restore” in the search bar
- From the search results list, click on Create a Restore point
Windows 8 Create Restore Point
- Go to the System Protection tab (or make sure it’s already selected)
- Select what drives you want the restore utility to be turned on or off
- Once the drive is selected, click Configure
- At this point, the feature can be turned on or off:
- Select Turn on system protection to have System Restore turned on
- Select Disable system protection to have System Restore turned off
- Click OK
Run at boot
You can run the restore wizard at boot, before logging into Windows 8 using your account:
- Restart your computer
- Press the F11 key to open System Recovery
- When the Advanced Options screen appears, select System Restore
- Choose an administrator account to continue
- Enter the password for the selected account
- Click Next
- Make sure “Choose a different restore point” option is selected and then click Next
- Select a restore point from the available list
- Click Next
- Click Next, at the Confirm your restore point screen
- Click Yes at the warning message
- Wait for the restore software to continue. Your computer will restart
- Once you log back in, go to your Desktop and see if the confirmation message appears: System Restore completed successfully.
Restore Windows 10
You can restore Windows 10 using the restore software, if it’s turned on.
Restore computer
You can restore your computer running Windows 10 with this set of instructions. If you’re not able to boot into Windows 10, go to Download restore disk.
- Open Windows 10 and type “restore point” in the search bar
- Click Create a restore point from the search results list

- From the System Protection tab, at the System Restore area, click on System Restore
- Click Next
- Select a restore point from the available list
- Click Next
- Click Finish
- Confirm this operation by clicking Yes at the warning message (“Once started, System Restore cannot be interrupted. Do you want to continue?“).
- The restore software will now start and your computer will restart
- After your computer boots back, go to your Desktop and you should see the confirmation message that the restore process has been successful: System Restore completed successfully.
Create restore point
You can create a restore point in Windows 8 with these steps:
- Open Windows 8
- Type “system restore” in the search bar
- Click on Create a restore point from the search results list
- At the System Protection tab, from the Protection Settings area select what drives you want to turn restore on. Usually the local drive where Windows 8 is installed is C:\ and has the Windows icon next to it
- Click Configure
- Select Turn on system protection. If this is already selected, the restore software might be working.
- Click OK
Turn on/off
The restore software in Windows 8 can be turned on or off by following these steps:
- Open Windows 8 and start typing “system restore” in the search bar
- From the search results list, click on Create a Restore point
- Go to the System Protection tab (or make sure it’s already selected)
- Select what drives you want the restore utility to be turned on or off
- Once the drive is selected, click Configure
- At this point, the feature can be turned on or off:
- Select Turn on system protection to have System Restore turned on
- Select Disable system protection to have System Restore turned off
- Click OK
Run at boot
You can run the restore wizard at boot, before logging into Windows 8 using your account:
- Restart your computer
- Press the F11 key to open System Recovery
- When the Advanced Options screen appears, select System Restore
- Choose an administrator account to continue
- Enter the password for the selected account
- Click Next
- Make sure “Choose a different restore point” option is selected and then click Next
- Select a restore point from the available list
- Click Next
- Click Next, at the Confirm your restore point screen
- Click Yes at the warning message
- Wait for the restore software to continue. Your computer will restart
- Once you log back in, go to your Desktop and see if the confirmation message appears: System Restore completed successfully.
Troubleshoot
System Restore errors in Windows Vista
If the wizard shows any error, try any of the following tips:
Fix #1: Run it in Safe Mode
Go to Windows Vista > Run in Safe Mode for instructions on how to start your system in Safe Mode and continue from there.
Fix #2: Disable Automatic Restart
- Right click on My Computer
- Go to Properties
- Go to the Advanced tab
- At the Startup and Recovery area, click on Settings
- Underneath System failure title, make sure the Automatically restart option is unchecked
- Click OK
Fix #3: Run the sfc /scannow command
- Open Command Prompt
- Type
sfc /scannow - Hit Enter
System Restore errors in Windows 7
If the restore wizard fails or displays an error, you can try one of the following tips.
Go to Use Easy Recovery Essentials to restore your computer or fix boot errors automatically.
Fix #1: Try a different restore point
If a certain restore point fails, try switching with a different restore point.
Fix #2: Turn off the restore software for all drives, except your main drive
- Go to Control Panel > System & Security > System > System Protection
- From the System Protection tab, make sure only your main drive is checked (this is usually C:\ and has the Windows icon next to it)
- Wait for the process to finish. It can take up to 20 minutes
Fix #3: Increase the space size for restore points
- Click Start
- Right-click on My Computer
- Click on Properties
- Choose the System Protection tab
- Select your main drive (where Windows is installed; usually C:\)
- Click Configure
- Check the Max Usage slider and update accordingly
Fix #4: Run the restore process from a clean boot
- Reboot your system
- Press F8 to open Advanced Boot Options
- Choose Repair Your Computer
- Hit Enter
- At the System Recovery Options screen, choose System Restore
System Restore errors in Windows 8/10
If the wizard in Windows 8 displays errors, you try any of the following tips.
Go to Use Easy Recovery Essentials to restore your computer or fix boot errors automatically.
Fix #1: Disable any antivirus or security software you might be running
If the software isn’t working, go and disable any antivirus or security software your Windows 8 might be running and try again.
Fix #2: Run the sfc /scannow command
If you can’t boot into Windows 8:
- Boot into Windows 8 using your installation disk (if you don’t have one, go to Use Easy Recovery Essentials as you can use its built-in Command Prompt)
- Open command prompt
- Type
diskpart - Hit Enter
- Type
list volume - Hit Enter
- Note the drives letter. Type
exit - Hit Enter
- Type the sfc command like this:
sfc /scannow /offbootdir=d:\ /offwindir=d:\windows
where
dis your drive letter where Windows is installed.
If you can boot into Windows 8:
- Open Command Prompt
- Type
sfc /scannow - Hit Enter
More Information
Support Links
- Easy Recovery Essentials for Windows – our repair and recovery disk.
It’s an easy-to-use and automated diagnostics disk. It’s available for Windows 8, Windows 7 and Windows Vista. It’s also available for Windows XP and Windows Server.Read more at Windows Recovery Disks.
- The NeoSmart Support Forums, member-to-member technical support and troubleshooting.
- Get a discounted price on replacement setup and installation discs: Windows XP, Windows Vista, Windows 7, Windows 8, Windows 10.
Applicable Systems
This Windows-related knowledgebase article applies to the following operating systems:
- Windows XP (all editions)
- Windows Vista (all editions)
- Windows 7 (all editions)
- Windows 8 (all editions)
- Windows 8.1 (all editions)
- Windows 10 (all editions)