This guide explains how to boot into Safe Mode for the following Windows versions: Windows XP, Vista, 7, 8, 8.1 and 10
Contents
About the Safe Mode
In Safe Mode, your computer is running with non-core components disabled which makes it easier to fix potential errors or remove various software that, in normal conditions, can’t be fixed or removed.
If you boot into Safe Mode, you can use various diagnostic tools:
- System Restore
- Various settings for your Windows version
- Device Manager, where you can update and remove devices and drivers from your computer
- Event Viewer
- System Information, where you can view information about the hardware
- Command Prompt
- Registry Editor
For more information on how to run these diagnostic tools, go to Diagnostic tools in Safe Mode.
In Windows XP, the Windows Advanced Options Menu shows the Safe Mode option available:
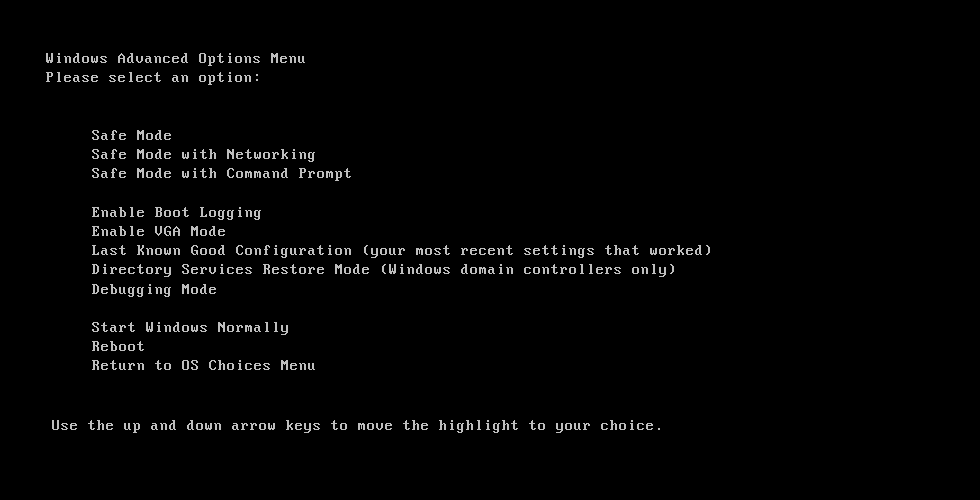
Advanced Options Menu in Windows XP
Usually, you can choose from 3 options: Safe Mode, Safe Mode with Networking and Safe Mode With Command Prompt:
- Safe Mode
- Safe Mode with Networking
- Safe Mode with Command Prompt
In Windows Vista, the equivalent of Windows Advanced Options Menu of Windows XP, the Advanced Boot Options, also lists the 3 options available for Safe Mode:
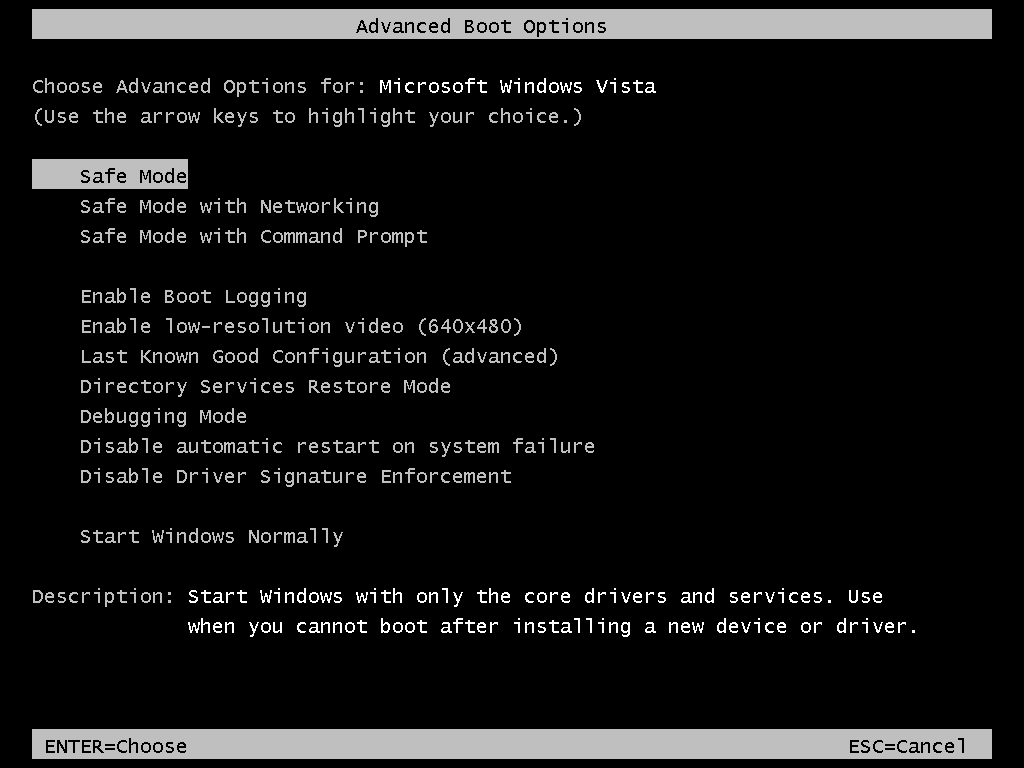
Advanced Options Menu in Windows Vista
Windows 7 is the same:

Advanced Options Menu in Windows 7
Windows 8 has the same options, but the interface is different:
Startup Settings screen in Windows 8
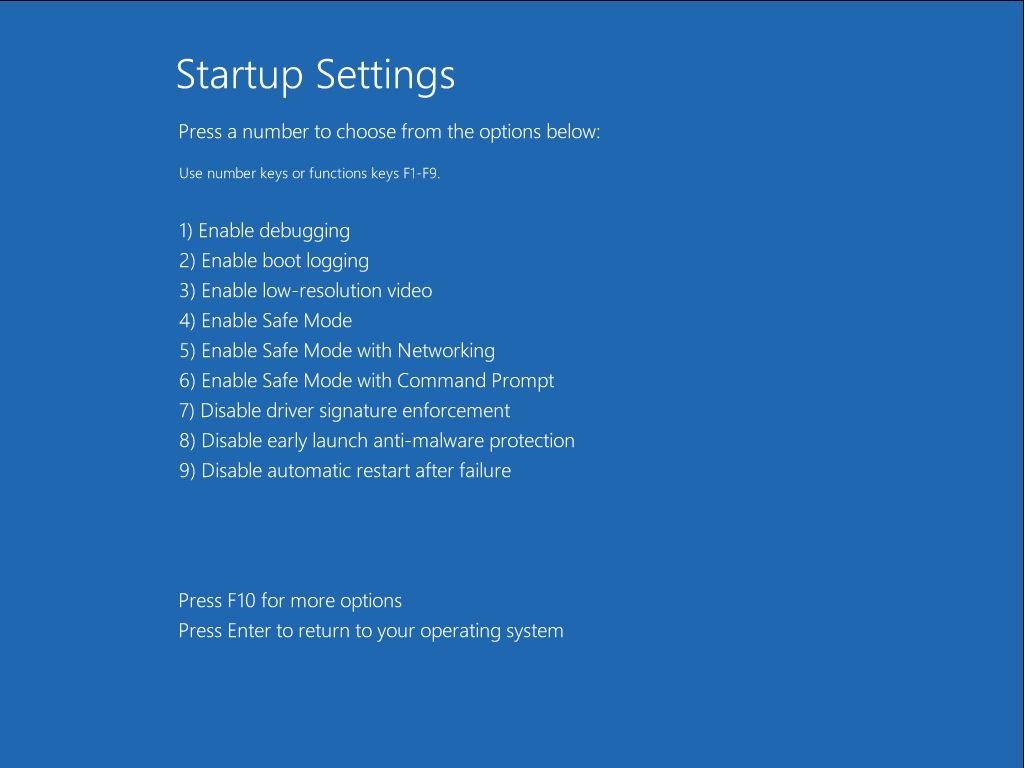
And the Windows 10 screen is slightly different as well:

Startup Settings screen in Windows 10
Options
The Safe Mode of Windows has 3 options available:
- Safe Mode. This is the most used option. It gives you a minimal set of devices, drivers and services to run Windows
- Safe Mode with Networking. This loads the same devices, drivers and services as the Safe Mode option with the additional drivers necessary to load networking.
- Safe Mode with Command Prompt. This option loads the same drivers and services as the Safe Mode option, but loads Command Prompt (cmd.exe) instead of Windows Explorer (graphical interface)
How to boot into Safe Mode
To boot into Safe Mode, you need to press the F8 key while your Windows is booting, but before the logo appears.
For Windows 8 and Windows 10, the combination of Shift and F8 keys might work, but it work for computers with UEFI/EFI.
For Windows-specific steps, follow the steps below.
Safe Mode in Windows XP
For Windows XP to start in Safe Mode, follow these steps:
- Reboot your computer. It’s recommended to remove all external cables and media and leave only the essentials: monitor, keyboard, mouse etc.
- Press the F8 key as your Windows starts, before the Windows XP logo appears
- The Windows Advanced Options Menu should now appear
- Choose Safe Mode
- Hit Enter

Advanced Options Menu in Windows XP
Safe Mode in Windows Vista
For Windows Vista to start in Safe Mode, follow these steps:
- Remove all CDs, DVDs or USBs from your computer. Make sure you don’t have any printers, scanners etc. connect
- Reboot the computer
- Press F8 as your computer start. You need to press this button before the Windows Vista logo appears.If you have more than 1 operating system, use the arrows keys to select which operating system you want to boot into Safe Mode and press Enter.
- At the Advanced Boot Options, use the arrows keys to select Safe Mode
- Press Enter
- Login in as an administrator, if prompted to do so
Advanced Options Menu in Windows Vista
Safe Mode in Windows 7
The steps to boot a Windows 7 system into Safe Mode are similar to those of Windows Vista:
- Remove any peripherals from your computer
- Restart your computer
- Press the F8 key before the Windows 7 logo appears.If you have more than 1 operating system installed on the same computer, use the arrows keys to navigate and select which operating system you want to boot into Safe Mode.
- Select Safe Mode using the arrows keys and press Enter
- If prompted to do, login as an administrator
Advanced Options Menu in Windows 7
Safe Mode in Windows 8, 8.1 and Windows 10
For Windows 8 or Windows 10 to boot into Safe Mode, follow these steps if you can boot into Windows:
- Restart the computer
- Press F8 or Shift + F8 during the boot, but before the Windows logo appears
If F8 or Shift + F8 doesn’t work, go to Windows 8 – F8 key not working or follow the alternative instructions below:
- Boot into Windows
- Press the
 and R keys to open Run
 - Type
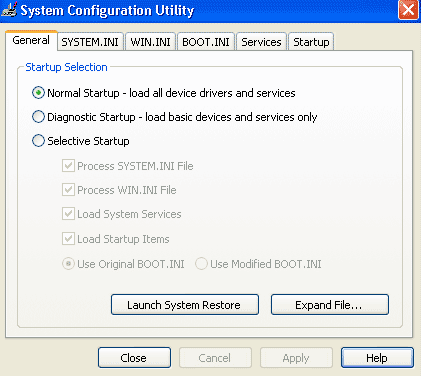
msconfig - Click the Boot Tab
- At the Boot options section, check the Safe Boot checkbox and the Minimal checkbox
- Click OK
- Restart the computer. If prompted by the System Configuration window, click Restart – not Exit without Restart.

Boot options menu in Windows
Another method is the combination of Shift and Restart keys at the login window:
- Boot into Windows until the login screen appears, but do not login as a user. If you don’t have a login screen showing, boot into the system and click on Settings
- Press the Power button
- While holding the Shift key, click Restart
- At the Choose an option screen, select Troubleshoot
- Select Advanced options
- Select Startup Settings
- Click Restart
- Your computer may restart and open the Startup Settings screen automatically
- Press the F4 key to boot into Safe Mode. For the other 2 options of Safe Mode, press F5 to boot into Safe Mode with Networking or press F6 to boot into Safe Mode with Command Prompt
Windows Startup Settings screen
It is also possible to use the installation CD/DVD to boot into Safe Mode:
- Insert the disc in the optical drive
- Reboot the system
- Press any key to boot from the CD/DVD
- Choose a keyboard layout
- Click Repair your computer
- Click Troubleshoot > Advanced options > Startup Settings
- Click Restart
- The computer should restart with the Startup Settings screen automatically
- Press F4 to boot into Safe Mode. Press F5 to boot into Safe Mode with Networking. Press F6 to boot into Safe Mode with Command Prompt.

Windows 8 Setup Screen
Diagnostic tools in Safe Mode
You can run various diagnostic tools in Safe Mode.
System Restore
- Boot into Safe Mode
- Go to Start
- Click All Programs
- Go to Accessories
- Click System Tools
- Click System Restore
- Enter the administrator password, if you are prompted to do so
For more details on System Restore, follow our guide Windows System Restore.
Device Manager
Follow these instructions on how to open and edit configuration in Device Manager while in Safe Mode:
- Boot your Windows into Safe Mode
- Click Start
- Click Control Panel
- Click System and Maintenance
- Click Device Manager
- Enter an administrator password, if prompted to do so

Device Manager in Windows Vista
You can use Device Manager and edit configurations only if you are logged in as an administrator. Changes that you do under a non-administrative account will apply to that user only.
Event Viewer
Follow these instructions on how to open Event Viewer while in Safe Mode:
- Boot into Safe Mode
- Click Start
- Click Control Panel
- Click System and Maintenance
- Click Administrative Tools
- Double-click on Event Viewer
Command Prompt
Follow these instructions on how to open Command Prompt while in Safe Mode:
- Boot into Safe Mode
- Click Start
- Click All Programs
- Click Accessories
- Click Command Prompt

Command Prompt screen
Troubleshoot
Safe Mode not working
If you can’t boot into Safe Mode, consider the following tips:
- Check if you have a Keyboard Support USB option in BIOS. If so, make sure it’s Enabled not Disabled.
- If you have a keyboard with F-lock functionality, make sure it’s Off
If the F keys don’t work to boot into Safe Mode even after following the above tips, you can also run msconfig from within Windows (you need to boot into Windows first):
- Boot into Windows
- Click Start
- Click Run
- Type
msconfig - Click OK
- Go to the Boot tab (or Boot.ini for Windows XP users)
- Check the Safe Boot checkbox (or the /SAFEBOOT for Windows XP users)
- Click OK
- Click Restart
- Wait for your Windows to automatically start in Safe Mode
Msconfig screen in Windows
Windows 8, 8.1 and 10 users can open Run by pressing the and R keys.
If you can’t boot into Windows to run msconfig, you can use the original installation disc or Easy Recovery Essentials to run Command Prompt and run chkdsk and bootrec commands.
chkdsk and bootrec utilities will attempt to fix any issues found on your hard drive or during the booting process of your Windows. After that, you can try again to boot into Safe Mode.
For more information on chkdsk, read our guide: chkdsk. For more information on Bootrec, read our guide: Bootrec.
The instructions for Windows XP are:
- Insert the installation CD in the optical drive
- Restart your computer
- At the “Press any key” message, press any key to make sure you boot from the CD
- Press R at the Windows Options menu to open Recovery Console
- Enter the administrator password
- When Command Prompt appears, type this command:
chkdsk C: /r
Replace
C:with the letter of the drive where Windows XP is installed - Press Enter
- You can also run the equivalent of bootrec found in Vista, 7, 8 for Windows XP, the bootcfg:
bootcfg /rebuild
- Press Enter
- When done, type
exit, press Enter and restart the computer
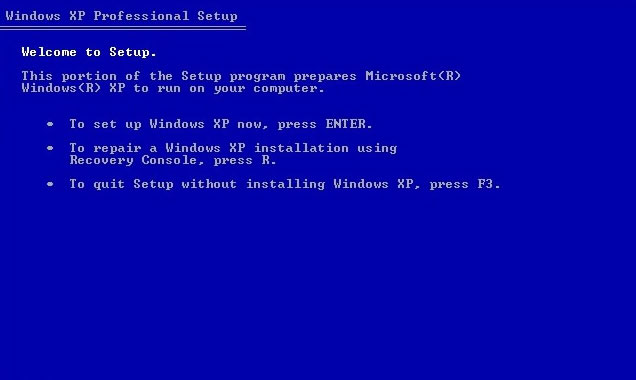
Windows XP setup screen
The instructions for Windows Vista, 7, 8, 8.1 and 10 are:
- Insert the original installation disc
- Reboot your computer
- Press any key to boot from the installation media: CD, DVD or USB drive
- Click Repair your computer
- Select your operating system
- Click Command Prompt
- Run these commands in order and press Enter after each:
chkdsk /r
bootrec /FixBoot
bootrec /FixMbr

Windows 7 setup screen
If you don’t have an original installation disc, you can run Command Prompt from Easy Recovery Essentials:
- Download Easy Recovery Essentials
- Burn the ISO Image. Follow our instructions on how to burn a bootable ISO image. If you’d like to have a recovery USB instead, follow our instructions on how to make a recovery USB.
- Boot into Easy Recovery Essentials
- Select Launch Command Line

Windows 8, 10 – F8 key not working
If you use Windows 8 or Windows 8.1 and have a computer with UEFI/EFI, the F8 key would not work to boot into Safe Mode as Windows 8 and Windows 10 are optimized to boot very quickly.
To enable the F8 key, follow these steps:
- Open the Command Prompt
- If you’re logged into Windows, click to run it as an administrator
- Type this command:
bcdedit /set bootmenupolicy legacy
- Press Enter
- A success message should appear:
The operation completed successfully.
- Restart your computer

Bcdedit utility results screen
If you can’t boot into Windows to run Command Prompt, you can open it from the installation disc (CD/DVD for Windows 8 and Windows 10; USB drive for Windows 8.1):
- Insert the disc in the optical drive and restart the computer
- Press any key to boot from the disc
- Choose a keyboard layout
- Click Next
- Click Repair your computer
- Click Troubleshoot
- Click Advanced options
- Click Command Prompt
If you don’t have the installation disc, use Easy Recovery Essentials to have access to Command Prompt:
- Download Easy Recovery Essentials
- Burn the ISO Image. Follow our instructions on how to burn a bootable ISO image. If you’d like to have a recovery USB instead, follow our instructions on how to make a recovery USB.
- Boot into Easy Recovery Essentials
- Select Launch Command Line
More Information
Support Links
- Easy Recovery Essentials for Windows – our repair and recovery disk.
It’s an easy-to-use and automated diagnostics disk. It’s available for Windows 8, Windows 7 and Windows Vista. It’s also available for Windows XP and Windows Server.Read more at Windows Recovery Disks.
- The NeoSmart Support Forums, member-to-member technical support and troubleshooting.
- Get a discounted price on replacement setup and installation discs: Windows XP, Windows Vista, Windows 7, Windows 8, Windows 10.
Applicable Systems
This Windows-related knowledgebase article applies to the following operating systems:
- Windows XP (all editions)
- Windows Vista (all editions)
- Windows 7 (all editions)
- Windows 8 (all editions)
- Windows 8.1 (all editions)
- Windows 10 (all editions)
- Windows Server 2003 (all editions)
- Windows Server 2008 (all editions)
- Windows Server 2012 (all editions)