This guide explains how to use the BCDEdit (bcdedit.exe) utility for the following Windows versions: Vista, 7, 8, 8.1or10
BCDEdit is the command-line utility that you can use to manage BCD stores on your computer. BCDEdit works similarly to Bootcfg.exe available on Windows XP systems, but with more options available and various improvements.
Contents
BCDEdit on Windows
You must be logged-in as an Administrator in order to use BCDEdit.
Always create a backup of your current BCD file before using the utility with the help of the /export parameter:
bcdedit /export C:\exportBCDfile
To open bcdedit, you need to:
- Open Command Prompt
- Type:
bcdedit
- Press Enter
When you type bcdedit in Command Prompt, the output is your computer’s current BCD configuration:
Microsoft Windows [Version 6.0]
 Copyright (c) 2006 Microsoft Corporation. All rights reserved.

 C:\Windows\system32>bcdedit

 Windows Boot Manager
 --------------------
 identifier {bootmgr}
 device partition=C:
 description Windows Boot Manager
 locale en-US
 inherit {globalsettings}
 default {current}
 resumeobject {0}
 displayorder {current}
 toolsdisplayorder {memdiag}
 timeout 30

 Windows Boot Loader
 -------------------
 identifier {current}
 device partition=C:
 path \Windows\system32\winload.exe
 description Microsoft Windows Vista
 locale en-US
 inherit {bootloadersettings}
 recoverysequence {0}
 recoveryenabled Yes
 osdevice partition=C:
 systemroot \Windows
 resumeobject {0}
 nx OptIn
BCDEdit on Windows XP
Windows XP doesn’t have a bcdedit.exe utility available, but the bootcfg.exe utility instead. Bootcfg.exe is part of the Windows XP’s Recovery Console.
To read about bootcfg, follow our guide: Bootcfg – Guide for Windows XP.
BCDEdit on Windows Vista
To run bcdedit.exe on a Windows Vista system, you have these options available:
- Use the original Windows Vista installation media to access Command Prompt
- If Repair Your Computer option is available on Advanced Boot Options menu, boot into this mode to access Command Prompt
- Use Easy Recovery Essentials
If you have the Windows Vista installation DVD, follow these steps:
- Insert the installation media and boot from it
- Select a language, time and keyboard and click Next
- Click Repair your computer

Windows Vista Repair Your Computer Menu
- Select the operating system
- Click Next
- At the System Recovery Options screen, click Command Prompt

Windows Vista System Recovery Options
- Type:
bcdedit.exe
- Press Enter
If you have the “Repair Your Computer” option available, you can access Command Prompt from there:
- Restart the computer
- Press the F8 key to open the Advanced Boot Options menu
- Select Repair Your Computer and press Enter
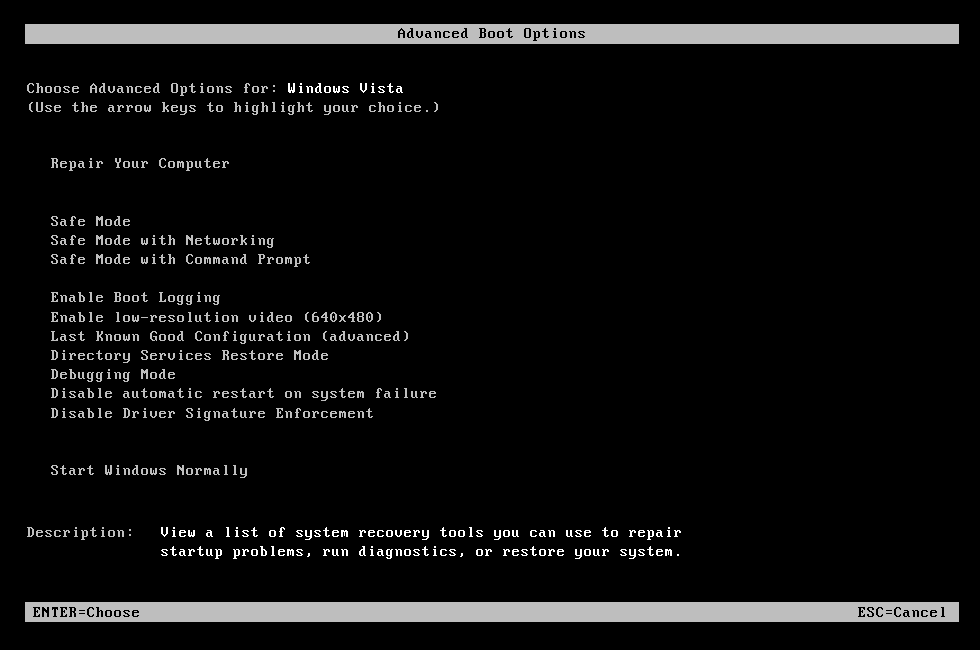
- If Repair Your Computer isn’t available, the recovery tools aren’t installed on your computer.
- At the System Recovery Options screen, click Command Prompt
- Type:
bcdedit.exe
- Press Enter
If you use Easy Recovery Essentials Command-line:
- Download Easy Recovery Essentials
- Burn the ISO Image. Follow our instructions on how to burn a bootable ISO image. If you’d like to have a recovery USB instead, follow our instructions on how to make a recovery USB.
- Boot Easy Recovery Essentials from the CD, DVD or USB
- Select Launch Command Line

To download Easy Recovery Essentials, click here.
BCDEdit on Windows 7
The options to run bcdedit.exe on Windows 7 systems are similar to those of Windows Vista.
If you have the Windows 7 installation DVD available, follow these steps:
- Insert the DVD in the optical drive
- Boot from it by restarting the computer and pressing any key when prompted
- Select a language, time and keyboard
- Click Next
- Click Repair your computer

Install Now (Windows 7)
- Select the operating system from the list and click Next
- At System Recovery Options, click Command Prompt
- Type:
bcdedit.exe
- Press Enter
If you have the “Repair Your Computer” available at “Advanced Boot Options” (most Windows 7 systems have these recovery tools installed), follow these steps:
- Restart the computer
- Press the F8 key to open Advanced Boot Options
- Select Repair your computer

Advanced Boot Options on Windows 7
- Press Enter
- At the System Recovery Options, click Command Prompt
- Type:
bcdedit.exe
- Press Enter
If you use Easy Recovery Essentials Command-line:
- Download Easy Recovery Essentials
- Burn the ISO Image. Follow our instructions on how to burn a bootable ISO image. If you’d like to have a recovery USB instead, follow our instructions on how to make a recovery USB.
- Boot Easy Recovery Essentials from the CD, DVD or USB
- Select Launch Command Line
To download Easy Recovery Essentials, click here.
BCDEdit on Windows 8
On Windows 8 or Windows 8.1 systems, you need to have the original installation media (DVD or USB drive) in order to access Command Prompt.
If you have the installation media, follow these steps:
- Insert the Windows 8 DVD or Windows 8.1 USB drive
- Restart the computer and boot from the DVD/USB
- Click Repair your computer

Windows 8 Repair Your Computer Menu
- Click Troubleshoot
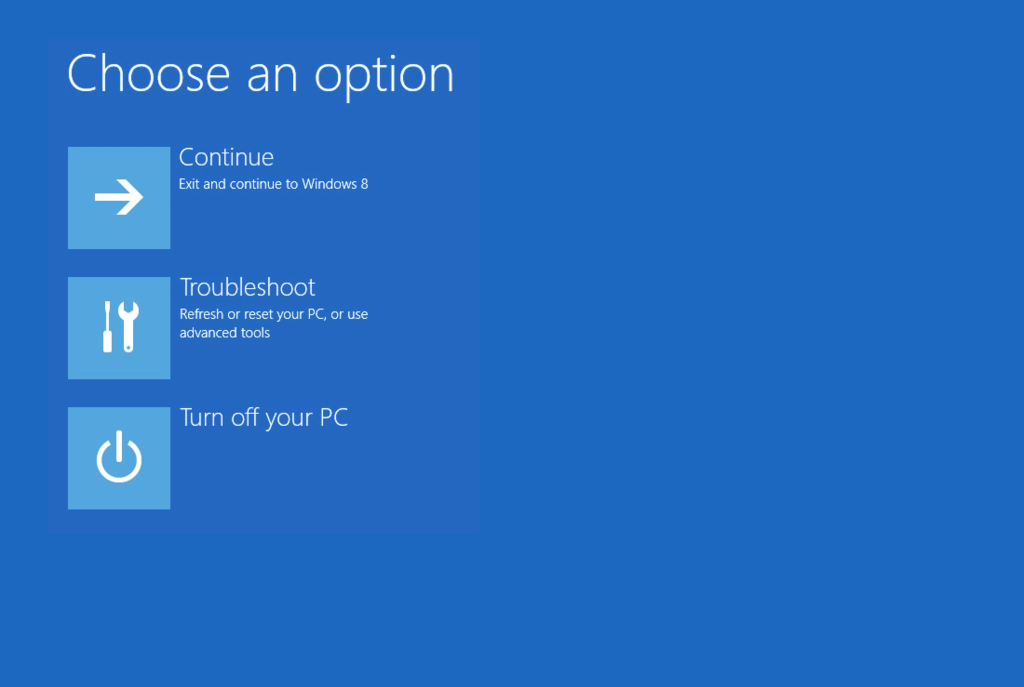
Troubleshoot in Windows 8 recovery options screen
- Click Command Prompt
- Type:
bcdedit.exe
- Press Enter
If you use Easy Recovery Essentials Command-line:
- Download Easy Recovery Essentials
- Burn the ISO Image. Follow our instructions on how to burn a bootable ISO image. If you’d like to have a recovery USB instead, follow our instructions on how to make a recovery USB.
- Boot Easy Recovery Essentials from the CD, DVD or USB
- Select Launch Command Line
To download Easy Recovery Essentials, click here.
BCDEdit on Windows 10
On Windows 10 systems, you need to have the original installation media (DVD or USB drive) in order to access Command Prompt.
If you have the installation media, follow these steps:
- Insert the Windows 10 media
- Restart the computer and boot from the DVD/USB
- Click Repair your computer

- Click Troubleshoot

- Click Command Prompt
- Type:
bcdedit.exe
- Press Enter
If you use Easy Recovery Essentials Command-line:
- Download Easy Recovery Essentials
- Burn the ISO Image. Follow our instructions on how to burn a bootable ISO image. If you’d like to have a recovery USB instead, follow our instructions on how to make a recovery USB.
- Boot Easy Recovery Essentials from the CD, DVD or USB
- Select Launch Command Line
To download Easy Recovery Essentials, click here.
Commands and parameters
For the complete list of commands and parameters you can use with BCDEdit, type:
bcdedit /?
Whenever you are using this utility to modify a BCD store, make use use of these parameters:
/createstoreto create a new empty boot configuration data (BCD) store./exportto export the current configuration of the BCD store./importto import a previously exported configuration file./createto create a new entry in the BCD store./deleteto delete an entry from the BCD store./deletevalueto delete a specified value./setto set a new value./defaultto specify the default entry./timeoutto specify the timeout at startup value.
For example, to create a new entry in the BCD file to load Windows XP, run these commands:
-
bcdedit /create {ntldr} /d "Windows XP" -
bcdedit /set {ntldr} device partition=C: -
bcdedit /set {ntldr} path \ntldr -
bcdedit /displayorder {ntldr} /addlast
More Information
Linked Entries
Support Links
- Easy Recovery Essentials for Windows – our repair and recovery disk.
It’s an easy-to-use and automated diagnostics disk. It’s available for Windows 8, Windows 7 and Windows Vista. It’s also available for Windows XP and Windows Server.Read more at Windows Recovery Disks.
- The NeoSmart Support Forums, member-to-member technical support and troubleshooting.
- Get a discounted price on replacement setup and installation discs: Windows XP, Windows Vista, Windows 7, Windows 8, Windows 10.
Applicable Systems
This Windows-related knowledgebase article applies to the following operating systems:
- Windows XP (all editions)
- Windows Vista (all editions)
- Windows 7 (all editions)
- Windows 8 (all editions)
- Windows 8.1 (all editions)
- Windows 10 (all editions)