The F8 key is called a function key. This key is usually used to enter the Windows Startup menu or the Advanced Boot Options.
Learn how to boot into Safe Mode with F8, what to do on Windows 8/8.1/10 systems and get the fix when F8 isn’t working.
Contents
Using the F8 key you can boot into the Advanced Boot Options menu of your system and run various tools:
- Safe Mode
- Repair your computer from which you can access System Recovery Options
Within Safe Mode you can run:
- System Restore
- Device Manager
- Event Viewer
- Command Prompt
- Registry Editor
- And more
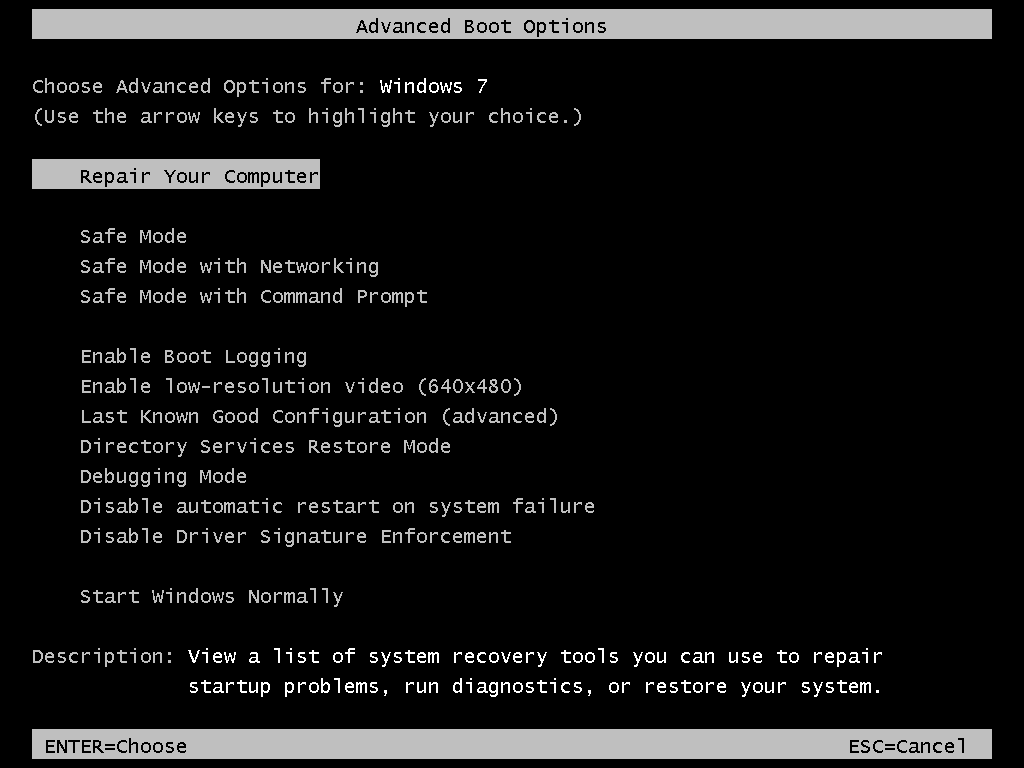
On Windows Vista and 7, the F8 key boots your computer into the Advanced Boot Options menu that lets you access System Recovery Options when selecting the “Repair your computer” option:
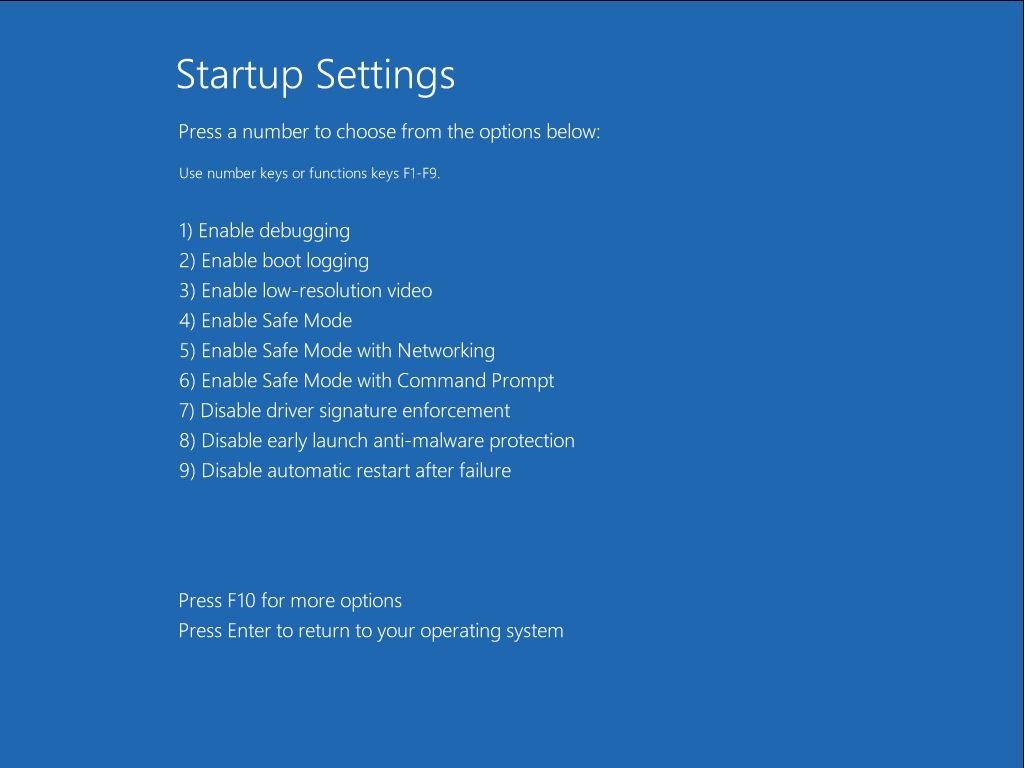
Windows 8 and Windows 10 replaced the Advanced Boot Options menu with the Startup Settings menu. After reaching the Startup Settings menu, users can press the F4 to boot into Safe Mode:
Boot into Safe Mode with F8
To boot into the Safe Mode of your Windows, follow these steps:
- Restart your computer
- As soon as your computer boots, press the F8 key repeatedly before the Windows logo appears
- Select Safe Mode using the arrow keys
- Click OK
These steps apply for the following Windows versions:
- Windows XP
- Windows Vista
- Windows 7
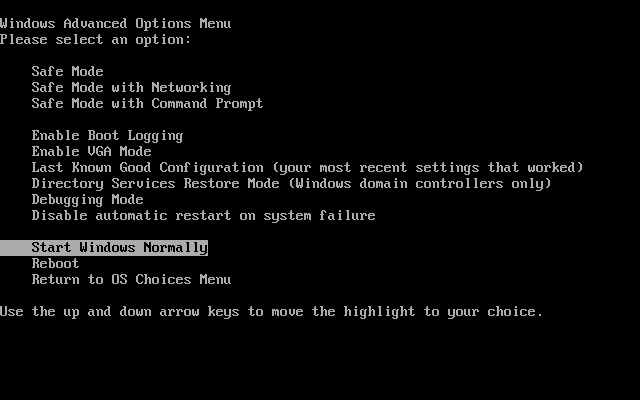
On a Windows XP system, the F8 key opens the Windows Advanced Options Menu:
On Windows Vista, the F8 key opens the Advanced Boot Options screen:
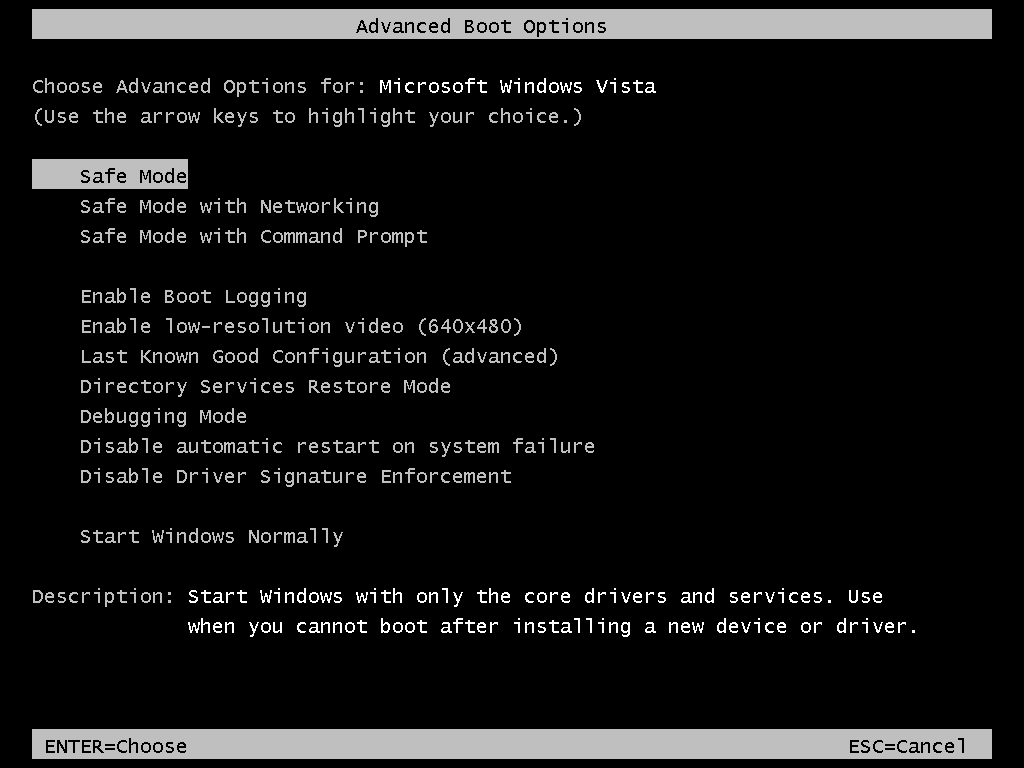
If you’re looking to access System Recovery Options via the Advanced Boot Options menu on a Windows Vista, you need to have a Repair your computer option listed. If you don’t have this option listed, it means that the necessary system recovery tools aren’t installed on your hard disk.
On a Windows 7 system, the key opens the same Advanced Boot Options screen as you see on a Windows Vista system, but usually with the Repair your computer option already listed as most Windows 7 systems have the system recovery tools already installed on the hard drive:

F8 on Windows 8/10
The F8 key is no longer available on Windows 8/8.1/10 systems.
In order to boot into Safe Mode, users with Windows 8 + 8.1 and Windows 10 need to use the original installation DVD or USB drive.
If the F8 key or the combination of Shift + F8 keys isn’t booting your Windows 8/8.1/10 into Safe Mode, you need to use the original DVD/USB to access Startup Settings and then press F4 to access Safe Mode.
Follow these steps to boot into Safe Mode on a Windows 8/8.1/10:
- Insert the DVD or USB flash drive
- Restart your computer
- Press any key to boot from the DVD or USB
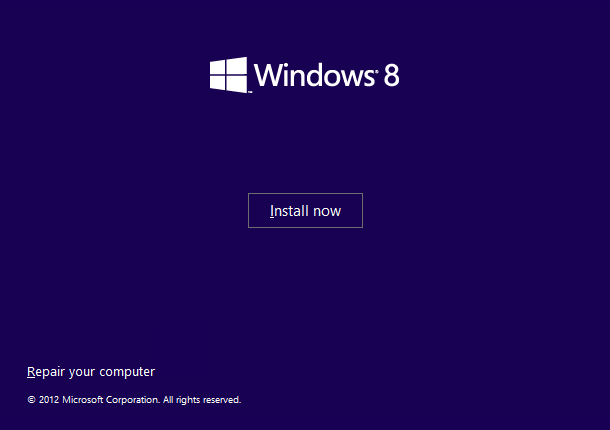
- Click Repair your computer at the Install now screen or press R
- Click Troubleshoot
- Click Advanced options
- Click Startup Settings
- Click Restart
- Your computer should now boot into the Startup Settings screen
- Press F4 to boot into Safe ModeYou can also press F5 to boot into Safe Mode with Networking or press F6 to boot into Safe Mode with Command Prompt.
If you can boot into Windows, but don’t have the original DVD/USB, follow these steps:
Method #1: msconfig
- Boot into your Windows 8
You need to boot into Windows 8. If you can’t boot, you need the original Windows 8/8.1 installation DVD/USB – read F8 on Windows 8.
- Press the
and R keys at the same time to open the Run utility
- Type
msconfig - Go to the Tab tab
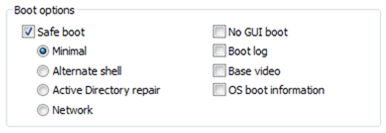
- At the Boot options section, check the following checkboxes: Safe Boot and MinimalThe configuration should be like this:
- Click OK
- Restart the computer
- If you’re prompted by a System Configuration window to restart or exit without restart, click Restart
Method #2: Choose an option
- Boot into Windows 8 until you reach the login screen. Do not login as any user.If you don’t have a login screen, boot into Windows 8/8.1 and go to Settings.
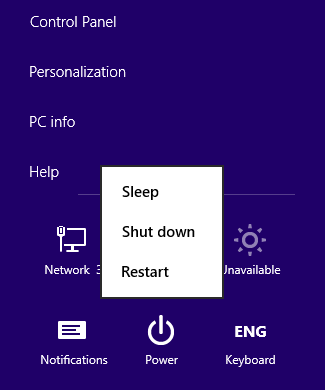
- Press the Power button
- Hold the Shift key and click Restart
- Click Troubleshoot
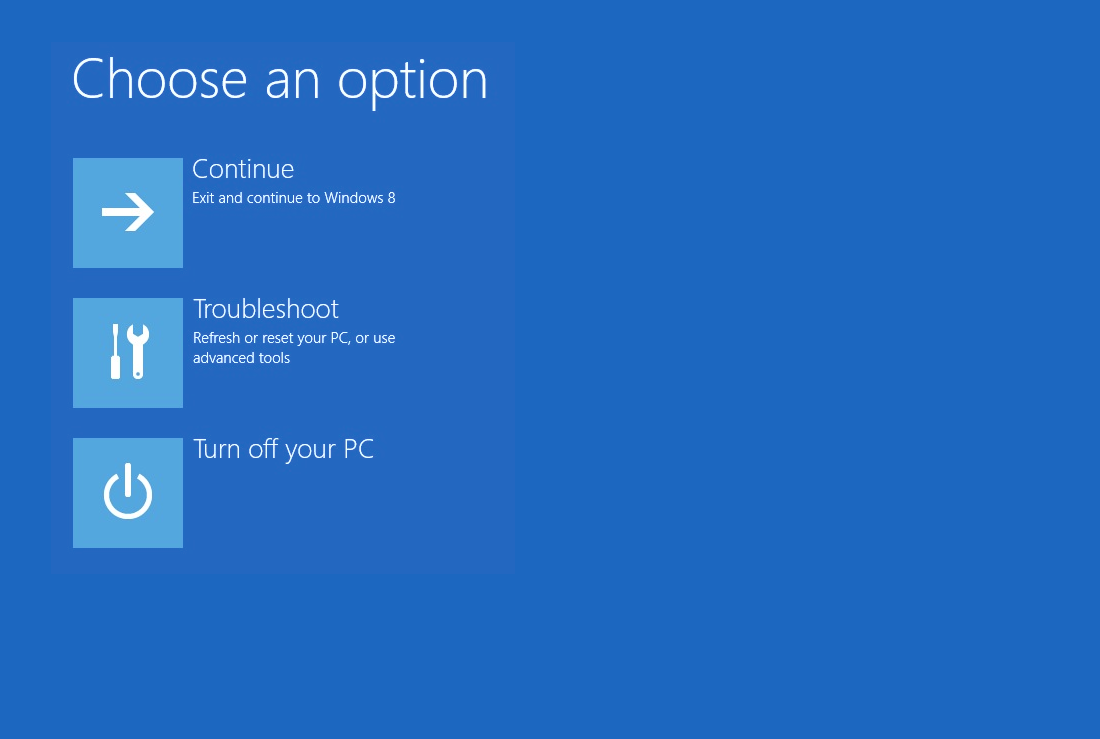
- Click Advanced Options
- Click Startup Settings
- Click Restart
- Your computer will now restart with the Startup Settings screen

- Click F4 to boot into Safe Mode
F8 not working
Safe Mode
If the F8 isn’t working to boot into the Safe Mode, try these steps for Windows Vista, 7 or 8:
If you’re looking to use the F8 key to boot into the Advanced Boot Options menu, go to Advanced Boot Options below.
- Boot into your Windows (Vista, 7 and 8 only)
- Go to Run. On Windows Vista and 7, click Start > Run. On Windows 8, you can press the
and R keys to open Run
- Type
msconfig - Press Enter or click OK
- Go to Boot tab
- Make sure the Safe Boot and Minimal checkboxes are checked, while the others are unchecked, at the Boot options section:

- Click OK
- At the System Configuration screen, click Restart.
System Configuration

You may need to restart your computer to apply these changes.

Before restarting, save any open files and close all programs.

[ ] Don't show this message again.

Restart | Exit without restart
- After you restart your computer a Windows Boot Manager should appear:
Windows Boot Manager

Choose an operating system to start, or press TAB to select a tool:
(Use the arrow keys to highlight your choice, then press ENTER.)

   Windows 7
   Windows 7 (Safe Mode)

To specify an advanced option for this choice, press F8.

Tools:

   Windows Memory Diagnostic

ENTER=Choose                TAB=Menu                ESC=Cancel
Advanced Boot Options
If the F8 key isn’t booting into the Advanced Boot Options screen, follow any of these methods.
These solutions apply for Windows Vista and Windows 7. For Windows 8 systems, go to F8 on Windows 8.
Method #1: ESC + F8
On some computer models, pressing ESC and F8, while your computer boots, should make your computer boot into the Advanced Boot Options screen:
- Restart your computer
- As soon as your computer boots, press ESC and F8
Method #2: Run bootrec
If the BCD file is corrupted or damaged, it may prevent you from seeing the Advanced Boot Options screen when hitting the F8 key at boot.
To fix the BCD you need to run the bootrec utility:
- Insert the original Windows Vista or Windows 7 installation disc in the drive
- Reboot the computer
- Press any key to boot from the CD or DVD
- Select your language, time and keyboard
- Click Next
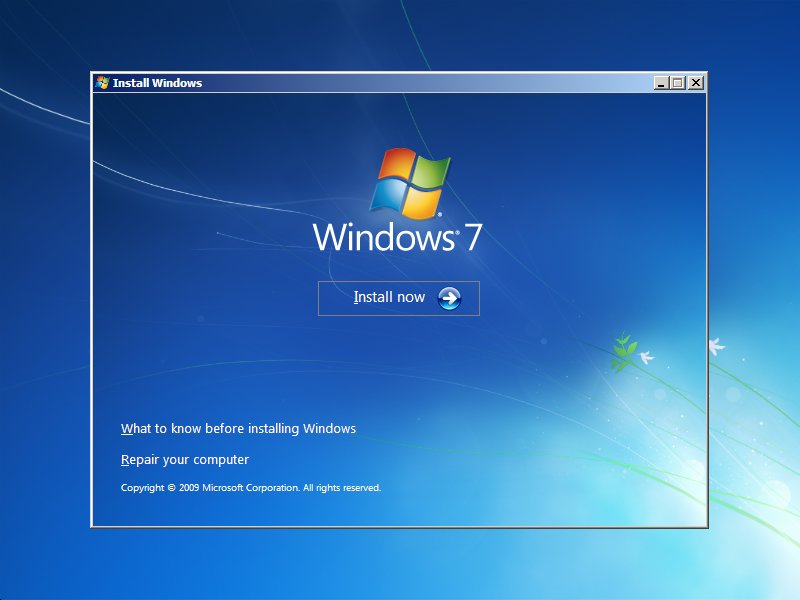
- Click Repair your computer at the Install now screen
- Select your operating system from the list and click Next
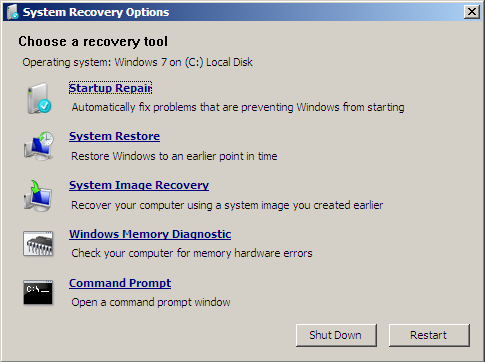
- At the System Recovery Options screen, click Command Prompt
- Type these commands, one each after another and press Enter for each command to start:
bootrec /FixMbr
bootrec /FixBoot
bootrec /ScanOs
bootrec /RebuildBcd
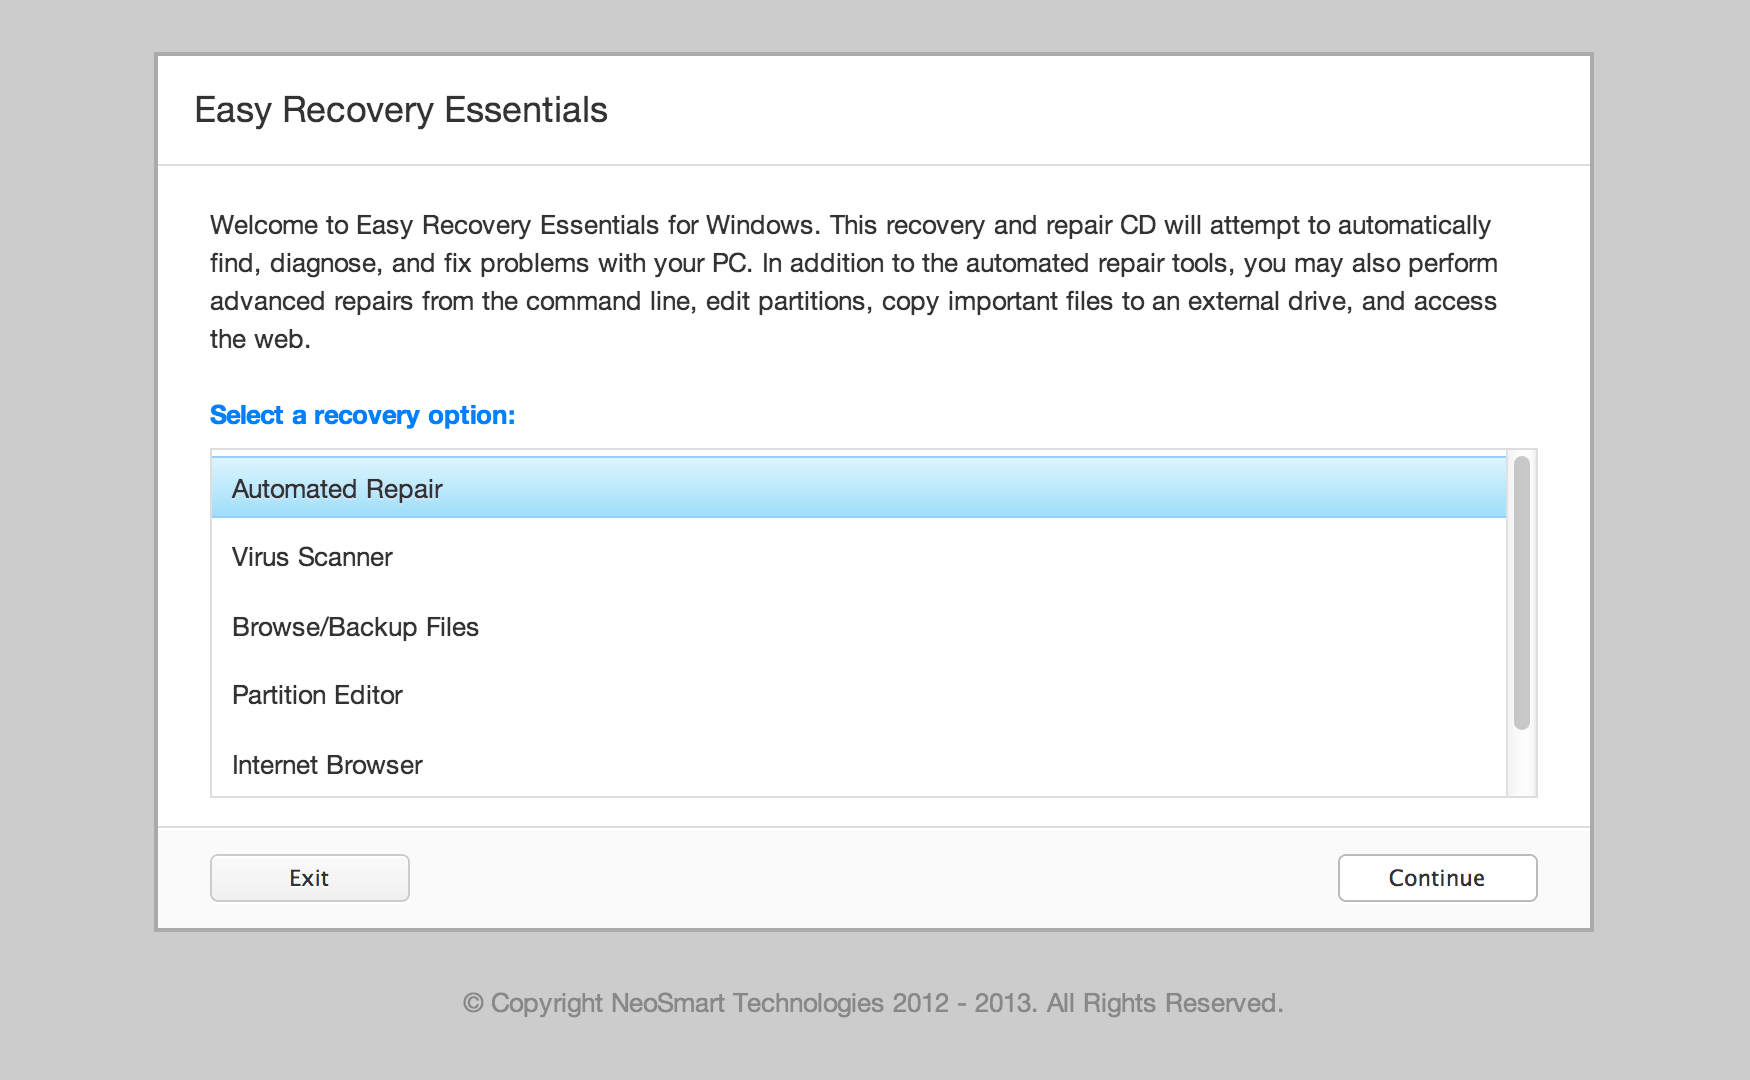
If you don’t have the original installation disc to run bootrec, use Easy Recovery Essentials to access Command Prompt and run the bootrec commands:
- Download Easy Recovery Essentials
- Burn the ISO Image. Follow our instructions on how to burn a bootable ISO image. If you’d like to have a recovery USB instead, follow our instructions on how to make a recovery USB.
- Boot Easy Recovery Essentials from the CD, DVD or USB
- Select Launch Command Line
More Information
Linked Entries
Support Links
- Easy Recovery Essentials for Windows – our repair and recovery disk.
It’s an easy-to-use and automated diagnostics disk. It’s available for Windows 8, Windows 7 and Windows Vista. It’s also available for Windows XP and Windows Server.Read more at Windows Recovery Disks.
- The NeoSmart Support Forums, member-to-member technical support and troubleshooting.
- Get a discounted price on replacement setup and installation discs: Windows XP, Windows Vista, Windows 7, Windows 8, Windows 10.
Applicable Systems
This Windows-related knowledgebase article applies to the following operating systems:
- Windows XP (all editions)
- Windows Vista (all editions)
- Windows 7 (all editions)
- Windows 8 (all editions)
- Windows 8.1 (all editions)
- Windows 10 (all editions)