This guide shows you how to fix a corrupted registry for the following Windows versions: Windows XP, Vista, 7, 8, 8.1, or 10.
Contents
Fix a corrupt registry in Windows XP
To fix a corrupt registry on a Windows XP system, follow these instructions:
- Insert the Windows XP setup CD and restart the computer
- Press any key to boot from the CD
- Press R to access Repair Console
- Enter the Administrator password. When the Command Prompt appears, type the following commands, one at a time and press Enter after each command, replacing
C:with the Windows’ drive letter:md tmp copy c:\windows\system32\config\system c:\windows\tmp\system.bak copy c:\windows\system32\config\software c:\windows\tmp\software.bak copy c:\windows\system32\config\sam c:\windows\tmp\sam.bak copy c:\windows\system32\config\security c:\windows\tmp\security.bak copy c:\windows\system32\config\default c:\windows\tmp\default.bak

Backing up current registry hives
delete c:\windows\system32\config\system
delete c:\windows\system32\config\software
delete c:\windows\system32\config\sam
delete c:\windows\system32\config\security
delete c:\windows\system32\config\default

Deleting current registry hives
copy c:\windows\repair\system c:\windows\system32\config\system
copy c:\windows\repair\software c:\windows\system32\config\software
copy c:\windows\repair\sam c:\windows\system32\config\sam
copy c:\windows\repair\security c:\windows\system32\config\security
copy c:\windows\repair\default c:\windows\system32\config\default

Restoring registry hives from a repair folder
- Type
exitand remove your CD:exit
- Press Enter
- Restart your computer
- Boot into Safe Mode by repeatedly pressing the F8 key after booting until the Startup Options menu appears
- Choose to boot into Safe Mode
- Start Windows Explorer (or open any folder or open My Computer)
- Click Tools
- Click Folder Options
- Go to the View tab
- At the Under hidden files and folders, select Show hidden files and folders and then click the Hide protected operating system files (Recommended) check box to be cleared (unchecked)
- Click Yes to confirm these actions

Windows XP show hidden files screen
- Go to My Computer >
C:\drive or the drive where you installed your Windows - Click on the System Volume Information folder.If you receive Access denied, please follow these guidelines to get access to that folder: https://neosmart.net/wiki/how-to-gain-access-to-the-system-v….
You’re most likely to receive Access denied if your Windows XP is on NTFS and not on FAT32.
If it’s on FAT32, you can continue the steps below. - Open any folder that wasn’t created at the current time, e.g. when you logged into the computer at this session.You can check this by right clicking on the first folder and check its date.The title format of these folders is something like this:
_restore{87BD36673246476B923FF86E30B3E7F8} -
Open any RP folder in that folder, e.g. RP1, and go to Snapshot.These are called Restore Points. Here is an example of path:
C:\System Volume Information\_restore{D86480E373EF47BCA0EBA81BE6EE3ED8}\RP1\Snapshot - From the Snapshot folder, copy the following files to
C:\Windows\Tmp- _REGISTRY_MACHINE_SAM
- _REGISTRY_MACHINE_SYSTEM
- _REGISTRY_MACHINE_SOFTWARE
- _REGISTRY_MACHINE_SECURITY
- _REGISTRY_USER_.DEFAULT
- Once copied, rename these files in the
Tmpfolder (not the Snapshot folder) as shown below:- Rename _REGISTRY_USER_.DEFAULT to DEFAULT
- Rename _REGISTRY_MACHINE_SECURITY to SECURITY
- Rename _REGISTRY_MACHINE_SOFTWARE to SOFTWARE
- Rename _REGISTRY_MACHINE_SYSTEM to SYSTEM
- Rename _REGISTRY_MACHINE_SAM to SAM
- Restart your computer and boot from the CD again
- Press R to access Recovery Console
- Once Command Prompt has loaded, type the following commands, each at a time, press Enter after each command:
del c:\windows\system32\config\sam
del c:\windows\system32\config\security
del c:\windows\system32\config\software
del c:\windows\system32\config\default
del c:\windows\system32\config\system

Deleting current registry hives
Continue with these commands:
copy c:\windows\tmp\software.bak c:\windows\system32\config\software
copy c:\windows\tmp\system.bak c:\windows\system32\config\system
copy c:\windows\tmp\sam.bak c:\windows\system32\config\sam
copy c:\windows\tmp\security.bak c:\windows\system32\config\security
copy c:\windows\tmp\default.bak c:\windows\system32\config\default

Restoring registry hives from the backup
- Type
exit, press Enter, remove your CD:exit
- Restart your computer
- Once restarted, go to System Restore and click on Restore to a previous point:
- Click Start
- Go to All Programs
- Select Accessories
- Then select Tools
- Click System Restore
- Follow the System Restore wizard steps


Fix a corrupt registry in Windows Vista
To fix a corrupt registry in Windows Vista, you can try any of the following:
- Run Startup Repair
- Perform an Upgrade Install
- Copy backup files from the RegBack folder using Command Prompt
Startup Repair
To run Startup Repair, follow these steps:
- Insert the original Windows Vista DVD in the disc tray
- Boot from the DVD
- Choose a language and keyboard layout
- At the Welcome screen, click on Repair your computer

Windows Vista Repair Your Computer Menu
- Choose your operating system from the list
- Click Next
- At the System Recovery Options window, click on Startup Repair

Windows Vista System Recovery Options
- Follow the instructions to complete the process
Upgrade Install
An Upgrade Install may fix a corrupt registry as it will install Windows Vista again without affecting your personal files.
While an Upgrade Install procedure shouldn’t touch your personal files, backup your files before you continue.
Before you continue with the set of instructions below, please note:
- If your Windows Vista has SP1 (Service Pack 1) installed, your original installation DVD also must have SP1.
- If your Windows Vista has SP2 (Service Pack 2) installed, your original installation DVD also must have SP2.
The instructions are:
- Log into Windows Vista as an Administrator
- Insert the Windows DVD in the disc tray
Do not boot from the DVD at boot. You must insert the Windows Vista DVD while you’re logged in as an Administrator in Windows Vista.
- If AutoPlay doesn’t open the DVD automatically, go to My Computer and double-click on the DVD drive
- Click Install Now
Windows Vista Repair Your Computer Menu
- Select Do no get the latest updates for installation.After you perform the Upgrade Install, you can manually update Windows Vista with the latest updates available.
- Do not type the license key
- Leave the Automatically activate Windows when I’m online option unchecked
- Click Next
- At the Do you want to enter your product key now? question, select No
- Select what type of Windows Vista you purchased and then check the I have selected the edition of Windows that I purchased option
- Click Next
- Click Upgrade
- Follow any instructions left and remove the DVD
After you performed the Upgrade Install, add the license key:
- Boot into Windows Vista
- Open Control Panel
- Go to System
- At the Windows activation section, click Change product key
Command Prompt
To replace the registry in a Windows Vista system, follow these steps:
- Open Command Prompt
- Type
C:\, whereC:is the letter of the drive where your Windows Vista is installed:C:\
- Press Enter
- Type
cd Windows\System32\Config - Press Enter
- Type
MD Tempand press Enter - Type the following commands and press Enter after each:
copy BCDTemplate Temp copy COMPONENTS Temp copy DEFAULT Temp copy SAM Temp copy SECURITY Temp copy SOFTWARE Temp copy SYSTEM Temp

Backing up the registry hives
- Type the following commands and press Enter after each:
ren BCDTemplate BCDTemplate.bak ren COMPONENTS COMPONENTS.bak ren DEFAULT DEFAULT.bak ren SAM SAM.bak ren SECURITY SECURITY.bak ren SOFTWARE SOFTWARE.bak ren SYSTEM SYSTEM.bak

Renaming the old the registry hives
- Then type these commands, one by one, and press Enter after each:
copy Regback\BCDTemplate BCDTemplate copy Regback\COMPONENTS COMPONENTS copy Regback\DEFAULT DEFAULT copy Regback\SAM SAM copy Regback\SECURITY SECURITY copy Regback\SOFTWARE SOFTWARE copy Regback\SYSTEM SYSTEM

Restoring the registry hives


Fix a corrupt registry in Windows 7
To fix a corrupt registry in Windows 7, you can try any of the following:
- Run Startup Repair
- Perform an Upgrade Install
- Copy backup files from the RegBack folder using Command Prompt
Startup Repair
To run Startup Repair, follow these instructions.
Method #1
- Insert the original Windows 7 installation DVD in the disc tray
- Reboot the computer
- Press any key when it says “Press any key to boot from CD or DVD..”
- Select a language and keyboard option
- Click Repair your computer

- Select your operating system

- Choose Startup Repair

Windows 7 System Recovery Options Screen
- Follow the wizard instructions to complete the procedure
Method #2
- Restart your computer
- Press the F8 key several times during booting before the Windows 7 logo appears
- At the Advanced Options screen, select Repair your computer

Advanced Boot Options on Windows 7
- Select a keyboard and language
- Select Startup Repair
Windows 7 System Recovery Options Screen
- Follow the wizard instructions to complete the process
Upgrade Install
An Upgrade Install may fix a corrupt registry as this option will install your Windows 7 again without affecting your personal files.
While Upgrade procedure shouldn’t touch your personal files, backup your files before you continue to make sure.
The instructions are:
- Boot into Windows 7
Important: You need to run the Windows 7 DVD while you’re logged in Windows 7.
- Insert the Windows 7 DVD
- If AutoPlay doesn’t open automatically, open the DVD directly from Computer
- Click Install Now
- Make sure the I want to help make Windows installation better option is unchecked
- Click Go online to get the latest updates for installation
- Accept the license terms
- Click Next
- Click Upgrade
- Uncheck the Automatically activate Windows when I’m online option
- Click Next
- Click Ask me later at the Help protect your computer and improve Windows automatically screen. You can install updates for your Windows 7 once this process is done.
- Continue with the instructions to complete the upgrade
Once this process is done, go and activate your license key:
- Go to Control Panel
- Go to System
- At the Windows activation section, click Change product key
Command Prompt
To replace the registry in a Windows 7 system, follow these steps:
- Open Command Prompt
- Type
C:\, whereC:is the letter of the drive where your Windows 7 is installed - Press Enter
- Type
cd Windows\System32\Config - Press Enter
- Type
MD Tempand press Enter - Type the following commands and press Enter:
copy BCDTemplate Temp copy COMPONENTS Temp copy DEFAULT Temp copy SAM Temp copy SECURITY Temp copy SOFTWARE Temp copy SYSTEM Temp
Backing up the registry hives
- Type the following commands and press Enter after each:
ren BCDTemplate BCDTemplate.bak ren COMPONENTS COMPONENTS.bak ren DEFAULT DEFAULT.bak ren SAM SAM.bak ren SECURITY SECURITY.bak ren SOFTWARE SOFTWARE.bak ren SYSTEM SYSTEM.bak
Renaming the old the registry hives
- Then type these commands, one by one, and press Enter after each:
copy C:\Windows\System32\Config\Regback\BCDTemplate C:\Windows\System32\Config\BCDTemplate copy C:\Windows\System32\Config\Regback\COMPONENTS C:\Windows\System32\Config\COMPONENTS copy C:\Windows\System32\Config\Regback\DEFAULT C:\Windows\System32\Config\DEFAULT copy C:\Windows\System32\Config\Regback\SAM C:\Windows\System32\Config\SAM copy C:\Windows\System32\Config\Regback\SECURITY C:\Windows\System32\Config\SECURITY copy C:\Windows\System32\Config\Regback\SOFTWARE C:\Windows\System32\Config\SOFTWARE copy C:\Windows\System32\Config\Regback\SYSTEM C:\Windows\System32\Config\SYSTEM
Restoring the registry hives
Fix a corrupt registry in Windows 8 or 8.1
To repair a corrupt registry in Windows 8 or 8.1, you have these options:
- Run Automatic Repair
- Refresh. The Refresh option will not affect your files. Windows 8 will reinstall any applications you installed and create a copy of these applications on your desktop, but backup your data before you do a refresh.
- Reset. A Reset option will remove all your personal files and delete any settings or configuration you did on your computer.
Run Automatic Repair
To run Automatic Repair which will attempt to fix a corrupt registry on your Windows 8 or 8.1 system, follow these steps:
- Open the Settings panel
- Go to General
- At the Advanced Startup panel, click Restart now
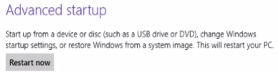
Windows 8 Advanced Startup
- At the Choose an option screen, click Troubleshoot
- At the Advanced Options screen, click Automated Repair
- Choose an account and login, when prompted to do so
- Automatic Repair should now start and your computer may reboot during this process

Windows 8 Advanced Startup screen
Refresh
To perform a Refresh on your Windows 8 or Windows 8.1 system, follow these steps:
- Go to the Settings panel
- Go to Change PC Settings
- Click Update and recovery
- Click Recovery
- At the Refresh your PC without affecting your files section, click Get started
- Follow the instructions to complete the refresh procedure

Windows 8 Recovery Screen
Reset
To do a Reset of your Windows 8 or Windows 8.1 system, follow these steps:
A Reset procedure will erase personal data from your computer. Backup your files before you continue.
- Go to Settings > Change PC Settings
- Click Update and recovery
- Click Recovery
- At the Remove everything and reinstall Windows section, click Get started
- Follow the instructions to complete the refresh procedure
Windows 8 Recovery Screen
Fix a corrupt registry in Windows 10
To repair a corrupt registry in Windows 10, you have these options:
- Run Automatic Repair
- Refresh. The Refresh option will not affect your files. Windows 10 will reinstall any applications you installed and create a copy of these applications on your desktop, but backup your data before you do a refresh.
- Reset. A Reset option will remove all your personal files and delete any settings or configuration you did on your computer.
Run Automatic Repair
To run Automatic Repair which will attempt to fix a corrupt registry on your Windows 10 system, follow these steps:
- Open the Settings panel
- Go to Update & Security
- At the Recovery tab, click Advanced Startup -> Restart now

Windows 10 Advanced Startup
- At the Choose an option screen, click Troubleshoot
- At the Advanced Options screen, click Automated Repair
- Choose an account and login, when prompted to do so
- Automatic Repair should now start and your computer may reboot during this process’

Windows 10 Advanced Startup screen
Refresh
To perform a Refresh on your Windows 10 system, follow these steps:
- Go to the Settings panel
- Go to Update and Security
- Click Recovery
- Click Get Started
- At the Reset This PC section, click Get started
- Click Keep My Files
- Follow the instructions to complete the refresh procedure

Windows 10 Recovery screen
Reset
To do a Reset of your Windows 10 system, follow these steps:
A Reset procedure will erase personal data from your computer. Backup your files before you continue.
- Go to the Settings panel
- Go to Update and Security
- Click Recovery
- Click Get Started
- At the Reset This PC section, click Get started
- Click Remove Everything
- Follow the instructions to complete the refresh procedure
Windows 10 Recovery screen
Troubleshooting
Registry permissions in Windows XP
In Windows XP (only the Professional version), the permissions of the registry can block you from editing certain keys.
Method #1
To unblock this and fix the permissions, follow these steps:
- Open Command Prompt
- Type this command:
secedit /configure /cfg %windir%\repair\secsetup.inf /db secsetup.sdb /verbose
- Press Enter

Fixing permissions with secedit
Method #2
If Method #1 doesn’t work to fix the permissions, try these steps instead:
- Download SubInACL Tool from Microsoft directly: http://www.microsoft.com/en-us/download/details.aspx?id=2351…
- Run the
.exefile - Open Command Prompt
- Type this command and press Enter:
cd "%ProgramFiles%\Windows Resource Kits\Tools
- Enter the following commands and press Enter after each:
subinacl /subkeyreg HKEY_LOCAL_MACHINE /grant=administrators=f /grant=system=f
subinacl /subkeyreg HKEY_CURRENT_USER /grant=administrators=f /grant=system=f
subinacl /subkeyreg HKEY_CLASSES_ROOT /grant=administrators=f /grant=system=f
subinacl /subdirectories %SystemDrive%\ /grant=administrators=f /grant=system=f
- Restart the computer

Fixing permissions with SubInAcl
More Information
Support Links
- Easy Recovery Essentials for Windows – our repair and recovery disk.
It’s an easy-to-use and automated diagnostics disk. It’s available for Windows 8, Windows 7 and Windows Vista. It’s also available for Windows XP and Windows Server.Read more at Windows Recovery Disks.
- The NeoSmart Support Forums, member-to-member technical support and troubleshooting.
- Get a discounted price on replacement setup and installation discs: Windows XP, Windows Vista, Windows 7, Windows 8, Windows 10.
Applicable Systems
This Windows-related knowledgebase article applies to the following operating systems:
- Windows XP (all editions)
- Windows Vista (all editions)
- Windows 7 (all editions)
- Windows 8 (all editions)
- Windows 8.1 (all editions)
- Windows 10 (all editions)