This guide is about Recovery Console, the command-line tool available for the following Windows versions: Windows XP, Windows 2000, Windows Server 2003.
Contents
What is Recovery Console
Recovery Console is a command-line tool available only for these versions of Windows: XP, 2000 and Server 2003.
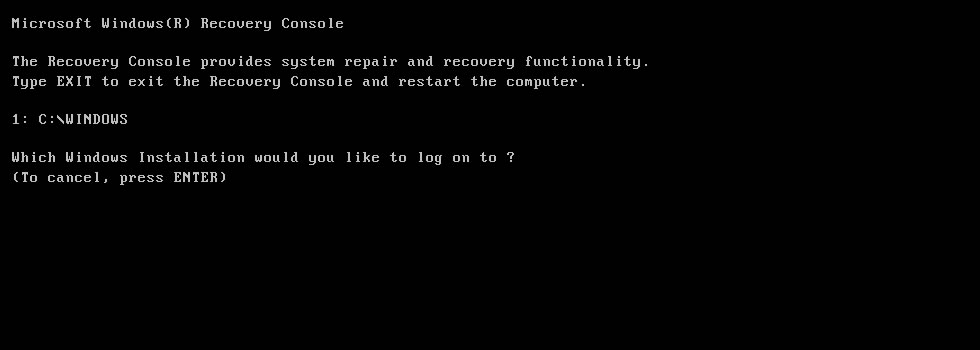
The tool loads with this message:
Microsoft Windows(R) Recovery Console

The Recovery Console provides system repair and recovery functionality.
Type EXIT to exit the Recovery Console and restart the computer.

1: C:\WINDOWS

Which Windows Installation would you like to log on to ?
(To cancel, press ENTER)
In the above example, Windows is installed on C:\. You need to type 1 and press Enter to load the Windows available on the C:\ drive.
The command-line tool isn’t available for Windows Vista, Windows 7, Windows 8 or Windows 8.1. It’s only available for Windows XP and Server 2003, these two operating systems being the last versions of Windows to have it installed.
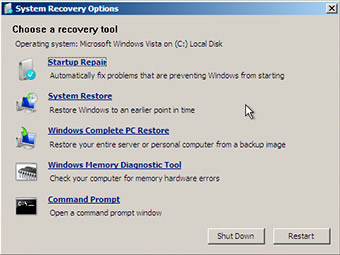
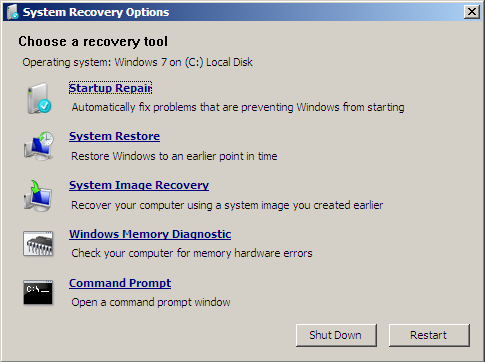
Windows Vista, 7 and 8 replaced Recovery Console with System Recovery Options, a collection of recovery tools.
You can perform the following with Recovery Console:
- Manipulate system files (copy, rename, replace etc.)
- Enable or disable startup services (services that run automatically at boot)
- Repair the MBR (related: Fix the MBR guide)
- Create and format partitions
- Run the chkdsk command
You can only use the Recovery Console as an Administrator of the system or as any user part of the Administrator group.
You can access the tool from the original installation CD or from the boot menu if you already installed it on your computer. Follow these instructions on how to install it and make it available at boot without a CD.
Access Recovery Console
To access the Recovery Console, you have the following options:
- Use the original Windows XP installation CD, if you still have it
- If you installed Recovery Console on your system, select it from the Startup Options menu
- Use Easy Recovery Essentials to access Command Line and run Recovery Console-specific commands
If you have the installation CD
If you have the original Windows XP installation CD, follow these steps to access Recovery Console:
- Boot your computer
- Insert the Windows XP CD
- Press any key at the Press any key to boot from CD message
- At the Welcome to Setup screen, press R:
To repair a Windows XP installation using Recovery Console, press R.
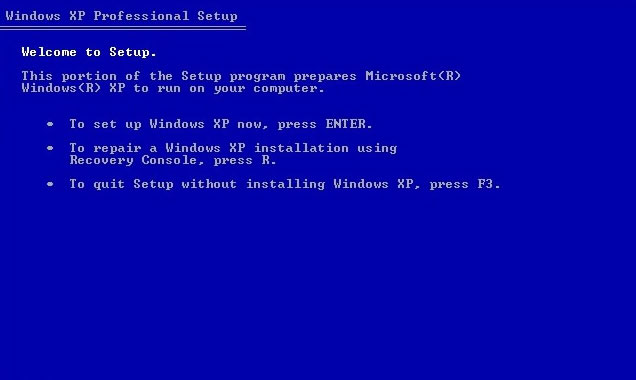
Windows XP Press R for Recovery Console
- The Windows XP CD will now load Recovery Console:
Microsoft Windows(R) Recovery Console

The Recovery Console provides system repair and recovery functionality.
Type EXIT to exit the Recovery Console and restart the computer.

1: C:\WINDOWS

Which Windows Installation would you like to log on to ?
(To cancel, press ENTER)
- Type
1and press Enter - Recovery Console is now loaded
If you installed Recovery Console
If you haven’t installed the tool, follow these instructions.
If you already installed Recovery Console on your computer, you may access it at the Startup Options menu. To do so, follow these steps:
- Start your computer
- Wait for your computer to boot into the Boot Options menu
- At the Please select the operating system to start: message, select Microsoft Windows XP Recovery Console
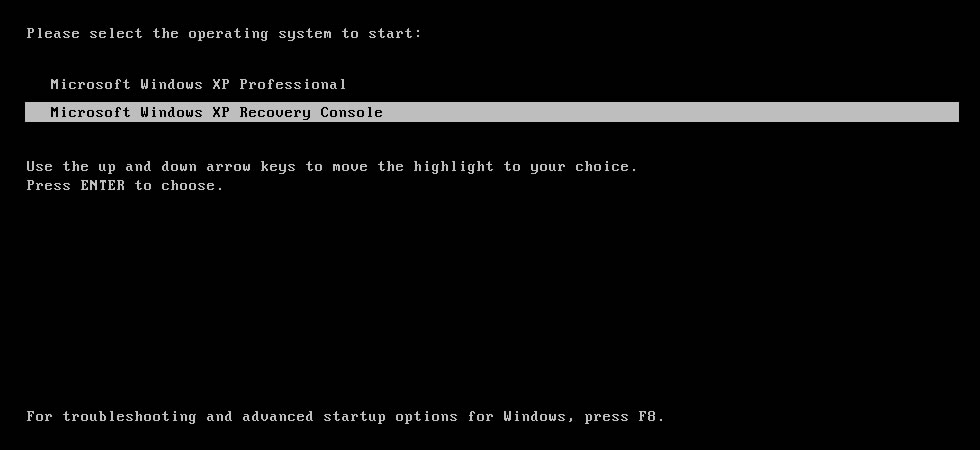
- Press Enter
If you use Easy Recovery Essentials
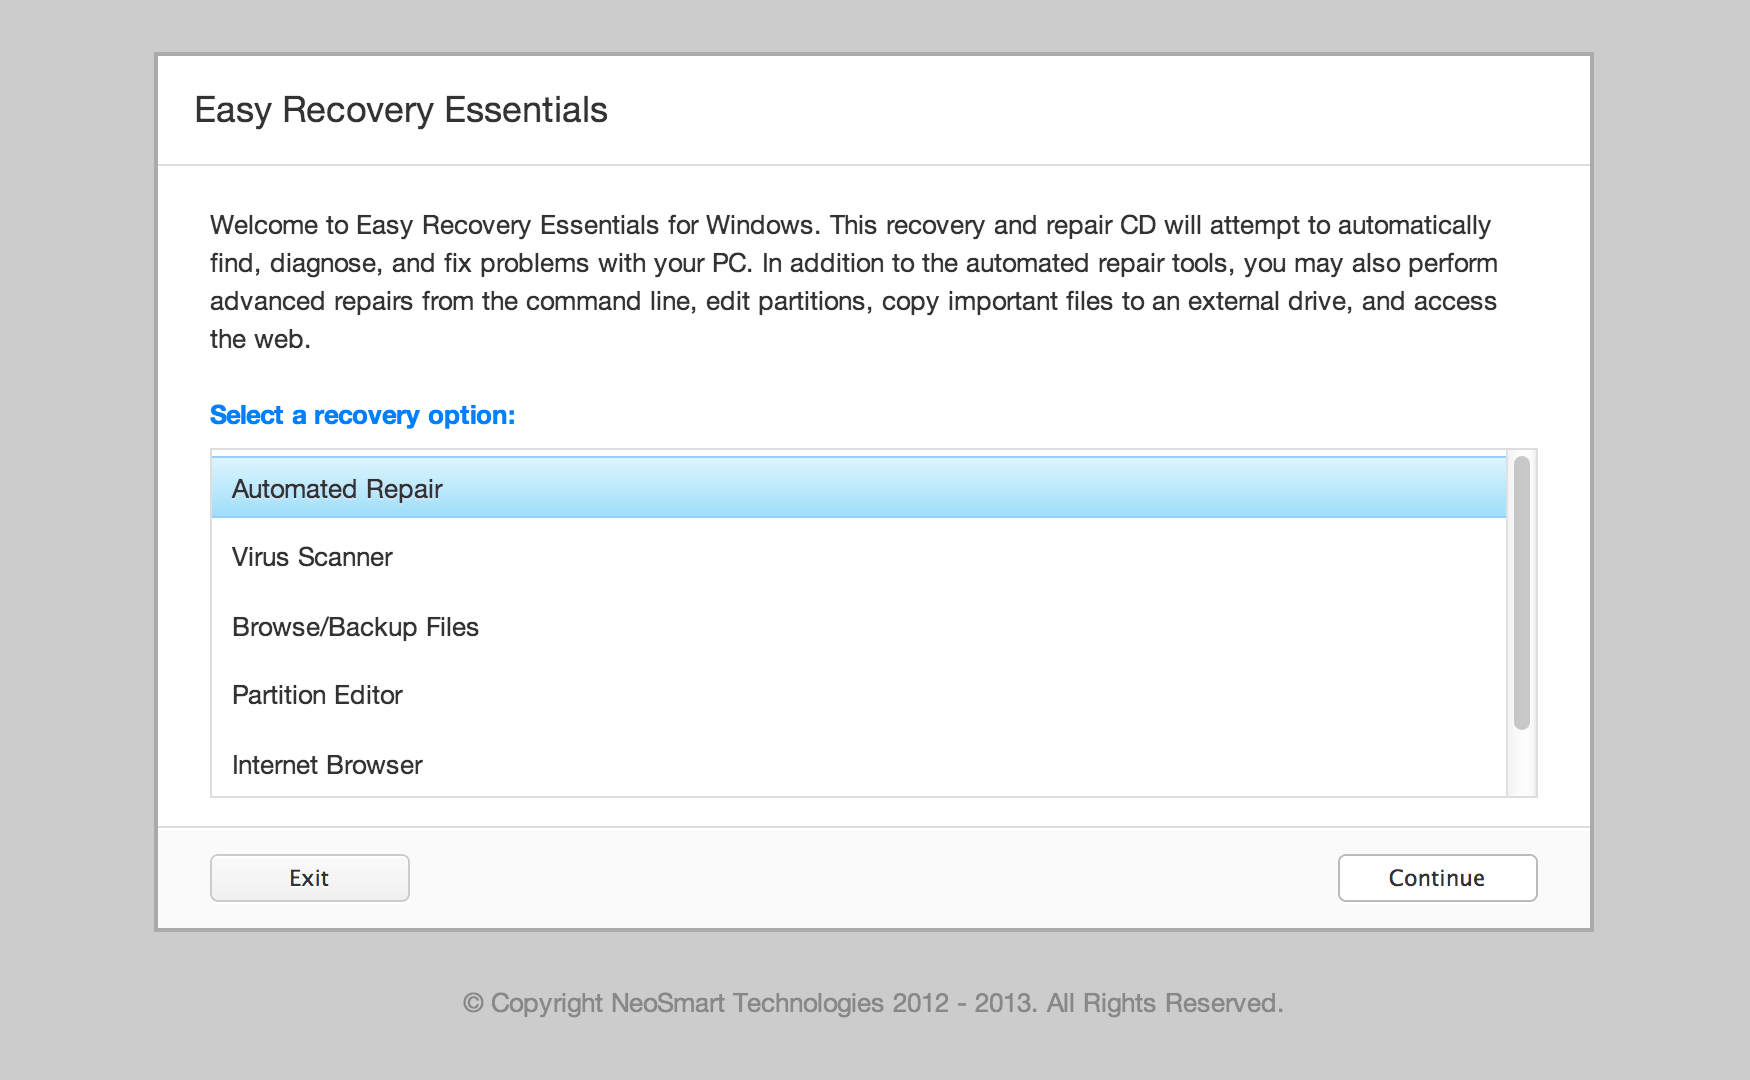
If you use Easy Recovery Essentials, our repair and recovery disk, you can access Command Line and run the commands you need:
- Download Easy Recovery Essentials
- Burn the ISO Image. Follow our instructions on how to burn a bootable ISO image. If you’d like to have a recovery USB instead, follow our instructions on how to make a recovery USB.
- Boot Easy Recovery Essentials from the CD, DVD or USB
- Select Launch Command Line
Install Recovery Console
You can install Recovery Console on your system.
Before you do, read these notes:
- You need to have the Windows XP installation CD
- You need to use the Windows XP installation CD, the CD that you used to install Windows XP on your computer.
If you have Windows XP SP1 on the CD, you need to have Windows XP SP1 installed and not SP2 installed.
If you do have SP2 installed, while your original CD is with SP1, read KB 898594.
To install Recovery Console, follow these steps:
- Boot into Windows XP
- Insert the Windows XP CD in the disk drive
- Go to Start
- Go to Run
- Type the following command, but replace
e:with your computer’s optical drive letter:e:\i386\winnt32.exe /cmdcons
- Press Enter
- Click Yes at the Windows Setup warning message

- Wait for the process to finish
- Click OK at the The Windows Recovery Console has been successfully installed message

- After Recovery Console is installed, you can restart your computer and see it at the boot options menu:

Delete Recovery Console
If you installed Recovery Console, you can also delete it from the boot options menu.
To delete it, follow these steps:
- Restart your Windows XP system
- Click Start
- Click My Computer
- Double-click on
C:\or the drive where Windows XP is installed - Click Tools, then Folder Options, and then click the View tab
- Click Show hidden files and folders and make sure Hide protected operating system files is unchecked
- Click OK
- Delete the
Cmdconsfolder and theCmldrfile fromC:\ - Right-click on the
Boot.inifile (warning: do not delete this file) and click Properties - Make sure the Read-only option is unchecked
- Click OK
- Open the
Boot.inifile with Notepad - Remove the Recovery Console line from the file. This line looks like this:
C:\cmdcons\bootsect.dat="Microsoft Windows Recovery Console" /cmdcons
- Save the
Boot.inifile
Commands
The following commands are available to use in Recovery Console:
attrib– changes the attributes of a folderbatch– will run commands that are specified in a text filebootcfg– this command is for boot configuration and recovery. For more information, see the bootcfg guidecd– will change to a different folderchdir– it’s similar tocdabove, it will change to a different folderchkdsk– will check the specified drive and repair it, if needed. For more information, see the chkdsk guidecls– clear the command screencopy– copies a file to a specified destinationdel– deletes a filedelete– similar todelabove, deletes a filedir– displays a list of files and folders from the current folderdisable– disables a specified Windows servicediskpart– manages partitions on the hard disk. For more information, see the diskpart guideenable– enables a specified Windows service. To disable a service, usedisableexit– exit Recovery Consoleexpand– expands a filefixboot– writes a new boot sector on the partitionfixmbr– repair the MBR of the boot partition. For more information, see the Fix MBR guideformat– formats a specified drivelistsvc– lists all available services and driverslogon– lists all detected Windows installationsmap– list drive letters, types, partition sizes and mappingsmd– create a new foldermkdir– similar tomd, creates a new foldermore– displays a text file to the screenrd– delete a folderrmdir– similar tord, deletes a folderren– rename a filerename– similar toren, renames a fileset– displays and modifies environment optionssystemroot– set the current folder to the %SystemRoot% folder of the current Windows installationtype– displays a text file
Troubleshooting
Password for Recovery Console
Recovery Console will ask you for the Administrator password.
If you usually log into Windows XP without a password, simply press Enter without typing any password to check if Recovery Console would accept this.
If this method doesn’t work, you’ll need to know the Administrator password.
Another alternative is to boot into Windows XP and open the Registry Editor to set the DWORD SecurityLevel to 1. To do so, follow these steps:
- Boot into Windows XP
- Click Start
- Click Run
- Type
regedit - Click OK or press Enter
- Navigate to this key:
HKEY_LOCAL_MACHINE\SOFTWARE\Microsoft\WindowsNT\CurrentVersion\Setup\RecoveryConsole
- Set the value of
DWORD SecurityLevelto1 - Exit the Registry Editor
- Reboot your Windows XP system
Recovery Console in Windows Vista or 7
Recovery Console is not available on Windows Vista or Windows 7 systems. Windows Vista, 7 and 8 systems are using the System Recovery Options set of tools instead of Recovery Console that you can use to repair or restore your computer.
To boot into System Recovery Options on a Windows Vista, follow these steps:
- Boot from the installation CD/DVD
- At the “Press any key to boot from CD or DVD…” message, press any key to boot from the DVD
- Click Repair your computer

- Choose the operating system from the list
- System Recovery Options is now available
To boot into System Recovery Options on a Windows 7, follow these steps:
- Boot from the Windows 7 installation DVD
- At the “Press any key to boot from CD or DVD…” message, press any key to boot from the DVD
- At the Install Windows screen, select a language, time and keyboard
- Click Next
- Click Repair your computer or press R
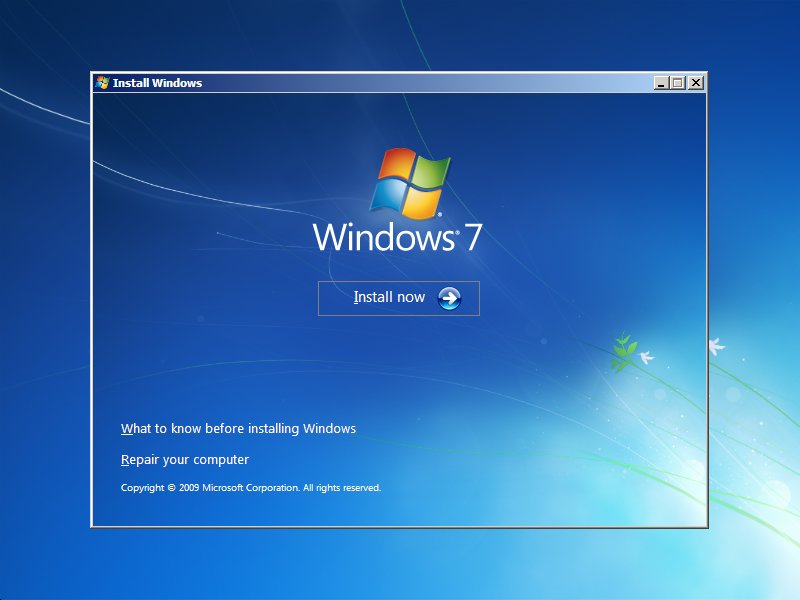
- System Recovery Options is now available
More Information
Support Links
- Easy Recovery Essentials for Windows – our repair and recovery disk.
It’s an easy-to-use and automated diagnostics disk. It’s available for Windows 8, Windows 7 and Windows Vista. It’s also available for Windows XP and Windows Server.Read more at Windows Recovery Disks.
- The NeoSmart Support Forums, member-to-member technical support and troubleshooting.
- Get a discounted price on replacement setup and installation discs: Windows XP.
Applicable Systems
This Windows-related knowledgebase article applies to the following operating systems:
- Windows XP (all editions)
- Windows Server 2003 (all editions)