This article shows how to setup your primary partition as active using the diskpart utility.
This how-to article applies for any of the following Windows versions: Windows XP, Vista, 7, 8 or 8.1
Contents
The following instructions are done through Command Prompt, which you can use if you can’t boot into Windows to set the partition as active.
However, you can use Disk Management if you can boot into Windows and do the necessary changes to your partition:
- Click Start
- Click Control Panel
- Click System and Security
- Click Administrative Tools
- Double-click Computer Management
- Click Disk Management under the Storage tab from the left
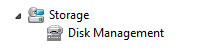
Select Disk Management from Storage
- Right-click on the partition you want to set as partition and click Mark Partition as Active
- Click Yes
Use diskpart from Easy Recovery Essentials
You can use Command Prompt from Easy Recovery Essentials and run the diskpart utility to make the necessary modifications to a partition:
- Download Easy Recovery Essentials
- Burn the ISO Image. Follow our instructions on how to burn a bootable ISO image. If you’d like to have a recovery USB instead, follow our instructions on how to make a recovery USB.
- Boot Easy Recovery Essentials from the CD, DVD or USB
- Select Launch Command Line

To download Easy Recovery Essentials, click here.
Set partition as active on Windows XP
In order to use diskpart and set your computer’s primary partition as active again, use your Windows XP installation disc to start Recovery Console.
If you don’t the original Windows XP CD, go to Use diskpart from Easy Recovery Essentials.
- Insert the Windows XP installation CD
- Restart the computer
- Press any key at the “Press any key” screen
- Press R at the Welcome to Setup screen
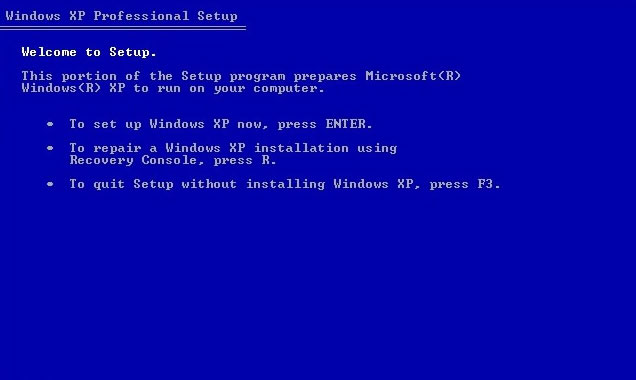
Windows XP Press R for Recovery Console
- Type
1to log into your Windows Installation and press Enter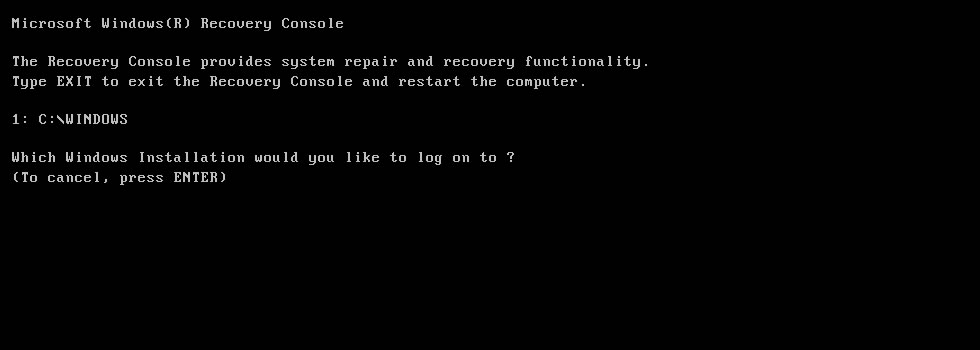
Recovery Console on Windows XP
- After Recovery Console logged into the Windows Installation, type
diskpart. Hit Enter to load the diskpart utility. - Type
list partition, press Enter - Type
select partition X, whereXis your partition - Press Enter
- Type
activeand press Enter - Restart your computer
Set partition as active on Windows Vista
Marking a partition as active on Windows Vista systems follows the same steps as the steps for Windows 7 or Windows 8.
You need to use the original disc (Windows Vista install DVD) to access Command Prompt and run diskpart.
If you don’t the original Windows Vista DVD, go to Use diskpart from Easy Recovery Essentials.
- Insert the installation DVD and boot from it (press any key at the “Press any key” screen)
- Select the language and keyboard method and click Next

Windows Vista Repair Your Computer Menu
- Click Repair your computer

Windows Vista System Recovery Options
- Click Command Prompt
- Once Command Prompt has loaded, type the following commands and press Enter after each:
diskpart
list disk
select disk 0
Where
0is the disk listed by thelist diskcommand. - Type:
list partition
- Press Enter
- Type:
select partition 1
Where
1is your partition. - Press Enter
- Type:
active
- Press Enter
Set partition as active on Windows 7
To set the primary partition to be active on your Windows 7 computer, follow these steps:
If you don’t the original Windows 7 DVD, go to Use diskpart from Easy Recovery Essentials.
- Insert the Windows 7 DVD
- Restart your computer
- Press any key to boot from the DVD
- At the Install Windows screen, either click Next and then Repair your computer or press the Shift and F10 keys to open Command Prompt.

Windows 7 System Recovery Options Screen
- Once in Command Prompt, type these commands and press Enter after each:
diskpart
list disk
- Type
select disk 0, where0is your computer’s disk that has the partition. - Press Enter
- Type
list partitionto have diskpart list all partition on the select disk and hit Enter to run the command - Type
select partition 1, where1is the number of the partition you want to set as active. Press Enter - Type
activeto mark the partition as active. Press Enter - Your partition is now active. Type
exit, hit Enter and restart your computer.
Set partition as active on Windows 8
To set a primary partition as active on a Windows 8 system, follow these steps:
If you don’t the original Windows 8 DVD/USB, go to Use diskpart from Easy Recovery Essentials.
- Insert the Windows 8 or Windows 8.1 USB and boot form the media
- Click Repair your computer

Windows 8 Repair Your Computer Menu
- Click Troubleshoot
- Click Command Prompt
- When at Command Prompt, type these commands:
diskpart
list disk
- Type
select disk 0, replace0with your computer’s primary disk - Type
list partition - Type
select partition 1, replace1with the partition’s letter that you want to set as active - Type
active - Type
exit - You can restart your computer now
More Information
Linked Entries
Support Links
- Easy Recovery Essentials for Windows – our repair and recovery disk.
It’s an easy-to-use and automated diagnostics disk. It’s available for Windows 8, Windows 7 and Windows Vista. It’s also available for Windows XP and Windows Server.Read more at Windows Recovery Disks.
- The NeoSmart Support Forums, member-to-member technical support and troubleshooting.
- Get a discounted price on replacement setup and installation discs: Windows XP, Windows Vista, Windows 7, Windows 8.
Applicable Systems
This Windows-related knowledgebase article applies to the following operating systems:
- Windows XP (all editions)
- Windows Vista (all editions)
- Windows 7 (all editions)
- Windows 8 (all editions)
- Windows 8.1 (all editions)