Get the fix for the error 0x0000007B(INACCESSIBLE BOOT DEVICE) on Windows XP, Windows Vista, Windows 7, Windows 8 and Windows 10.
Contents
About “0x0000007B“
The following information on this error has been compiled by NeoSmart Technologies, based on the information gathered and reported by our global network of engineers, developers, and technicians or partner organizations.
Description and Symptoms
The error messages, alerts, warnings, and symptoms below are tied to this error.
Symptom 1: “0x0000007b” error screen on startup
When a computer is turned on, the BIOS picks an eligible, bootable hard drive and then calls code stored in the MBR at the start of that hard drive. That MBR code in turn loads the bootsector from the active partition. Then, the bootsector code loads the bootloader, which is responsible for loading the operating system. However, if the PC suddenly loses access to the system partition during startup, then the “0x0000007b” error screen is displayed and the boot process is halted.
Here is an example of “0x0000007b” error screen for Windows XP, Vista and Windows 7:

A problem has been detected and Windows has been shut down to prevent damage to your computer.

If this is the first time you've seen this Stop error screen, restart your computer. If this screen appears again, follow these steps:

Check for viruses on your computer. Remove any newly installed hard drives or hard drive controllers. Check your hard drive to make sure it is properly configured and terminated. Run CHKDSK /F to check for hard drive corruption, and then restart your computer.

Technical information:

*** STOP: 0x0000007B (0xFFFFF880009AE7E8, 0xFFFFFFFFC0000034, 0x0000000000000000, 0x0000000000000000)
On some PC’s the error text may be a little different:
A problem has been detect and Windows has been shut down to prevent damage to your computer.

INACCESSIBLE_BOOT_DEVICE

If this is the first time you've seen this Stop error screen, restart your computer. If this screen appears again, follow these steps:

Check to make sure any new hardware or software is properly installed. If this is a new installation, ask your hardware or software manufacturer for any Windows updates you might need.

If problems continue, disable or remove any newly installed hardware or software. Disable BIOS memory options such as caching or shadowing. If you need to use Safe Mode to remove or disable components, restart your computer, press F8 to select Advanced Startup Options, and then select Safe Mode.

Technical information:

*** STOP: 0x0000007B (0xF8975528, 0xc0000034, 0x00000000, 0x00000000)
And here is an example of “0x0000007b” error screen for Windows 8, Windows 8.1 and Windows 10:
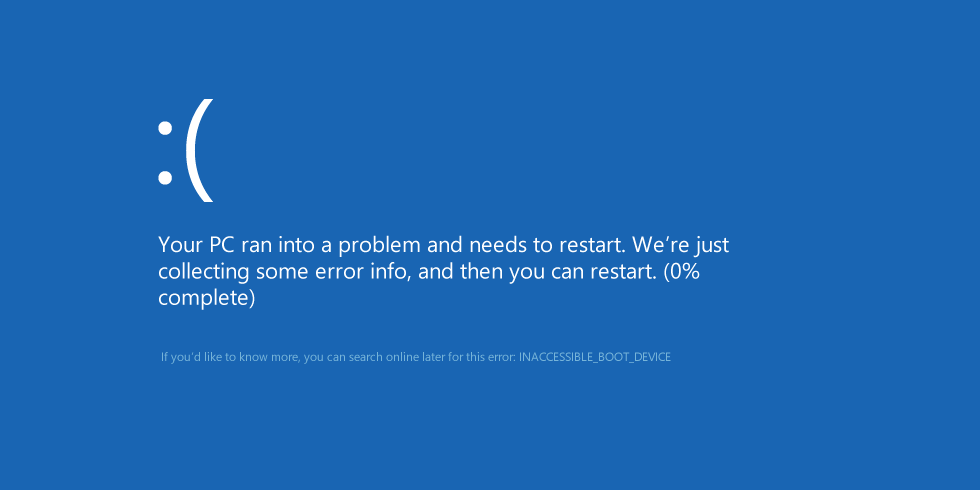
Your PC ran into a problem and needs to restart. We're just collecting some error info, and then you can restart. (0% complete)

If you'd like to know more, you can search online later for this error: INACCESSIBLE_BOOT_DEVICE
Causes of this Error
This error has been known to occur as a result of one of the following causes:
Cause 1: Bootloader files are missing or corrupt
One of the most common causes of this error is the boot-related files that became either missing, corrupt, or misconfigured. That could happen because of disk write errors, power outages, boot sector viruses, or errors made while configuring these files manually.
Cause 2: Incorrect BIOS configuration
the user made changes to the BIOS recently, the new settings he has entered might not be compatible with the hard drive. The UEFI/Legacy BOOT mode setting is the most infamous one in that regard, so users should take extra care when making changes to the BIOS.
Another thing that could happen is that the SATA controller has an incorrect work mode selected in BIOS. For most PC’s, there are three main SATA controller work modes available:
- IDE is the most-basic mode that treats the SATA controller in the same way legacy IDE controllers treat ATA drives: the controller itself contains almost no read/write-related logic and simply serves as the most ascetic of bridges, simply proxying data to and from the drives.
- AHCI is the more advanced and modern mode that also offers substantial optimized hardware-level read/write logic and caching, which results in a significant speed increase compared to IDE.
- RAID mode that allows the user to combine multiple physical disk drivers into a single logical unit for optimized performance, redundancy, or combination thereof.
If the user’s hard drive does not support one of these modes, or if Windows was installed and booted using one mode, but a different mode was configured, then the boot process will be halted.
Cause 3: Boot sector virus
Another possible reason for this error is a boot sector virus that prevents the computer from loading. In that case, running an antivirus program that is capable of deleting boot-sector viruses may solve the issue.
Cause 4: Registry is damaged
This error may also occur after the key parts of system registry became corrupt. This usually happens after disk read/write errors, and in that case, a disk check program should be used to scan the disk for errors and fix them.
Cause 5: EFI bootloader is corrupt
The special EFI bootloader introduced in Windows 8 may also become corrupt or misconfigured. If that’s the case, it should be rebuilt to fix the error.
Fixing “0x0000007b” on Windows
Windows Setup CD/DVD Required!
Some of the solutions below require the use of the Microsoft Windows setup CD or DVD. If your PC did not come with a Windows installation disc or if you no longer have your Windows setup media, you can use Easy Recovery Essentials for Windows instead. EasyRE will automatically find and fix many problems, and can also be used to solve this problem with the directions below.
Fix #1: Rebuild boot files with Easy Recovery Essentials
Easy Recovery Essentials’ one-click automated system repair corrects issues caused by missing or misconfigured boot.ini and BCD by recreating them from scratch on the active bootable partition for Windows. It also checks the drive for viruses and removes them from the PC. This is done automatically as part of the automated repair process, and requires no manual action or user intervention.
Easy Recovery Essentials is guaranteed to fix the “0x0000007b” error automatically using its built-in Automated Repair option. EasyRE is currently available for Windows XP, Vista, 7, 8, Windows 10, and Windows 11 and can be downloaded and created on any PC.
- Download Easy Recovery Essentials. Make sure to note your Windows version (XP, Vista, 7, 8, 10, or Windows 11) before you download EasyRE. This guide can help you identify what version of Windows you have installed.
- Burn the image. Follow these instructions on how to burn the bootable ISO image very carefully, as making a bootable CD can be tricky! Alternatively, these instructions explain how to create a bootable EasyRE recovery USB stick/drive.
- Boot up your PC from the Easy Recovery Essentials CD or USB you created.
- Once EasyRE is running, choose the “Automated Repair” option and click Continue.

Choose “Automated Repair” in Easy Recovery Essentials
- After EasyRE scans your computer’s drives, identify and select the drive letter for your Windows installation from the list, and then click on the Automated Repair button to begin.

Choose the drive associated with the Windows installation you’re trying to repair.
- Easy Recovery Essentials will start analyzing the selected drive for problems. EasyRE will test for and attempt to automatically correct errors with the disk, partition, bootsector, filesystem, bootloader, and registry. No intervention is required, as EasyRE’s repair is fully automated:

Easy Recovery Essentials searches for errors and makes corrections to the selected Windows installation.
- Once the process is complete, EasyRE will report its findings. Click on the Restart button to reboot your PC and test the changes.
- The “0x0000007b” error should now be fixed as your PC begins to load:


You can download Easy Recovery Essentials from here.
Fix #2: Check drive for viruses with Easy Recovery Essentials
If your computer is infected with a boot-sector virus, run an antivirus scan to remove all viruses from your computer to possibly fix this error.
Use any up-to-date modern antivirus scanner.
If you don’t have an antivirus scanner or can’t boot into Windows to run a scan, use the Virus Scanner of Easy Recovery Essentials (our recovery disk):
- Download Easy Recovery Essentials from here
- Burn the image. Follow these instructions on how to burn the bootable ISO image very carefully, as making a bootable CD can be tricky.
- Boot Easy Recovery Essentials
- Choose Virus Scanner

- Wait for the scan to complete

Fix #3: Boot into Last Known Good Configuration
Windows features a “Last Known Good Configuration” mode that can potentially fix certain issues caused by misconfigured drivers or any other corruptions.
This mode forces your system to use a previously saved version of the registry.
The instructions are:
- Restart the computer
- Tap the F8 key repeatedly before the Windows logo appears
- At the Boot Options list screen, choose Last Known Good Configuration (Advanced)
- Press Enter

Advanced Boot Options Menu
Fix #4: Repair corrupted system files with the SFC command
On Windows Vista and Windows 7, it is possible to use the built-in Windows SFC(system file checker) tool to automatically scan a computer’s system files and repair them if necessary.
Here are the steps to run SFC:
- Boot from your Windows install disc
- Click on Repair your computer after selecting proper language, time and keyboard input.
- Select the Windows installation drive, which is usually
C:\, and click Next - Choose Command Prompt when the System Recovery Options box appears
- Write the following command and press Enter afterwards:
sfc /scannow /offbootdir=D:\ /offwindir=D:\Windows\
Replace D: with the letter of the driver where Windows is installed, and D:\Windows with the Windows folder location.
Here is an example of what the PC’s console output should look like once the sfc.exe scan is complete and missing files are successfully restored:

System files restored by the SFC utility
Fix #5: Check your disk with CHKDSK utility
If the hard drive has its file integrity compromised, it is possible to use built-in Windows CHKDSK utility to scan the disk and fix the file system errors.
Here are the steps to run CHKDSK:
- Boot from your Windows install disc
- Click on Repair your computer after selecting proper language, time and keyboard input.
- Select the Windows installation drive, which is usually
C:\, and click Next - Choose Command Prompt when the System Recovery Options box appears
- Write the following command and press Enter afterwards:
chkdsk C: /f
Replace C: with the letter of the driver where Windows is installed.
Here is an example of what the PC’s console output should look like once the chkdsk.exe is complete:

Chkdsk utility results screen
Fix #6: Replace NTLDR and NTDETECT.COM files
Windows XP users can replace the required files for NTLDR to load correctly by using your Windows Installation Disc. The files are named NTLDR and NTDETECT.COM.
Here are the steps to replace these files:
- Insert the Windows XP install CD in your CD drive
- Restart the PC and boot from the CD
- Press any key to boot from the CD
- Press R after the Windows Options menu is done loading to access Repair Console
- After this step, log into Windows by pressing 1 using the Administrator password
- Use the following commands to copy the NTLDR and NTDETECT.COM files from the Windows installation disk to the hard disk:
copy D:\i386\ntldr C:\
copy D:\i386\ntdetect.com C:\
Where
D:\is the install CD’s drive letter andC:\is the Windows XP partition’s drive letter - Once these files are copied, remove the Windows installation disc from the disc drive
- Restart the PC
Here is an example of what the PC’s console output should look like once NTLDR and NTDETECT files are properly restored:

Replacing ntldr and ntdetect.com files
Fix #7: Rebuild boot.ini file
The next steps to fix this error on Windows XP are to rebuild the boot.ini file:
- Insert the Windows XP install CD in your CD drive
- Restart the PC and boot from the CD
- Press any key to boot from the CD
- Press R after the Windows Options menu is done loading to access Repair Console
- After this step, log into Windows by pressing 1 using the Administrator password
- Enter the following command when Command Prompt appears:
bootcfg /rebuild
- When the systems prompts about whether it should add an identified Windows installation to the boot list, answer “Y”(Yes)
- Enter “Windows XP” as Load Identifier and “/fastdetect” as OS Load Options.
- Remove the install CD
- Restart the PC
Here is an example of what the PC’s console output should look like once the boot.ini file is properly restored:

Fixing Boot.ini file
Fix #8: Rebuild the BOOTMGR file
Since on newer systems, this error screen is often caused by a damaged BOOTMGR, replacing it with the correct version is often a good and effective solution.
Here are the steps to replace the BOOTMGR:
- Boot from the Windows install disc
- Click on Repair your computer after selecting proper language, time and keyboard input.
- Select the Windows installation drive, which is usually
C:\, and click Next - Choose “Command Prompt” when the System Recovery Options box appears
- Type in the following command and then press Enter:
Bcdboot C:\Windows /s D:\
Where C:\Windows is your Windows installation folder and D:\ is your active boot partition.
Here is an example screenshot of what the PC’s console output should look like after the BOOTMGR is updated correctly:

Windows 7 BcdBoot utility screen
Fix #9: Recover the registry
The corrupted registry may also be fixed by replacing it with a clean copy that was created on the hard drive when Windows was installed. Note that this operation will restore the system to a state that might be very far from its current state; however, it still should be possible to recover user data in that state. This procedure also should not be used if the computer has an OEM-installed operating system, because the system registry hive on OEM installations creates passwords and user accounts that did not exist previously. This means that if these steps are followed on an OEM machine, then it may not be possible to log back into the recovery console to restore the original registry hives.
First, a backup of all current registry files is made so that they could be restored if anything goes wrong. Then, the existing registry is deleted, and replaced with a clean copy from the C:\Windows\Repair folder.
- Insert the Windows XP setup CD and restart the computer
- Press any key to boot from the CD
- Press R to access Repair Console
- Enter the Administrator password. When the Command Prompt appears, type the following commands, one at a time and press Enter after each command, replacing
C:with the Windows’ drive letter:md tmp copy c:\windows\system32\config\system c:\windows\tmp\system.bak copy c:\windows\system32\config\software c:\windows\tmp\software.bak copy c:\windows\system32\config\sam c:\windows\tmp\sam.bak copy c:\windows\system32\config\security c:\windows\tmp\security.bak copy c:\windows\system32\config\default c:\windows\tmp\default.bak

Backing up current registry hives
delete c:\windows\system32\config\system
delete c:\windows\system32\config\software
delete c:\windows\system32\config\sam
delete c:\windows\system32\config\security
delete c:\windows\system32\config\default

Deleting current registry hives
copy c:\windows\repair\system c:\windows\system32\config\system
copy c:\windows\repair\software c:\windows\system32\config\software
copy c:\windows\repair\sam c:\windows\system32\config\sam
copy c:\windows\repair\security c:\windows\system32\config\security
copy c:\windows\repair\default c:\windows\system32\config\default

Restoring registry hives from a repair folder
- Type
exitand remove your CD:exit
- Press Enter
- Restart your computer


Right after the boot process is completed successfully, it is possible to either backup all user data and reinstall Windows from scratch, or follow the procedure described in the Windows KB corrupted registry article to manually restore the system registry to a more newer version that was backed up by System Restore.
For more details on Windows XP System Restore, go to our Restore Windows XP – Windows System Restore guide.
Fix #10: Repair the EFI bootloader
Windows 8/8.1/10 feature a EFI bootloader that you repair if the commands from Rebuild the BCD don’t work.
To do so, follow these steps:
- Restart your computer and boot from the Windows DVD/USB
- Click Repair your computer, then Troubleshoot, Advanced Options, and then Command Prompt
- Type these commands and press Enter after each:
diskpart
sel disk 0
list vol
- Check the “Fs” column and find the item that has “FAT32” at this “Fs” column. The EFI partition is formatted under FAT32.
- If, for example, the number for the EFI item is “1”, type this command:
sel vol 1
- Now you need to assign a letter to the partition, a unique letter that isn’t already available on your computer (for example,
y:\):assign letter=y:
- When this message appears – DiskPart successfully assigned the drive letter or mount point – type
exitto quit the utility softwareexit
- Type this command, but replace
y:\with the letter of your choice:cd /d y:\EFI\Microsoft\Boot\
- Type this command:
bootrec /fixboot
- Type this command to backup the old BCD:
ren BCD BCD.backup
- Type this command to recreate the BCD. Remember to replace
y:\, if needed:bcdboot c:\Windows /l en-us /s y: /f ALL
- Type
exit, hit Enter and remove the disk from your disk tray - Restart the PC
Fix #11: Other fixes
If none of the fixes above work, try any of these tips too:
- If you installed a new hardware piece recently, try to remove it and then restart your computer
- Make sure all hard disk cables are connected properly
- If you installed any device drivers, try booting into Safe Mode and uninstall that particular driver and then restart your computer. Make sure the driver is compatible with your Windows version
More Information
Linked Entries
Support Links
- Easy Recovery Essentials for Windows – our repair and recovery disk.
It’s an easy-to-use and automated diagnostics disk. It’s available for Windows 8, Windows 7 and Windows Vista. It’s also available for Windows XP and Windows Server.Read more at Windows Recovery Disks.
- The NeoSmart Support Forums, member-to-member technical support and troubleshooting.
- Get a discounted price on replacement setup and installation discs: Windows XP, Windows Vista, Windows 7, Windows 8, Windows 10.
Applicable Systems
This Windows-related knowledgebase article applies to the following operating systems:
- Windows XP (all editions)
- Windows Vista (all editions)
- Windows 7 (all editions)
- Windows 8 (all editions)
- Windows 8.1 (all editions)
- Windows 10 (all editions)
- Windows Server 2003 (all editions)
- Windows Server 2008 (all editions)
- Windows Server 2012 (all editions)