Get the fix for the error A disk read error occurred on Windows XP, Windows Vista, Windows 7 and Windows 8.
Contents
About “A disk read error occurred“
The following information on this error has been compiled by NeoSmart Technologies, based on the information gathered and reported by our global network of engineers, developers, and technicians or partner organizations.
Description and Symptoms
The error messages, alerts, warnings, and symptoms below are tied to this error.
Symptom 1: “A disk read error occurred” error screen on startup
The “A disk read error occurred error” appears on a black screen without an identifiable error code.
Pressing the Ctrl, Alt and Del keys will only restart the computer and boot into the same error screen:

A disk read error occurred
Press Ctrl+Alt+Del to restart
In most cases the error can appear for any of the following reasons:
- Incorrect or invalid MBR configuration
- Improperly configured partition table
- Faulty hard drive
- IDE cables failing
- Bad RAM memory
- Issues with your computer’s BIOS version
The most common cases of this error are attributable to an incorrectly-flashed MBR to the system startup disk or the absence of an active partition on the startup disk. In these situations, the recommendations below should resolve the problem readily. If the problem is with hardware, additional diagnosis and the possible replacement of system components may be needed.
Causes of this Error
This error has been known to occur as a result of one of the following causes:
Cause 1: Incorrect or invalid MBR configuration
The most common cause for this error is an incorrect MBR configuration. This is usually caused by disk write errors, virus attacks or power outages.
Cause 2: Misconfigured partition table
For the same reasons, the partition table may become misconfigured. If that’s the case, it is possible to rebuild the partition table from scratch to make sure system loads correctly.
Fixing “A disk read error occurred” on Windows
Windows Setup CD/DVD Required!
Some of the solutions below require the use of the Microsoft Windows setup CD or DVD. If your PC did not come with a Windows installation disc or if you no longer have your Windows setup media, you can use Easy Recovery Essentials for Windows instead. EasyRE will automatically find and fix many problems, and can also be used to solve this problem with the directions below.
Fix #1: Use Easy Recovery Essentials
Easy Recovery Essentials can fix many errors such as this automatically using its built-in Automated Repair option. EasyRE is currently available for Windows XP, Vista, 7, 8, Windows 10, and Windows 11 and can be downloaded and created on any PC.
- Download Easy Recovery Essentials. Make sure to note your Windows version (XP, Vista, 7, 8, 10, or Windows 11) before you download EasyRE. This guide can help you identify what version of Windows you have installed.
- Burn the image. Follow these instructions on how to burn the bootable ISO image very carefully, as making a bootable CD can be tricky! Alternatively, these instructions explain how to create a bootable EasyRE recovery USB stick/drive.
- Boot up your PC from the Easy Recovery Essentials CD or USB you created.
- Once EasyRE is running, choose the “Automated Repair” option and click Continue.

Choose “Automated Repair” in Easy Recovery Essentials
- After EasyRE scans your computer’s drives, identify and select the drive letter for your Windows installation from the list, and then click on the Automated Repair button to begin.

Choose the drive associated with the Windows installation you’re trying to repair.
- Easy Recovery Essentials will start analyzing the selected drive for problems. EasyRE will test for and attempt to automatically correct errors with the disk, partition, bootsector, filesystem, bootloader, and registry. No intervention is required, as EasyRE’s repair is fully automated:

Easy Recovery Essentials searches for errors and makes corrections to the selected Windows installation.
- Once the process is complete, EasyRE will report its findings. Click on the Restart button to reboot your PC and test the changes.
- The “A disk read error occurred” error should now be fixed as your PC begins to load:


You can download Easy Recovery Essentials from here.
Fix #2: Check RAM memory
If you recently added new RAM memory to your computer, you can try to:
- Remove the new RAM modules you’ve recently added
- Leave only 1 single RAM module
- Restart the computer
You can also try to move the single RAM module on a different slot to troubleshoot if any of your RAM slots are damaged. To do that, simply follow these steps:
- Leave 1 RAM module on Slot #1
- Restart the computer
If “A disk read error occurred” still appears, move the RAM module on Slot #2 and start the computer again.
Fix #3: Check Hard Disk Cables
If the error is caused by damaged hard disk cables, try any of the following tips to fix the error:
- Try a different port for the SATA/IDE cables
- If you have more than 1 HDD, leave only the HDD with Windows installed and test multiple SATA/IDE ports and cables
The “A disk read error occurred” error can appear if:
- The SATA/IDE cables are damaged
- The SATA/IDE ports of your hard disks are damaged
If the HDD cables and ports are not damaged, the issue can also be from the hard disk itself.
To test if your hard disk is failing or it’s already failed, use Easy Recovery Essentials’ Automated Repair. Automated Repair process will report any issues found with your hard disk or RAM memory:
- Download Easy Recovery Essentials
- Burn the ISO Image. Follow our instructions on how to burn a bootable ISO image. If you’d like to have a recovery USB instead, follow our instructions on how to make a recovery USB.
- Boot into Easy Recovery Essentials
- Select Automated Repair
- Click Continue and wait for the Automated Repair process to finish. Automated Repair process will report any issues found with your hard disk or RAM memory:

To download Easy Recovery Essentials, click here.
Fix #4: Reset or Upgrade BIOS
In some cases, “A disk read error occurred” can be fixed by either reverting your BIOS to its default settings or upgrading BIOS to the latest version available for your computer.
To revert your computer’s BIOS to its default settings or default configuration, follow these steps:
- Restart the computer
- Press the key to boot into BIOS. This is usually any of the following keys: F2, F8, F12, Esc or Del. The key you need to press will be listed at the first screen when you boot your computer:
- Once booted into BIOS, find a “Load Defaults” options. The option name to revert to default settings can be different, depending on your computer manufacturer and BIOS version:
- Load Fail-Safe Defaults
- Load BIOS Defaults
- Load Default Settings
- Load Setup Default
- Get Default Values
- Select to revert the settings and hit Enter to select the option
- Exit BIOS by saving the changes
If reverting to BIOS defaults doesn’t make “A disk read error occurred” disappear, you can also try to update the BIOS version to the latest available.
Fix #5: Run chkdsk
The chkdsk utility checks for hard drives integrity and can attempt to fix various file system errors.
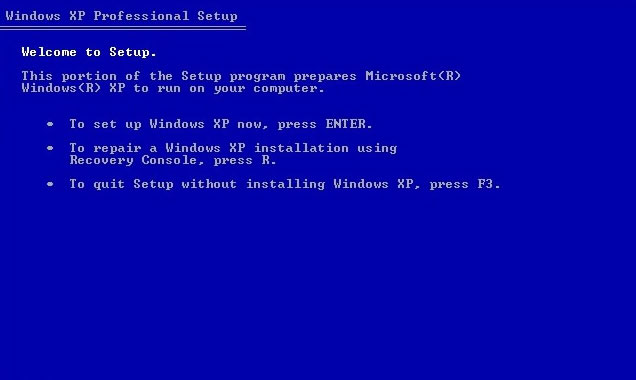
To run chkdsk on a Windows XP system, follow these steps:
- Insert the Windows XP CD and boot from it
- At the Windows Options screen, press R to open Recovery Console
- At Command Prompt, type the
chkdskcommand:chkdsk C: /r
Make sure you replace
C:with the drive where Windows XP is installed - Press Enter
- Restart the computer
To run chkdsk on a Windows Vista or Windows 7 system, follow these steps:
- Insert the Windows Vista or Windows 7 DVD and boot from it
- At the Install Windows screen, select Repair your computer to access System Recovery Options

- Once at System Recovery Options, select Command Prompt

- Type the same chkdsk command as that of Windows XP:
chkdsk C: /r
where
C:is the letter of the drive where Windows Vista or Windows 7 is installed on - Hit Enter
On Windows 8 or 8.1, chkdsk can accessed through the same steps:
- Insert the installation media (DVD or USB drive) and boot from it
- Select a language, keyboard method and time
- Click Next
- At the Install now screen, select Repair your computer or press R

- Navigate to Troubleshoot > Advanced Options
- Click Command Prompt
- Type the chsksk command and press Enter:
chkdsk C: /f /x /r
Replace
C:with the drive where Windows 8 is installed

chkdsk utility results screen
Fix #6: Run bootrec
If chkdsk doesn’t fix the “A disk read error occurred” error, you can also try to run the bootrec utility in order to fix damaged or corrupt BCD files.
If you have a Windows XP system, run the bootcfg utility. Bootrec is only available for Windows Vista, 7, 8.
- Insert the Windows XP CD in the disc tray and boot from it
- Press R to access Recovery Console
- At Command Prompt, type the
bootcfgcommand:bootcfg /rebuild
- Press Enter
- When bootcfg finishes the procedure, type
exitand hit Enter to exit Command Prompt - Restart the computer
If you have a Windows Vista or Windows 7 computer, run the bootrec command by following these steps:
- Insert the original install media and boot from it
- Click Repair your computer
- Once at System Recovery Options, select Command Prompt

- Type the bootrec commands and press Enter:
bootrec /rebuildbcd
- Type:
bootrec /fixmbr
- Press Enter
- Type:
bootrec /fixboot
- Press Enter
- Restart the computer
If “A disk read error occurred” appears on a Windows 8, run the same bootrec utility:
- Boot from the installation media
- Click Repair your computer or press R
- Click Troubleshoot
- Click Advanced options
- Click Command Prompt
- Type the commands and press Enter after each:
bootrec /rebuildbcd
bootrec /fixmbr
bootrec /fixboot
- Type
exitand press Enter to quit Command Prompt - Restart the computer

bootrec utility results screen
More Information
Linked Entries
Support Links
- Easy Recovery Essentials for Windows – our repair and recovery disk.
It’s an easy-to-use and automated diagnostics disk. It’s available for Windows 8, Windows 7 and Windows Vista. It’s also available for Windows XP and Windows Server.Read more at Windows Recovery Disks.
- The NeoSmart Support Forums, member-to-member technical support and troubleshooting.
- Get a discounted price on replacement setup and installation discs: Windows XP, Windows Vista, Windows 7, Windows 8.
Applicable Systems
This Windows-related knowledgebase article applies to the following operating systems:
- Windows XP (all editions)
- Windows Vista (all editions)
- Windows 7 (all editions)
- Windows 8 (all editions)
- Windows 8.1 (all editions)