This article explains how to use the bootsect (bootsect.exe) utility to rebuild your computer’s boot sector code.
bootsect.exe is available only for these Windows versions: Windows XP, Vista, 7, 8, 8.1 and 10.
Contents
Bootsect on Windows
Bootsect on Windows Vista
If you have the installation disc
If you have your original Windows Vista installation disc, you can boot from the disc and run bootsect.exe from Command Prompt:
If you don’t have the Windows Vista disc, go to Repair boot sector with Easy Recovery Essentials.
- Insert the Windows Vista CD/DVD and restart your computer
- Boot from the CD/DVD. Press any key when presented with the “Press any key” screen to boot from the disc.
- Click Repair your computer

Windows Vista Repair Your Computer Menu
- Select your operating system, click Next
- Click Command Prompt at System Recovery Options

Windows Vista System Recovery Options
- Type:
bootsect /nt60 sys
This command will update your Windows Vista’s boot sector.
- Press Enter
For more commands and parameters you can run with bootsect, go to Parameters you can use.
If you don’t have the installation disc
Certain computers with Windows Vista pre-installed may have the System Recovery Options installed on the hard disk (the same System Recovery Options you’ll find on an original Windows Vista disc).
If your computer has the recovery tools pre-installed, follow these steps to access Command Prompt and run bootsect:
- Reboot your computer and press the F8 key as soon as your computer starts to boot
- At Advanced Boot Options, select Repair Your Computer
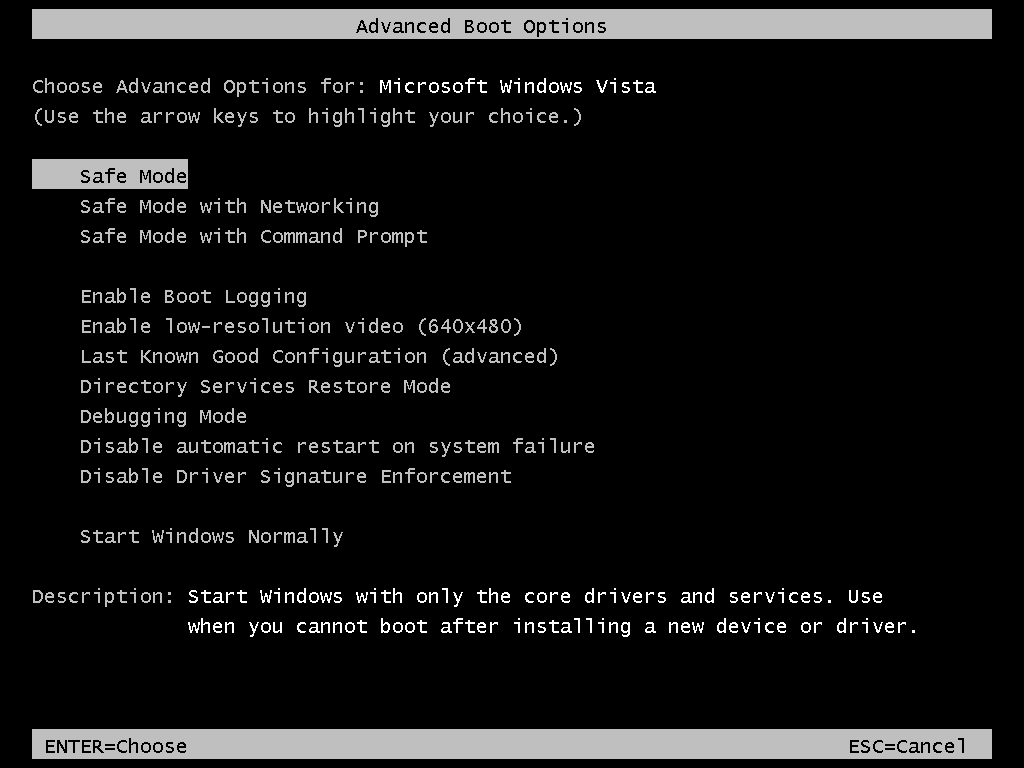
The Advanced Boot Options screen in Windows Vista
- Press Enter
- Select Command Prompt
Windows Vista System Recovery Options
- Type:
bootsect /nt60 sys
This command will attemtp to repair your Window Vista’s boot sector.
- Press Enter
If you don’t have the Repair your computer option listed at the Advanced Boot Options, you can use Easy Recovery Essentials and launch Command Prompt:
- Download Easy Recovery Essentials
- Burn the ISO Image. Follow our instructions on how to burn a bootable ISO image. If you’d like to have a recovery USB instead, follow our instructions on how to make a recovery USB.
- Boot Easy Recovery Essentials from the CD, DVD or USB
- Select Launch Command Line

Bootsect on Windows 7
If you have the installation disc
Here are the instructions on how to access bootsect on a Windows 7 using the installation disc:
If you don’t have the Windows 7 disc, go to Repair boot sector with Easy Recovery Essentials.
- Insert the installation disc and restart your computer
- Boot from the Windows 7 disc
- Click Repair your computer or press R

Install Now (Windows 7)
- Select the operating system
- Click Next
- Click Command Prompt

Windows 7 System Recovery Options Screen
- Type:
bootsect /nt60 sys
- Press Enter
For more commands and parameters, go to Parameters you can use.
If you don’t have the installation disc
If you don’t have the Windows 7 installation disc, your computer most likely has the recovery tools pre-installed on the hard disk.
To access these, follow these steps:
- Restart the computer
- Press the F8 key as soon as your computer boots, but before the Windows 7 logo appears
- At Advanced Boot Options, select Repair your computer
- Select Command Prompt from System Recovery Options
- Type:
bootsect /nt60 sys
- Press Enter
If you don’t have the recovery tools installed, use Easy Recovery Essentials:
- Download Easy Recovery Essentials
- Burn the ISO Image. Follow our instructions on how to burn a bootable ISO image. If you’d like to have a recovery USB instead, follow our instructions on how to make a recovery USB.
- Boot Easy Recovery Essentials from the CD, DVD or USB
- Select Launch Command Line
Bootsect on Windows 8 or 8.1
If you have the installation DVD or USB of your Windows 8 or 8.1, you can use it to run bootsect.
If you don’t have the Windows 8 media, go to Repair boot sector with Easy Recovery Essentials.
- Insert the installation media and boot from it
- At the Welcome screen, click Repair your computer

Windows 8 Repair Your Computer Menu
- Select Troubleshoot
- Select Command Prompt
- Type:
bootsect /nt60 sys
- Press Enter
Bootsect on Windows 10
If you have the installation DVD or USB of your Windows 10, you can use it to run bootsect.
If you don’t have the Windows 10 media, go to Repair boot sector with Easy Recovery Essentials.
- Insert the installation media and boot from it
- At the Welcome screen, click Repair your computer

- Select Troubleshoot
- Select Command Prompt
- Type:
bootsect /nt60 sys
- Press Enter
Repair boot sector with Easy Recovery Essentials
Easy Recovery Essentials can fix many errors such as this automatically using its built-in Automated Repair option. EasyRE is currently available for Windows XP, Vista, 7, 8, Windows 10, and Windows 11 and can be downloaded and created on any PC.
- Download Easy Recovery Essentials. Make sure to note your Windows version (XP, Vista, 7, 8, 10, or Windows 11) before you download EasyRE. This guide can help you identify what version of Windows you have installed.
- Burn the image. Follow these instructions on how to burn the bootable ISO image very carefully, as making a bootable CD can be tricky! Alternatively, these instructions explain how to create a bootable EasyRE recovery USB stick/drive.
- Boot up your PC from the Easy Recovery Essentials CD or USB you created.
- Once EasyRE is running, choose the “Automated Repair” option and click Continue.

Choose “Automated Repair” in Easy Recovery Essentials
- After EasyRE scans your computer’s drives, identify and select the drive letter for your Windows installation from the list, and then click on the Automated Repair button to begin.

Choose the drive associated with the Windows installation you’re trying to repair.
- Easy Recovery Essentials will start analyzing the selected drive for problems. EasyRE will test for and attempt to automatically correct errors with the disk, partition, bootsector, filesystem, bootloader, and registry. No intervention is required, as EasyRE’s repair is fully automated:

Easy Recovery Essentials searches for errors and makes corrections to the selected Windows installation.
- Once the process is complete, EasyRE will report its findings. Click on the Restart button to reboot your PC and test the changes.
- The “boot sector error” error should now be fixed as your PC begins to load:


You can download Easy Recovery Essentials from here.
Parameters you can use
The bootsect utility has the following parameters you can use:
/nt52 – use nt52 parameter to repair a Windows XP boot sector. The command you need to run would be bootsect /nt52 D:, where D: is the drive’s letter
/nt60 – use nt60 to repair the boot sector for Windows Vista, 7 or 8. The full command would be: bootsect /nt60 D:, where D: is the drive’s letter
SYS – the SYS parameter is used to update the MBR code on the system partition, the partition used to boot Windows.
ALL– the ALL parameter is used to update all MBR codes on all partitions. It updates the MBR code only on volumes that can be used to boot Windows.
/force – you can use the /force parameter if the targeted partition is being used.
Run the utility with the /force parameter if you receive this kind of message:
Updated NTFS filesystem bootcode. The update may be unreliable since the volume could not be locked during the update:
Access is denied.

Bootcode was successfully updated on all targeted volumes.
Use /force with extra caution. Using this parameter can invalidate open files on the selected volume.
Download bootsect
You can download the bootsect.exe file by any of the following options:
- Logging into your Microsoft account
- From the original installation disc
If you need to use bootsect to repair your computer’s boot sector, go to Repair boot sector with Easy Recovery Essentials.
Method #1: Login to your Microsoft account
If you purchased Windows 7 or Windows 8 through Microsoft.com Store, you can login into your account and download a copy of bootsect.exe from there.
To do so, follow these steps:
- Login to your Microsoft Store account
- Go to your purchases
- Click the Additional download options menu
- Select 32-bit ISO
- Right-click on the link and save the bootsect.exe file
Method #2: From the original installation disc
If Method #1 isn’t available to you, use the original installation disc to copy-paste the file:
- Insert the installation disc in the optical tray
- Open My Computer
- Right-click on the optical’s drive
- Click Explore
- Go to the Boot folder
- Find the bootsect.exe file
Troubleshooting
Unable to run bootsect
It’s common to have this error appear when using the Windows 7 USB/DVD Download Tool from Microsoft:
Files copied successfully. However, we were unable to run bootsect to make the USB device bootable. If you need assistance with bootsect, please click the "Online Help" link above for more information.
Follow any of the tips below to fix this error.
Fix #1: Check if USB is already bootable
The error may appear if the USB drive you’re trying to make bootable is already bootable.
Fix #2: Format it as FAT32
If the USB drive already has partitions, you should delete them first before running the Windows 7 USB/DVD Download Tool:
- Insert the USB drive
- Go to Command Prompt
- Type:
diskpart
list disk
- Type:
select disk 2
Make sure 2 is the USB Drive!
- Extra-caution on selecting the right drive (the USB Drive). The following diskpart steps will use the clean parameter that will format your USB drive.
- Type:
clean
- Type:
create partition primary
- Type:
select partition 1
- Type:
active
- Type:
format quick fs=fat32
- Type:
assign
- Type:
exit
After you’ve performed these instructions, run Windows 7 USB/DVD Tool again.
More Information
Linked Entries
Support Links
- Easy Recovery Essentials for Windows – our repair and recovery disk.
It’s an easy-to-use and automated diagnostics disk. It’s available for Windows 8, Windows 7 and Windows Vista. It’s also available for Windows XP and Windows Server.Read more at Windows Recovery Disks.
- The NeoSmart Support Forums, member-to-member technical support and troubleshooting.
- Get a discounted price on replacement setup and installation discs: Windows XP, Windows Vista, Windows 7, Windows 8, Windows 10.
Applicable Systems
This Windows-related knowledgebase article applies to the following operating systems:
- Windows XP (all editions)
- Windows Vista (all editions)
- Windows 7 (all editions)
- Windows 8 (all editions)
- Windows 8.1 (all editions)
- Windows 10 (all editions)