If you installed multiple Windows versions on the same PC, your dual-boot (or multi-boot) configuration may stop working.
The most cause for a dual-boot or multi-boot configuration error (to stop working) is when you reinstall the older Windows version before the newer Windows version.
For example, Windows Vista and Windows 7 were already installed as dual-boot and then Windows Vista was reinstalled again. At the second installation, Windows Vista overwrites the MBR and the new MBR isn’t recognized by Windows 7.
In this article, you can find various solutions to repair your dual-boot configuration.
Contents
What is dual-boot/multi-boot
Dual-booting or multi-booting means installing multiple Windows versions (or other operating systems) on the same computer and being able to choose which operating system you’d like to boot into.
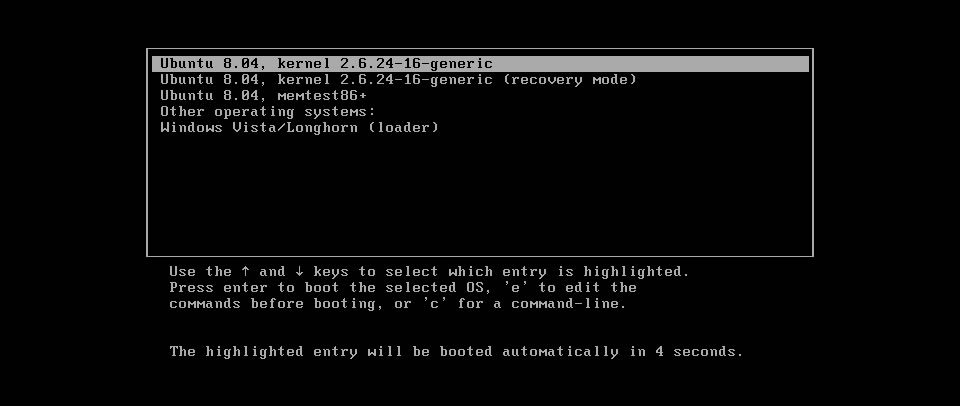
It’s very common to see this kind of configuration on Windows computers:
- Windows XP with Windows Vista
- Windows Vista with Windows 7
- Windows 8 with Windows 7
For more information on how to setup a dual-boot system, go to our guides from EasyBCD.
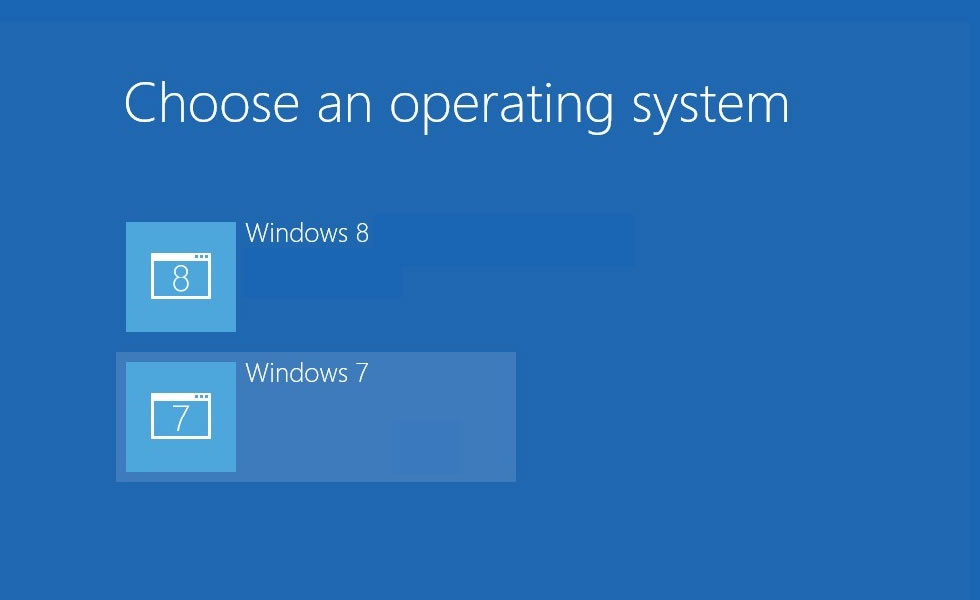
If you’re dual-booting Windows 8 with Windows 7, the boot options menu will look like this:
Fix dual-boot configuration with Easy Recovery Essentials
Easy Recovery Essentials can correct the errors of your computer’s boot configuration.
Easy Recovery Essentials can fix many errors such as this automatically using its built-in Automated Repair option. EasyRE is currently available for Windows XP, Vista, 7, 8, Windows 10, and Windows 11 and can be downloaded and created on any PC.
- Download Easy Recovery Essentials. Make sure to note your Windows version (XP, Vista, 7, 8, 10, or Windows 11) before you download EasyRE. This guide can help you identify what version of Windows you have installed.
- Burn the image. Follow these instructions on how to burn the bootable ISO image very carefully, as making a bootable CD can be tricky! Alternatively, these instructions explain how to create a bootable EasyRE recovery USB stick/drive.
- Boot up your PC from the Easy Recovery Essentials CD or USB you created.
- Once EasyRE is running, choose the “Automated Repair” option and click Continue.

Choose “Automated Repair” in Easy Recovery Essentials
- After EasyRE scans your computer’s drives, identify and select the drive letter for your Windows installation from the list, and then click on the Automated Repair button to begin.

Choose the drive associated with the Windows installation you’re trying to repair.
- Easy Recovery Essentials will start analyzing the selected drive for problems. EasyRE will test for and attempt to automatically correct errors with the disk, partition, bootsector, filesystem, bootloader, and registry. No intervention is required, as EasyRE’s repair is fully automated:

Easy Recovery Essentials searches for errors and makes corrections to the selected Windows installation.
- Once the process is complete, EasyRE will report its findings. Click on the Restart button to reboot your PC and test the changes.
- The “dual-boot errors” error should now be fixed as your PC begins to load:


You can download Easy Recovery Essentials from here.
Other solutions to repair dual-boot configurations
Repair Windows XP on a dual-boot system
Windows Setup CD/DVD Required!
Some of the solutions below require the use of the Microsoft Windows setup CD or DVD. If your PC did not come with a Windows installation disc or if you no longer have your Windows setup media, you can use Easy Recovery Essentials for Windows instead. EasyRE will automatically find and fix many problems, and can also be used to solve this problem with the directions below.
If you have installed Windows XP along another Windows system (e.g. Windows Vista) on the same computer, follow these instructions to repair the Windows XP and fix the dual-boot configuration.
If you don’t have the original installation disc, go to Fix dual-boot configuration with Easy Recovery Essentials.
- Insert the Windows XP installation disc and start the computer
- At the Press any key to boot from CD screen, press any key to boot from the CD
- Press Enter to setup Windows. You will not re-install Windows XP, but repair the installation.Clicking R at this step will load Recovery Console, not the repair installation utility. Do not click R!
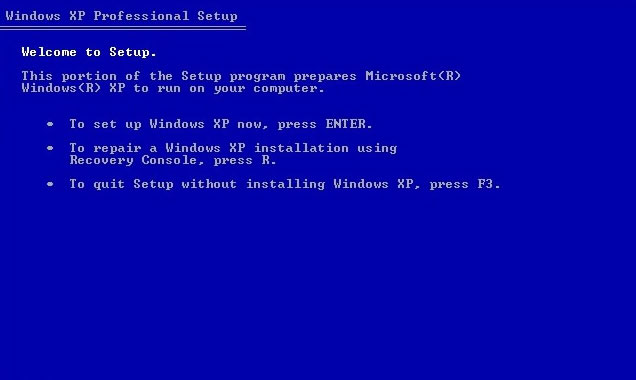
Windows XP Press R for Recovery Console
- Press the F8 key to accept the license agreement
- Select your Windows XP installation from the disc and press R.
- If the repair option isn’t available or the Windows XP installation isn’t found, exit the setup. If you continue from this step you may overwrite your Windows XP system and delete all personal files!
Repair Windows Vista on a dual-boot system
To repair Windows Vista’s bootloader and fix the dual-boot configuration, you can use the bootrec utility that’s available on the original Windows Vista installation disc (CD or DVD).
If you don’t have the original installation disc, go to Fix dual-boot configuration with Easy Recovery Essentials.
Fix #1: Run bootrec
Windows Setup CD/DVD Required!
Some of the solutions below require the use of the Microsoft Windows setup CD or DVD. If your PC did not come with a Windows installation disc or if you no longer have your Windows setup media, you can use Easy Recovery Essentials for Windows instead. EasyRE will automatically find and fix many problems, and can also be used to solve this problem with the directions below.
- Insert the installation disc in the tray and boot from it
- At the Welcome screen, click on Repair your computer

Windows Vista Repair Your Computer Menu
- Choose your operating system and click Next
- At the System Recovery Options screen, click Command Prompt

Windows Vista System Recovery Options
- Type:
bootrec /FixMbr
- Press Enter
- Type:
bootrec /FixBoot
- Press Enter
- Type:
bootrec /RebuildBcd
- Press Enter
- Remove the CD/DVD from the tray
- Type:
exit
- Press Enter
- Restart your computer
Fix #2: Run diskpart, then bootrec
Windows Setup CD/DVD Required!
Some of the solutions below require the use of the Microsoft Windows setup CD or DVD. If your PC did not come with a Windows installation disc or if you no longer have your Windows setup media, you can use Easy Recovery Essentials for Windows instead. EasyRE will automatically find and fix many problems, and can also be used to solve this problem with the directions below.
If Fix #1 above doesn’t work, you may need to set the partition which was Windows Vista installed as active first and then run bootrec.
To do so, run diskpart:
- Insert the Windows installation disc and boot from it
- Go to Command Prompt from System Recovery Options (same steps as Fix #1)
- Type:
diskpart
- Press Enter
- Type:
list disk
This command will list all disks available on your computer.
- Press Enter
- Type:
select disk 0
Replace
0with the disk where your Windows Vista is installed on. If you have only 1 hard drive, it’s0. - Press Enter
- Type:
list part
This command will list the partition available on the select disk.
- Press Enter
- Type:
select partition 0
Replace
0with the partition where Windows Vista is installed. - Press Enter
- Type:
active
- Press Enter
- Type:
exit
- Press Enter
- diskpart is now closed. Run the bootrec commands, one by one, and press Enter after each:
bootrec /fixmbr
bootrec /rebuildbcd
bootrec /fixboot
Repair Windows 7 on a dual-boot system
In order to have Windows 7 back in your dual-boot options menu, use the bootsect utility to restore Windows 7’s MBR.
If you don’t have the original installation disc, go to Fix dual-boot configuration with Easy Recovery Essentials.
- Boot from the original Windows 7 installation DVD
- At the System Recovery Options screen, click Command Prompt
- Type:
diskpart
- Press Enter
- Type:
select disk 0
Replace
0with the disk available on the hard disk, where Windows 7 is installed on. To have the full list of disks from your computer, typelist disk. - Press Enter
- Type:
list volume
- Press Enter
- Look for the drive’s letter of your optical drive (where the Windows 7 installation DVD is now running). This usually has “CD-ROM” mentioned in the Type column.
- Type:
exit
- Press Enter
- Type:
D:
Where
D:is the optical’s drive letter. - Press Enter
- Type:
cd boot
- Press Enter
- Type:
dir
- Press Enter
- Type:
bootsect /nt60 SYS /mbr
- Press Enter
- Type:
exit
- Press Enter
- Restart your computer
Repair Windows 8 or 8.1 on a dual-boot system
Using the bootrec utility you can repair Windows 8 or Windows 8.1 on a dual-boot system and boot into your Windows.
If you don’t have the original installation disc or original USB, go to Fix dual-boot configuration with Easy Recovery Essentials.
Fix #1: Use bcdboot
Windows Setup CD/DVD Required!
Some of the solutions below require the use of the Microsoft Windows setup CD or DVD. If your PC did not come with a Windows installation disc or if you no longer have your Windows setup media, you can use Easy Recovery Essentials for Windows instead. EasyRE will automatically find and fix many problems, and can also be used to solve this problem with the directions below.
Using bcdboot, attempt to fix your computer and have the boot menu back:
- Insert the Windows 8 DVD or Windows 8.1 USB and restart your computer to boot from the media
- Go to Command Prompt (click Troubleshoot > Command Prompt)
- Type:
bcdboot C:\windows
Where
C:\is the drive’s letter where Windows 8 or Windows 8.1 is installed on. - Press Enter
- Remove the DVD or USB
- Type:
exit
- Press Enter
- Restart your computer
Fix #2: Use diskpart, then bootrec
- Insert the Windows 8 DVD or Windows 8.1 USB
- Restart your computer and boot from the media
- Click Repair your computer at the Welcome screen

Windows 8 Repair Your Computer Menu
- Go to Troubleshoot > Command Prompt
- Type:
diskpart
- Press Enter
- Type:
sel disk 0
- Press Enter
- Type:
list vol
- Press Enter
- Determine which volume has FAT32 mentioned at the Fs column. This would be the UEFI/EFI partition with Windows 8/8.1
- Type:
sel vol 2
Where
2is the volume with the FAT32 format. - Press Enter
- Type:
assign letter x:
Where
x:is the partition’s letter. The letter must be unique. - Press Enter
- Type:
exit
- Press Enter
- Type:
cd /d x:\EFI\Microsoft\Boot\
Where
x:is the letter you used. - Press Enter
- Type:
bootrec /FixBoot
- Press Enter
- Type:
ren BCD BCD.backup
This would create backup of the BCD.
- Press Enter
- Type:
bcdboot c:\Windows /l en-us /s x: /f ALL
Where
c:\is the drive’s letter where Windows 8 is installed on. - Press Enter
- Remove the DVD or USB
- Type:
exit
- Press Enter
- Restart your computer
Repair Windows 10 on a dual-boot system
Using the bootrec utility you can repair Windows 10 on a dual-boot system and boot into your Windows.
If you don’t have the original installation disc or original USB, go to Fix dual-boot configuration with Easy Recovery Essentials.
Fix #1: Use bcdboot
Windows Setup CD/DVD Required!
Some of the solutions below require the use of the Microsoft Windows setup CD or DVD. If your PC did not come with a Windows installation disc or if you no longer have your Windows setup media, you can use Easy Recovery Essentials for Windows instead. EasyRE will automatically find and fix many problems, and can also be used to solve this problem with the directions below.
Using bcdboot, attempt to fix your computer and have the boot menu back:
- Insert the Windows 10 media and restart your computer to boot from the media
- Go to Command Prompt (click Troubleshoot > Command Prompt)
- Type:
bcdboot C:\windows
Where
C:\is the drive’s letter where Windows 10 is installed on. - Press Enter
- Remove the DVD or USB
- Type:
exit
- Press Enter
- Restart your computer
Fix #2: Use diskpart, then bootrec
- Insert the Windows 10 media
- Restart your computer and boot from the media
- Click Repair your computer at the Welcome screen

- Go to Troubleshoot > Command Prompt
- Type:
diskpart
- Press Enter
- Type:
sel disk 0
- Press Enter
- Type:
list vol
- Press Enter
- Determine which volume has FAT32 mentioned at the Fs column. This would be the UEFI/EFI partition with Windows 10
- Type:
sel vol 2
Where
2is the volume with the FAT32 format. - Press Enter
- Type:
assign letter x:
Where
x:is the partition’s letter. The letter must be unique. - Press Enter
- Type:
exit
- Press Enter
- Type:
cd /d x:\EFI\Microsoft\Boot\
Where
x:is the letter you used. - Press Enter
- Type:
bootrec /FixBoot
- Press Enter
- Type:
ren BCD BCD.backup
This would create backup of the BCD.
- Press Enter
- Type:
bcdboot c:\Windows /l en-us /s x: /f ALL
Where
c:\is the drive’s letter where Windows 10 is installed on. - Press Enter
- Remove the DVD or USB
- Type:
exit
- Press Enter
- Restart your computer
More Information
Linked Entries
Support Links
- Easy Recovery Essentials for Windows – our repair and recovery disk.
It’s an easy-to-use and automated diagnostics disk. It’s available for Windows 8, Windows 7 and Windows Vista. It’s also available for Windows XP and Windows Server.Read more at Windows Recovery Disks.
- The NeoSmart Support Forums, member-to-member technical support and troubleshooting.
- Get a discounted price on replacement setup and installation discs: Windows XP, Windows Vista, Windows 7, Windows 8, Windows 10.
Applicable Systems
This Windows-related knowledgebase article applies to the following operating systems:
- Windows XP (all editions)
- Windows Vista (all editions)
- Windows 7 (all editions)
- Windows 8 (all editions)
- Windows 8.1 (all editions)
- Windows 10 (all editions)