While Easy Recovery Essentials for Windows is often created and used as a recovery CD by following our guides on creating a bootable CD, it can also be readily converted to a bootable USB stick for use in PCs that don’t have CD drives or when a CD or DVD isn’t available.
We receive many complaints from users who’ve mistakenly created an EasyRE USB with the “Rufus” usb iso tool. Rufus does not support EasyRE and USBs created with Rufus will not boot into EasyRE! Please follow the instructions below instead.
Contents
Easy USB Creator
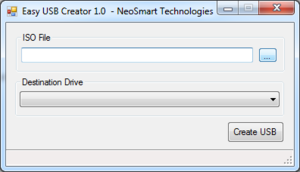
Easy USB Creator is a simple and easy-to-use utility that lets you burn a EasyRE ISO image to a USB or other removable disk with a single click. It is compatible with version 5.0 and up of Easy Recovery Essentials. For older versions of EasyRE, please refer to the EasyBCD-based USB creation instructions instead.
Creating a bootable USB stick
The following pictorial/instructions will guide you through the process of creating a bootable USB stick by using the Easy USB Creator.
Download Easy USB Creator
Download a copy of Easy USB Creator from the following link:
http://cdn.neosmart.net/software/…/Easy USB Creator Lite.exe
Run Easy USB Creator
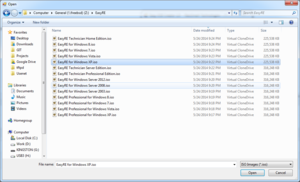
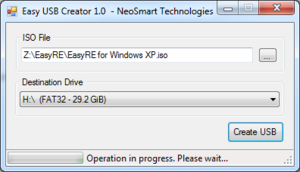
Run UsbCreator.exe to start Easy USB Creator, and then browse to the ISO image you downloaded. If you don’t yet have the EasyRE ISO image, you can grab yourself a copy from http://neosmart.net/EasyRE/
Browse for the ISO image
You’ll need to press the ‘…’ button in the top-right of the Easy USB Creator dialog to select the ISO image to convert to a bootable USB. The exact name of the downloaded ISO image may depend on how it was downloaded, as will the location of the file.
Select the Removable Drive
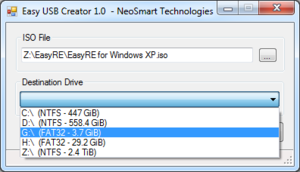
After selecting the ISO image to burn to the USB, you’ll need to select the removable drive or USB stick to burn the ISO to.
Easy USB Creator will display all drives – be careful to avoid selecting a local drive, and make sure you’ve selected the USB stick you wish to use for this process.
Create the USB
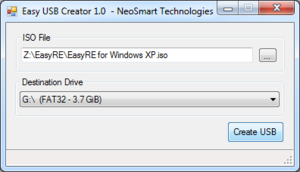
Once you’ve selected both the source ISO file and the destination USB drive, you should be ready to create the USB. Simply click the button labeled “Create USB” and wait while Easy USB Creator converts the ISO image to a bootable USB.
Please note that depending on the size of the ISO file and the write speed of the removable drive or USB stick, this might be a slower procedure. The progress bar at the bottom of the dialog will give you a fairly accurate representation of the progress and remaining time.
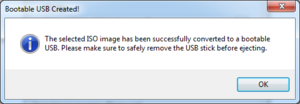
Safely eject the USB
It’s very important to safely eject the USB stick or removable drive before disconnecting it from your PC. Easy USB Creator writes a lot of sensitive data to the selected drive, and severe data loss or physical damage to the USB stick may occur if it isn’t correctly ejected.
Booting from the USB
To start your system from your newly-created bootable USB stick or flash drive, please continue with the instructions in this related article from our knowledgebase: booting from a USB drive. Still having problems? Read our guide on troubleshooting boot from USB issues.
