This guide details how you can troubleshoot and fix a slow boot. This guide details general tips that you can apply for these Windows versions: XP, Vista, 7, 8, 8.1, 10.
Contents
Fixes for a slow boot
Fix #1: Check the HDD and/or RAM
If the slow booting of your computer is caused by a failing HDD/SSD, test your hard disk or RAM memory.
For more information on how to check HDD/SSD for failures, read this this guide.
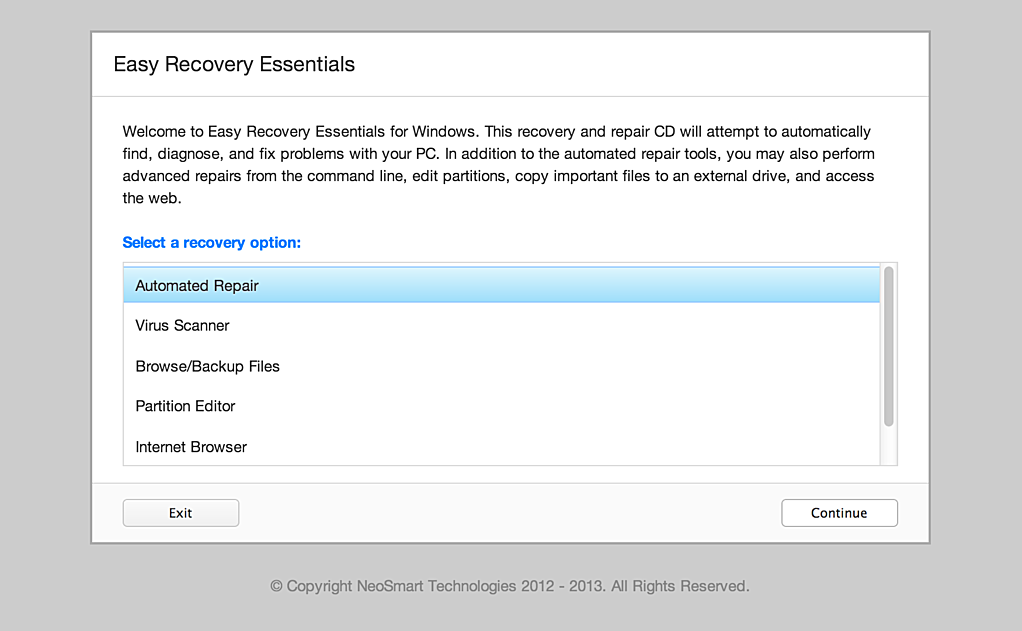
To do so, run Automated Repair from Easy Recovery Essentials (our recovery and repair disc). It will report any issues found with your HDD or RAM memory.
- Download Easy Recovery Essentials
- Burn the ISO Image. Follow our instructions on how to burn a bootable ISO image. If you’d like to have a recovery USB instead, follow our instructions on how to make a recovery USB.
- Boot into Easy Recovery Essentials
- Select Automated Repair
- Click Continue and wait for the Automated Repair process to finish. Automated Repair process will report any issues found with your hard disk or RAM memory:

To download Easy Recovery Essentials, click here.
Fix #2: Disable startup applications
If the slow booting is caused by a startup software application or service, you can troubleshoot the exact application causing this by disabling each application with the help of the msconfig utility.
If, after removing/disabling a specific software application, your computer begins to boot correctly and not slow as it was, the issue can be from that software application. Try to update it to the latest available version.
To run msconfig, follow these steps:
- Boot into your system
- Click Start
- Click Run
- Type:
msconfig
- Press Enter or click OK
- Go to the Startup or Services tab
- Disable all services listed in this tab
- Click OK
- Click Restart
- Restart the computer
If your computer still boots slowly, go to Fix #2.
Fix #3: Delete temporary files
For more information how to delete temporary files, read this guide.
Large volumes of temporary files (stored in the specific %temp% folder on Windows) may slow down your computer, including the booting process.
To delete the temporary files on your computer, follow these steps:
- Start your computer
- Click Start
- Click Run
- Type:
%temp%
- Press Enter or click OK
- Go to Folder Options (Tools > Folder Options for Windows XP; Organize or Tools > Folder Options for Windows Vista or 7)
- Go to View
- At the Hidden files and folders section, check the Show hidden files, folders, or drive checkbox
- Click OK
- Select all files and folders from the Temporary folder
- Right-click and click Delete
- Click Yes to confirm the deletion of these files and folders
If you’re not able to boot into Windows to delete the temporary files, use Automated Repair from Easy Recovery Essentials (our recovery and repair disc). Besides find and fixing boot errors automatically, it can delete temporary files automatically.
Fix #4: Defragment HDD
Having a fragmented hard-disk might slow your computer and how it boots.
Using the Disk Defragmenter utility from Windows, you can rearrange the fragmentation of your hard-disk to make it run more efficiently.
To defragment your hard-disk, follow these steps:
- Start your computer and boot into Windows
- Click Start
- Search for Disk Defragmenter
- At the Current Status section, select the disk you want to defragment. If you have multiple disks listed, defragment all disks.
- Click Defragment disk
Fix #5: Check for viruses
Download and run a scan with an up-to-date antivirus software application.
If you don’t have one and/or if you can’t boot into Windows, you can use Easy Recovery Essentials built-in antivirus scanner which can run outside Windows.
The Professional Edition of Easy Recovery Essentials for Windows features a powerful antivirus and rootkit scanner that can normally resolve this and similar errors caused by viruses, rootkits, trojans, or spyware. EasyRE is currently available for Windows XP, Vista, 7 and 8 and can be downloaded and created on any PC.
- Download Easy Recovery Essentials. Make sure to note your Windows version (XP, Vista, 7 or 8) before you download EasyRE. This guide can help you identify what version of Windows you have installed. For the purposes of this guide, you will need to obtain the Professional Edition of EasyRE.
- Burn the image. Follow these instructions on how to burn the bootable ISO image very carefully, as making a bootable CD can be tricky! Alternatively, these instructions explain how to create a bootable EasyRE recovery USB stick/drive.
- Boot up your PC from the Easy Recovery Essentials CD or USB you created.
- Once EasyRE is running, choose the “Virus Scanner” option and click Continue.
- After EasyRE scans your computer’s drives, identify and select the drive letter for your Windows installation from the list, and then click on the Scan button to begin.
- EasyRE will begin scanning the drive for viruses, rootkits, trojans, spyware, and other unwanted malware on your machine. No intervention is required, and EasyRE will repair viruses as it finds them, reporting its progress as it goes along:
- Once the process is complete, EasyRE will report its findings. Click on the Restart button to reboot your PC and test the changes.
You can download Easy Recovery Essentials from here.
Fix #6: Run Startup Repair
The Startup Repair utility can find and fix various errors that may prevent your computer to boot correctly. If the slow boot is caused by a boot error, Startup Repair will attempt to fix the error.
The Startup Repair utility is available only on Windows Vista and Windows 7 systems. For Windows XP systems, follow the next set of instructions, at Fix #7.
- Insert the Windows Vista or Windows 7 installation disc (the install DVD) and boot from it
- At the Welcome screen, click Repair your computer
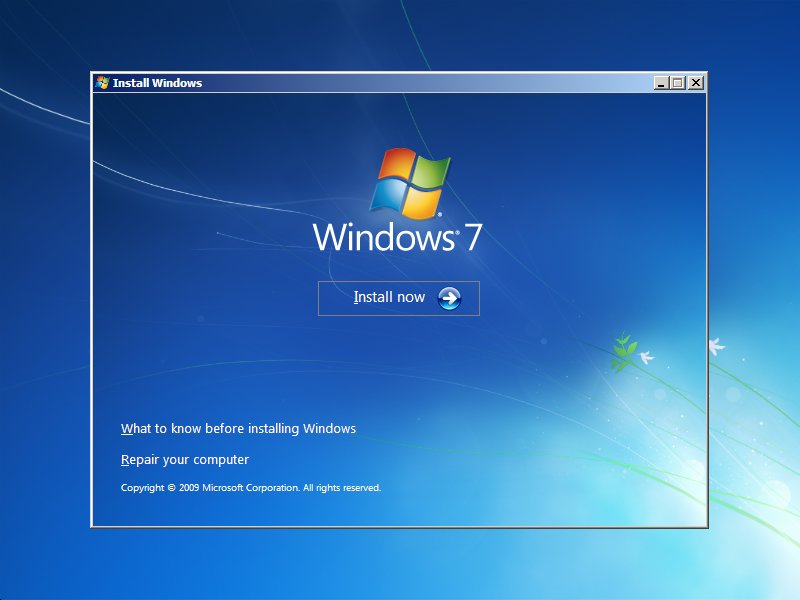
Install Now (Windows 7)
- Choose your operating system and click Next to continue
- At System Recovery Options, select Startup Repair
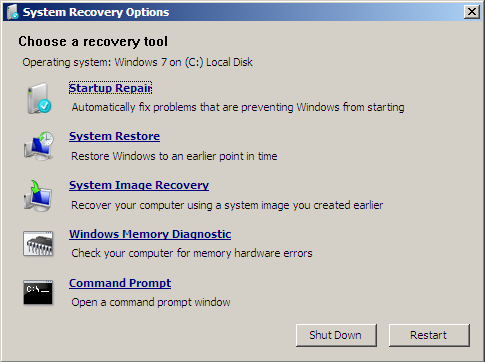
Windows 7 System Recovery Options Screen
- After Startup Repair finished the process, restart your computer
Fix #7: Run chkdsk and sfc
If you have Windows XP, follow these steps:
- Insert the Windows XP CD and boot from it
- At Welcome to Setup, press R
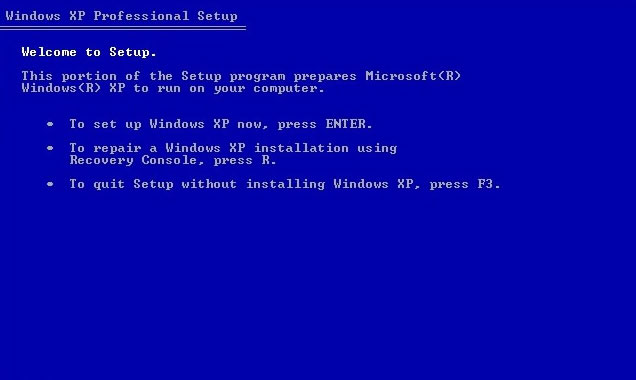
Windows XP Press R for Recovery Console
- Type:
chkdsk C: /r
Replace
C:is the letter of the drive where Windows is installed. - Press Enter
- Type:
sfc /scannow /offbootdir=c:\ /offwindir=c:\windows
Replace
C:with the letter of the drive where your Windows XP is installed. - Press Enter
- Type
exitand press Enter. Restart your computer.
If you have Windows Vista or Windows 7, follow these steps:
- Follow the steps from Fix #7 until you reach Command Prompt
- When Command Prompt is loaded, type this command:
chkdsk
C:/rWhere
C:is the letter of the drive where your Windows Vista or Windows 7 is installed. - Press Enter
- Type:
sfc /scannow
- Press Enter
- Type:
exit
- Press Enter
- Restart your computer
If you have Windows 8 or Windows 10, follow these steps:
- Insert the installation media (DVD or USB)
- At the Welcome screen, click Repair your computer
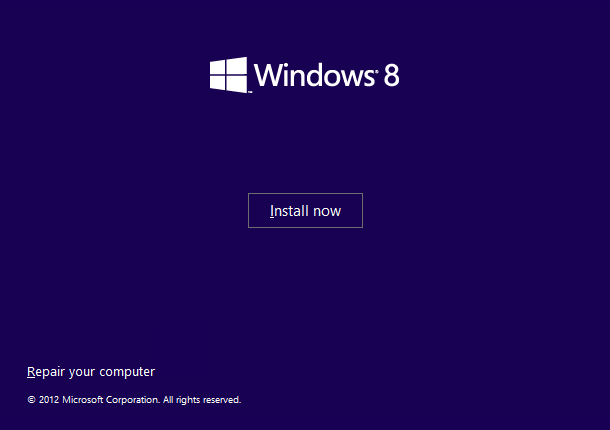
Windows 8 Repair Your Computer Menu
- Click Troubleshoot at the Choose an option screen
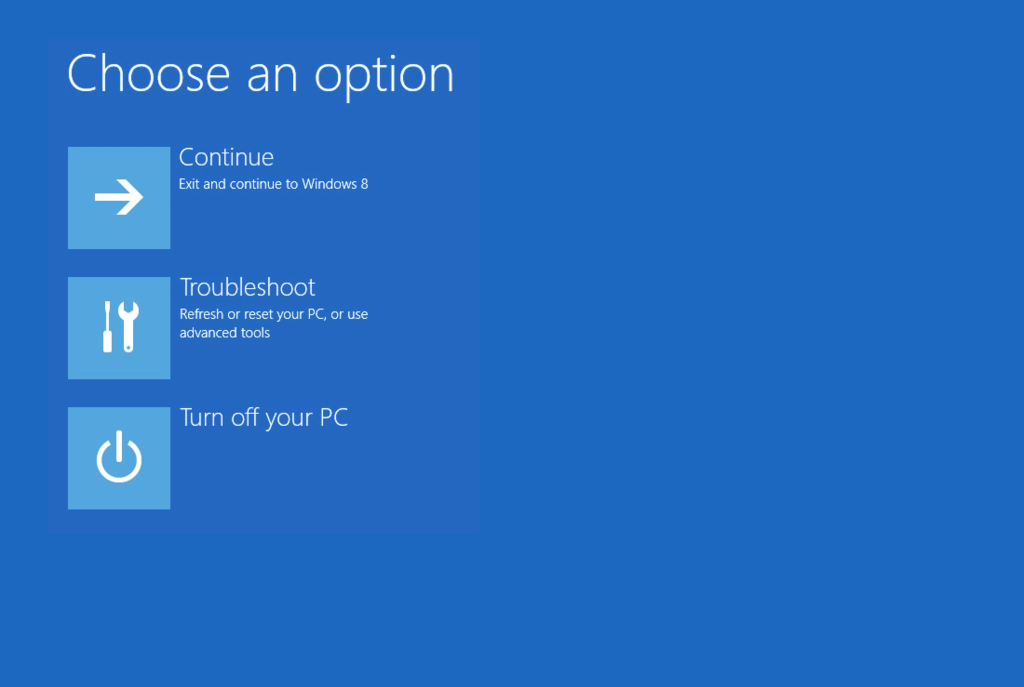
Troubleshoot in Windows 8 recovery options screen
- Click Advanced options
- Click Command Prompt
- Type:
chkdsk C: /f /x /r
Replace
C:with the letter where Windows 8/8.1 is installed. - Press Enter
- Type:
sfc /scannow
- Press Enter
- Type:
exit - Press Enter
- Restart your computer
Other fixes you can try
If none of the fixes presented above fixed the slow booting process of your computer, consider these tips:
Tip #1: Delete software you don’t use
Software applications that you no longer use can slow your computer.
If you’re not able to boot into Windows, boot into the Last Known Good Configuration or Safe Mode and try to uninstall software applications that you no longer use:
- Restart your computer
- Press the F8 key to open the Advanced Boot Options menu
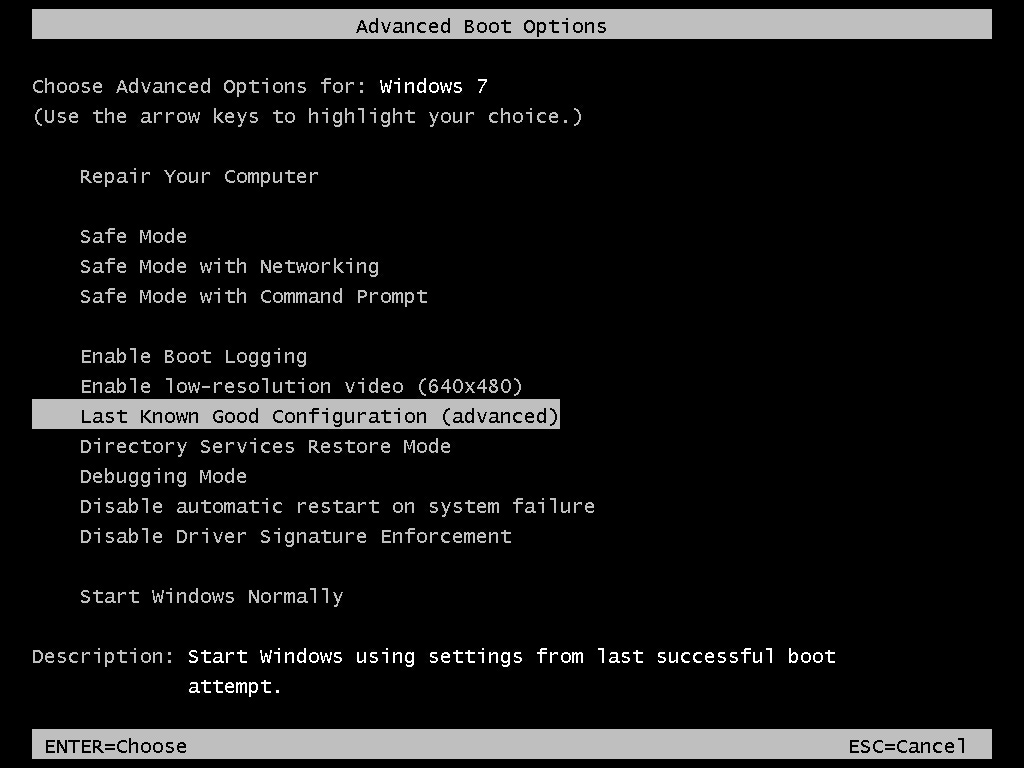
The advanced boot options startup menu.
- Select Last Known Good Configuration or Safe Mode
- Press Enter
Tip #2: Upgrade RAM or install SSD
If you’ve already checked your HDD or RAM for faults, consider upgrading your RAM memory or switching from HDD to SSD.
Tip #3: Update drivers
If you recently added hardware drivers on your computer, make sure you have the latest available version from the manufacturer that’s compatible with the Windows version you’re running: XP, Vista, 7 or 8.
Tip #4: Update or reinstall Windows
Updating or reinstalling Windows might fix the slow boot.
Reinstalling Windows means you will loose all data if you don’t backup your personal files.
You can use the Browse/Backup Files feature from Easy Recovery Essentials to access your computer and backup your personal files on a USB drive:
- Download Easy Recovery Essentials. Make sure to select your Windows version – XP, Vista, 7, 8, Windows 10, or Windows 11 – before you download EasyRE.
- Burn the ISO image. Our guides will help you do this: how to burn EasyRE on a CD/DVD, how to create a bootable EasyRE recovery USB drive.
- Boot up your PC from the Easy Recovery Essentials CD or USB you created.
- Choose the “Browse/Backup Files” option and click Continue.

Browse/Backup Files from EasyRE
- You now have access to your files. You can backup the files on an external USB drive.

Browse files from EasyRE directly
Download Easy Recovery Essentials by clicking this link.
To reinstall Windows Vista or Windows 7, follow these steps:
- Insert the installation DVD and boot from it
- Select a keyboard method and language and click Next
- Click Install Now at the Welcome screen
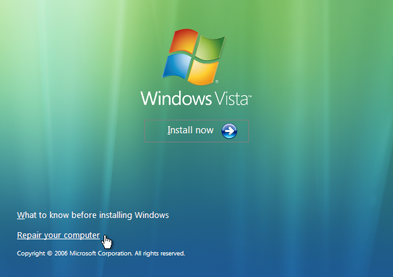
Windows Vista Repair Your Computer Menu
- Follow the wizard to complete the installation process
More Information
Linked Entries
Support Links
- Easy Recovery Essentials for Windows – our repair and recovery disk.
It’s an easy-to-use and automated diagnostics disk. It’s available for Windows 8, Windows 7 and Windows Vista. It’s also available for Windows XP and Windows Server.Read more at Windows Recovery Disks.
- The NeoSmart Support Forums, member-to-member technical support and troubleshooting.
- Get a discounted price on replacement setup and installation discs: Windows XP, Windows Vista, Windows 7, Windows 8, Windows 10.
Applicable Systems
This Windows-related knowledgebase article applies to the following operating systems:
- Windows XP (all editions)
- Windows Vista (all editions)
- Windows 7 (all editions)
- Windows 8 (all editions)
- Windows 8.1 (all editions)
- Windows 10 (all editions)
