How to fix if your Windows no longer shows the System Restore points (points are missing or have disappeared). These fixes can be applied for the following Windows versions: XP, Vista, 7, 8,10.
These instructions are useful if you can’t boot into Windows normally in order to fix System Restore and have the points shown correctly. If you’re not able to boot into Windows, go to How to restore your PC.
Contents
Troubleshoot missing restore points
Fix #1: System Restore is enabled
If the System Restore points are missing, it can be because the System Restore utility has been turned off manually. Whenever your turn off System Restore, all previous points created are deleted. By default, it’s turned on.
To check if everything runs correctly with System Restore, follow the instructions below.
For Windows XP:
- Click Start > Control Panel
- Click System
- Go to System Restore tab
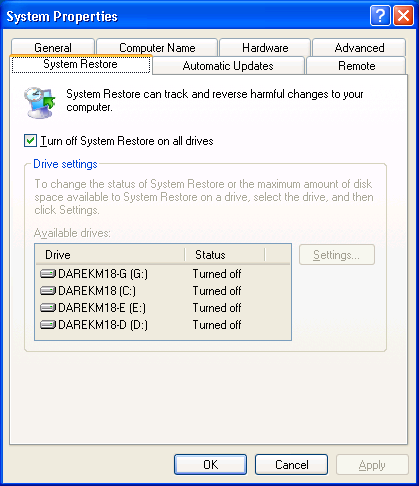
Windows XP System Restore tab
- Make sure the Turn off System Restore on all drives is unchecked
For Windows Vista:
- Click Start > Programs > Accessories > System Tools
- Click System Restore
- Click System Protection
- From Available Disks, make sure all disks are checked. Whenever you check a drive checkbox, System Restore will be enabled for that disk.
For Windows 7:
- Click Start > Control Panel
- Click System
- Choose System Protection and then go to the System Protection tab
- Select which drive you want to check if System Restore is enabled (turned on or off) and click Configure
- Make sure the Restore system settings and previous versions of files option is checked
For Windows 8:
- Search for system restore in the search bar
- Click Create a restore point
- Go to System Protection
- Select which drive you want to check and click Configure
- Make sure the Turn on system protection option is checked in order for System Restore to be turned on
For Windows 10:
- Search for system restore in the search bar
- Click Create a restore point
- Go to System Protection
- Select which drive you want to check and click Configure
- Make sure the Turn on system protection option is checked in order for System Restore to be turned on
Fix #2: Check HDD space
If your computer no longer has the free space, System Restore – even if it’s turned on – will stop creating restore points.
You can also configure System Restore to use more space to save the restore points. To do so, follow the steps from until you reach the Max Usage option of System Restore.
Use the Max Usage slide to increase the space for System Restore.

Windows 10 System Restore screen
Fix #3: Run chkdsk, sfc
By running the chkdsk and sfc commands you can check if there are any issues with your computer’s hard drive.
- Open Command Prompt
- Type:
chkdsk /f
- Press Enter
- Type:
sfc /scannow
- Press Enter
If chkdsk or sfc (or both) output shows error in System Restore, your computer’s hard drive might be failing or it’s corrupted. This could be the cause for the missing System Restore points.
You can also check if the hard drive is healthy with Easy Recovery Essentials:
- Download Easy Recovery Essentials
- Burn the ISO Image. Follow our instructions on how to burn a bootable ISO image. If you’d like to have a recovery USB instead, follow our instructions on how to make a recovery USB.
- Boot into Easy Recovery Essentials
- Select Automated Repair
- Click Continue and wait for the Automated Repair process to finish. Automated Repair process will report any issues found with your hard disk or RAM memory:

To download Easy Recovery Essentials, click here.
For more information on how you can check your computer for HDD or SSD failures, read this guide.
Fix #4: Check Volume Shadow Copy
The Volume Shadow Copy utility from Windows creates backups of your Windows while in use. If Volume Shadow Copy is disabled, your computer’s System Restore points might not be available.
To check if Volume Shadow Copy is running or not, follow these steps:
- Click Start
- Type
services.mscin the Run dialog box or in the Search bar (for Windows Vista, 7 or 8) - Press Enter to open the Services utility
- Find the Volume Shadow Copy item from the list
- Make sure Volume Shadow Copy is running: check the “Status” column corresponding to this item.If it’s not running, click Start the service from the left in order to start it.

Windows 10 Volume Shadow Copy screen
Fix #5: Check page file for fragmentation
If your system’s page file is fragmented, your System Restore points might get deleted at each restart. This is very common behavior for Windows 7 systems.
In order to fix this, you can do the following: disable, delete or recreate the page file.
To do so, follow these steps:
- Open Control Panel
- Type
advanced system settingsin the search bar - Click View advanced system settings
- Click Settings under Performance
- Click Change under Virtual Memory
- Select your main drive, e.g.
C:, and then select No paging file - Click Set
- Click OK (three times) to exit the current menu
- Restart your computer
- Boot again and go to Computer (or My Computer)
- Delete
pagefile.sysfrom your main drive, e.g.C:\.
In this example,pagefile.syspath is:C:\pagefile.sysNote thatpagefile.sysis a hidden file and you need to show hidden files and folders (go to Folder Options to enable this option) to view the file. - Click Start
- Type
cmdto open Command Prompt - Type:
defrag /h c:
Replace
c:with the letter of the drive where Windows is installed. - Go back and enable paging file again. Follow the first steps and deselect the No paging file option.
- Click OK (three times) to exit the menu
- Reboot your computer
- Check if System Restore or Volume Shadow Copy is running correctly. You can try to create a manually restore point.

Windows 10 Paging file settings screen
How to restore your PC
If you’re not able to boot into Windows and run System Restore, you have the following options available:
System Restore via Safe More
To open System Restore in Safe Mode, follow these steps:
- Boot your computer
- Press the F8 key before the Windows logo appears on your screen
- At Advanced Boot Options, select Safe Mode with Command Prompt
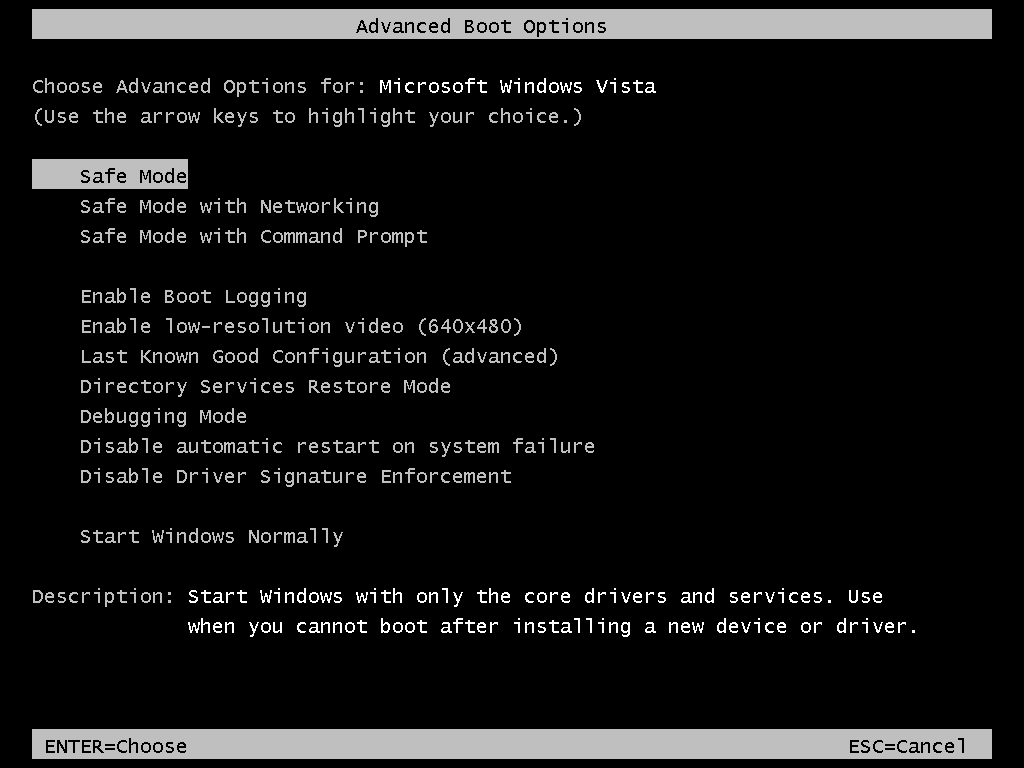
The Advanced Boot Options screen in Windows Vista
- Press Enter
- Type:
rstrui.exe
- Press Enter
- Follow System Restore instructions to restore your computer by choosing an available restore point from the list
If you don’t have any restore points listed, your System Restore may have not created any restore points of your system.
You can use Easy Recovery Essentials Automated Repair feature to automatically find and fix various boot errors that can help you boot into your computer again.
System Restore via EasyRE
The System Restore feature of Easy Recovery Essentials – or EasyRE – is “fully non-destructive” — it does not in any way touch, remove, or undo changes to your personal files and folders (such as the Desktop, Downloads, Music, Pictures, etc.)
- Download Easy Recovery Essentials.
Please make sure you download the copy that corresponds to your Windows version (XP, Vista, 7 or 8).If you’re unsure, this guide can help you identify what version of Windows you have installed.
- Burn the image. Follow these instructions on how you can burn EasyRE, depending on which media you want to use: burn the EasyRE ISO on a CD or DVD or burn the EasyRE ISO on a USB drive.
- Boot up your PC from the Easy Recovery Essentials CD or USB
- Select “Automated Repair” and click Continue.

Choose “Automated Repair” in Easy Recovery Essentials
- Wait for EasyRE to scan your computer’s drives and then identify and select the drive letter for your Windows installation from the list, and then click on the System Restore button to begin.

Choose the drive associated with the Windows installation you’re trying to repair.
- EasyRE will scan the selected Windows installation for System Restore points. System Restore snapshots that were located, if any, are then listed and displayed, allowing the user to choose a particular snapshot (associated with a certain date) for restore/recovery:

Pick a restore point for EasyRE to recover.
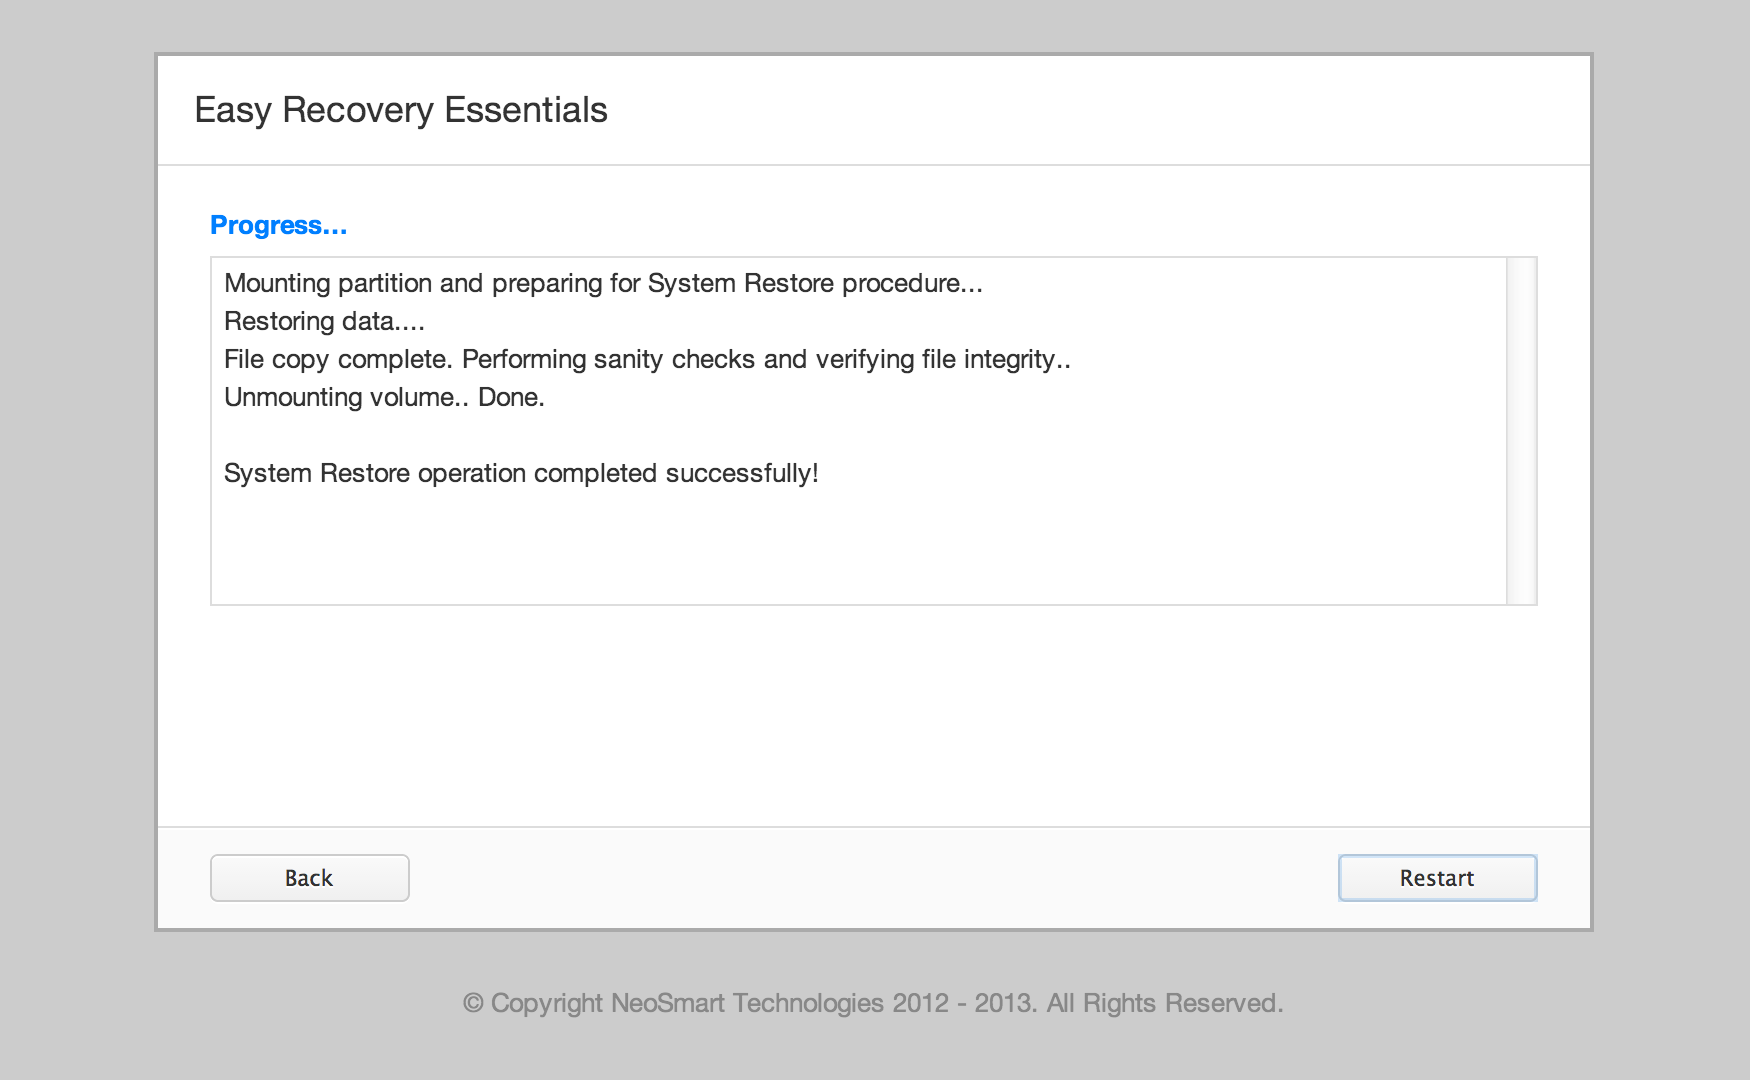
- After selecting the restore point you which to revert your system to, click on Restore to begin.
- EasyRE will begin the process of restoring your system configuration to the state it was in at the date that was selected.
Only system files and registries will be affected, as the Easy Recovery Essentials’ System Restore feature is non-destructive and does not affect user data.

Choose the drive associated with the Windows installation you’re trying to repair.
- Once the process is complete, EasyRE will report its findings. Click on the Restart button to reboot your PC and test the changes.
- Your PC begins to load:


Download Easy Recovery Essentials
More Information
Linked Entries
Support Links
- Easy Recovery Essentials for Windows – our repair and recovery disk.
It’s an easy-to-use and automated diagnostics disk. It’s available for Windows 8, Windows 7 and Windows Vista. It’s also available for Windows XP and Windows Server.Read more at Windows Recovery Disks.
- The NeoSmart Support Forums, member-to-member technical support and troubleshooting.
- Get a discounted price on replacement setup and installation discs: Windows XP, Windows Vista, Windows 7, Windows 8, Windows 10.
Applicable Systems
This Windows-related knowledgebase article applies to the following operating systems:
- Windows XP (all editions)
- Windows Vista (all editions)
- Windows 7 (all editions)
- Windows 8 (all editions)
- Windows 8.1 (all editions)
- Windows 10 (all editions)