This article shows you how to create a recovery disk for Windows Server 2003, Server 2008 and Server 2012 or where to download our disk – Easy Recovery Essentials. We also have versions for Windows Server 2016 and Windows Server 2022 now available for download.
Download recovery disk for Windows Server
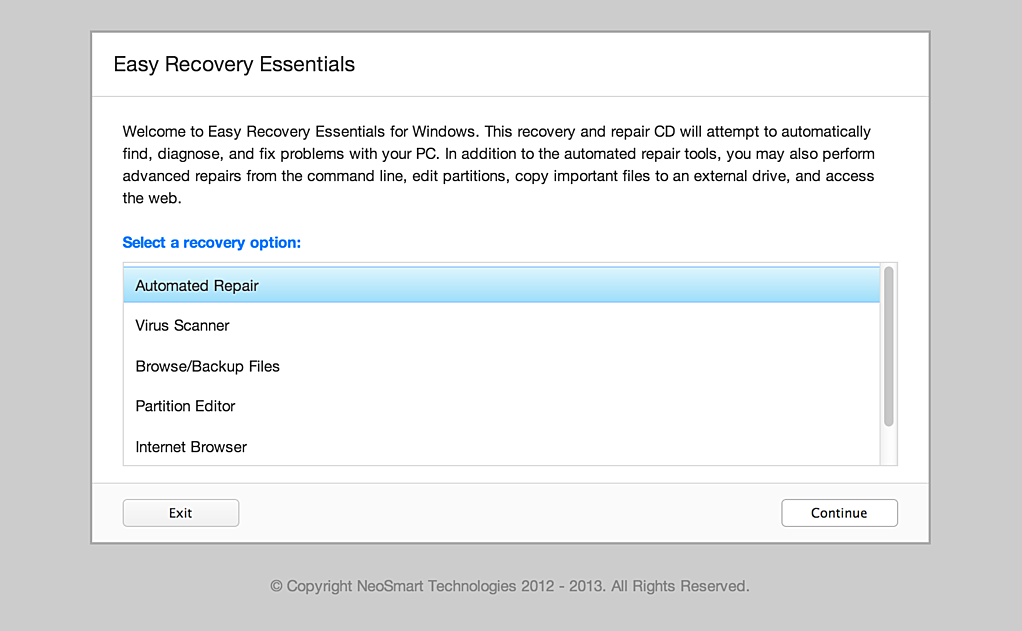
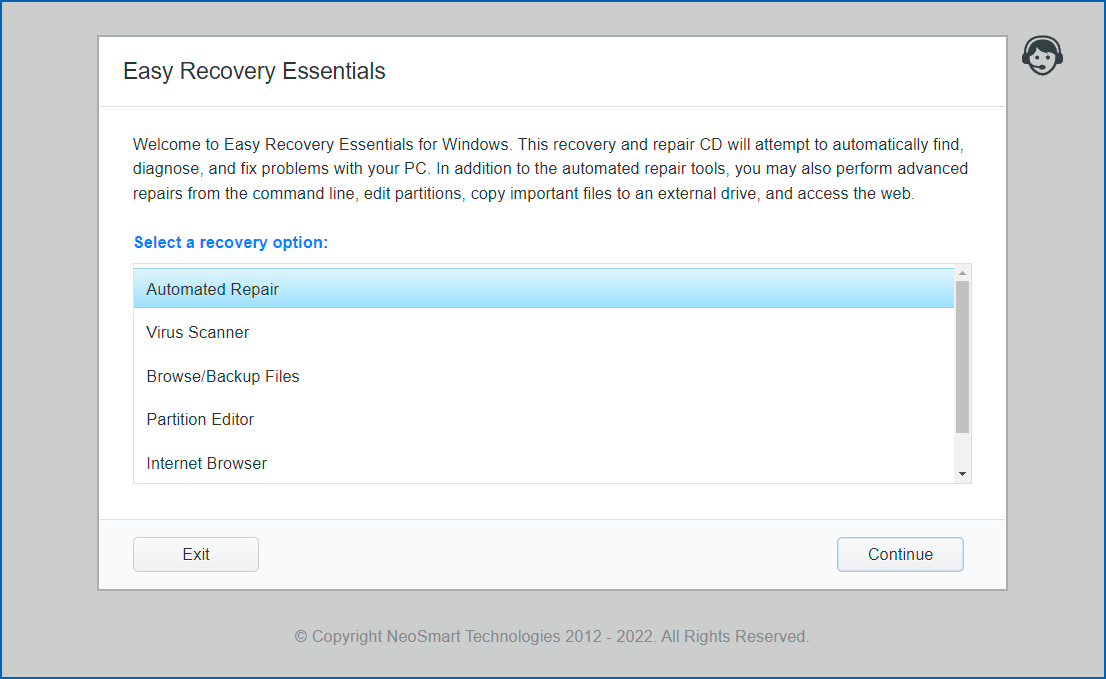
If you’re not able to create a recovery disk for your Windows Server edition (2003, 2008 or 2012), you can download our recovery and repair disk, Easy Recovery Essentials, to repair your Windows Server edition.
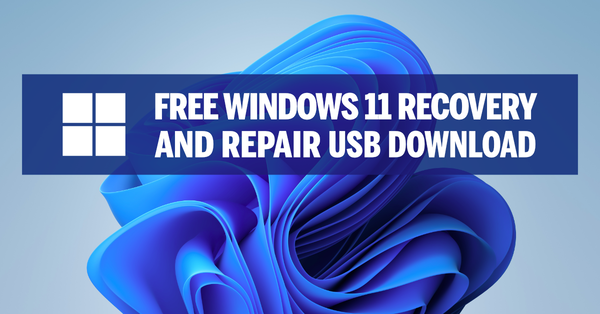
Download Easy Recovery Essentials
Features of Easy Recovery Essentials include:
- Automatically find and fix boot errors
- Works even when you can’t get into Windows
- Recover from virus infections
- Restore your PC to a working state
- Access and backup your important data
- Advanced tools for IT experts
Easy Recovery Essentials is an ISO download image ready to be burned directly to a CD, DVD or a USB flash drive.
It’s compatible with newer versions of Windows, up to Windows 8.1:
It’s also compatible with Windows XP:
Create recovery disk for Windows Server 2003
To recover a Windows Recovery 2003 system you’ll need to boot into the Recovery Console (similar to Windows XP steps).
You need to have your original Windows Server 2003 installation CD to access Recovery Console, if you don’t have it installed on your computer.
If you’re not able to access Recovery Console, go to Download recovery disk for Windows Server.
Follow these steps to access the Recovery Console:
- Insert the CD in the optical drive
- Restart your computer
- At the Welcome to Setup screen, press R to load Recovery Console
- Select the Windows installation you want to access with Recovery console
- You’ll need to log in as an Administrator or with any user that has administrative rights to the system. Do so and enter the password.
- Press Enter
- The Recovery Console should now be available
In Recovery Console, you can now run the bootcfg or chkdsk commands.
Create recovery disk for Windows Server 2008
Your original Windows Server 2008 installation CD can be used a recovery disk.
If you already created a bare metal restore image using the Windows Server backup utility, you can restore your computer from that image.
Restoring Windows Server 2008 from a bare metal image will delete all personal files and replace your system with the backup image.
If you haven’t created a bare metal image (required to restore your computer) and can’t boot into Windows to do so, go to Download recovery disk for Windows Server.
Follow these steps to create a bare metal restore image that you can restore later using the installation CD:
- Boot into your Windows Server 2008
- Click Start
- Click Administrative Tools
- Click Windows Server Backup
- Select Backup once…
- Select Different options at the Backup options screen
- Click Next
- Select Custom
- Click Next
- Click Add Items
- Select Bare metal recovery
- Click OK
- Click Next
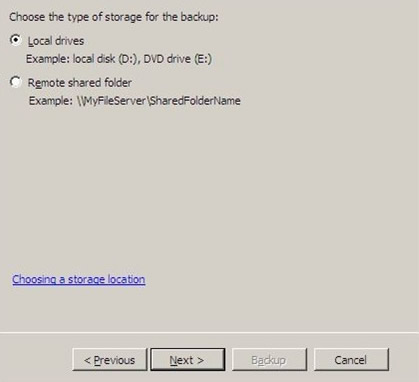
- Select Local drives from the Specify Destination Type screen
- Click Next
- Select your backup destination from the Backup destination field
- Click Next
- At the Confirmation screen, click Backup
- Wait for the backup process to finish
- At the Backup Progress screen, you should see the Status: Completed text
In order to restore your Windows Server 2008 from this created bare metal image, follow these steps.
You need your original installation CD for the steps below. If you don’t have it, go to Download recovery disk for Windows Server.
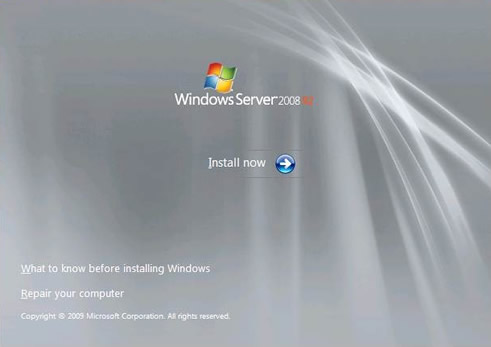
- Insert the Windows Server 2008 CD in the disc tray
- Boot your computer
- Boot from the CD
- At the Install Windows screen, select a language, time and keyboard
- Click Next
- Click Repair your computer
- At the System Recovery Options screen, select Restore your computer using a system image that you created earlier
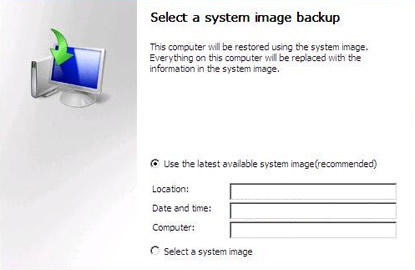
- Click Next
- At the Select a system image backup, select Select a system image
- Click Next
- At the Choose additional restore options screen, you can choose to format and repartition the disks
- Click Next
- Click Finish
- Click Yes at the warning message

- Wait for the process to finish
Create recovery disk for Windows Server 2012
Windows Server 2012 uses the Windows Server Backup utility, just as Windows Server 2008 does, which lets you create a bare metal image that you can use later to restore from.
Restoring from a bare metal image will delete all personal files and will be replaced with the image you are restoring from.
If you haven’t created a bare metal image (required to restore your computer) and can’t boot into Windows to do so, go to Download recovery disk for Windows Server.
Follow these steps to create a bare metal restore image:
- Boot into your Windows Server 2012
- Click Start or search for the Windows Server Backup software
- Load Windows Server Backup
- Select Backup once…
- Continue with the wizard instructions until you can select the Bare metal recovery option
- Click Next
- Continue with the wizard instructions to create the image
Once you’ve created the bare metal image, you can restore it using your original Windows Server 2012 installation DVD:
- Insert the DVD in the optical drive
- Boot from the DVD
- At the Windows Setup screen, click Repair your computer
- Select Troubleshoot
- Select System Image Recovery
- Select the Windows system, e.g. Windows Server 2012
- At the Re-image your computer screen, you can begin to select what image to restore from
- Click Next and follow the instructions to continue with the process
More Information
Linked Entries
Support Links
Applicable Systems
This article applies to the following operating systems:
- Windows Server 2003
- Windows Server 2008
- Windows Server 2012

 Today’s the big day: Windows 8 has hit the shelves and customers are flocking to buy the latest version of Microsoft’s operating system. In the back of everyone’s mind is the big question: what do I do to properly set up my Windows 8 installation, and in the (hopefully unlikely) situation of disaster, if I can no longer get into my Windows 8 PC, what can I do about it?